Adding NDIS Participant Information
In Power Diary, you can enter clients NDIS participant numbers and their NDIS plan start and end dates, which will be showing on client invoices and statements.
In this article:
Collecting NDIS Participant Numbers Via Online Forms
With Power Diary online forms, clients can submit their NDIS participant numbers which will automatically populate into their client profiles. Start with creating an online form template.
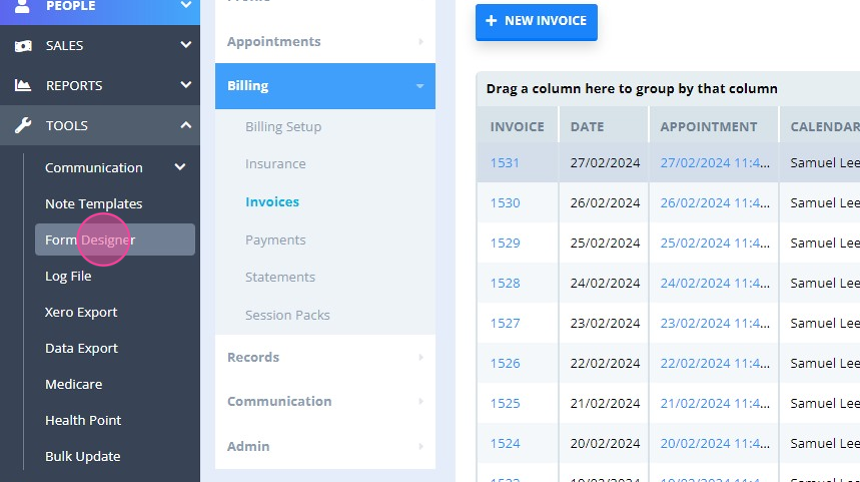
1. Click 'TOOLS':
2. Select 'Form Designer':
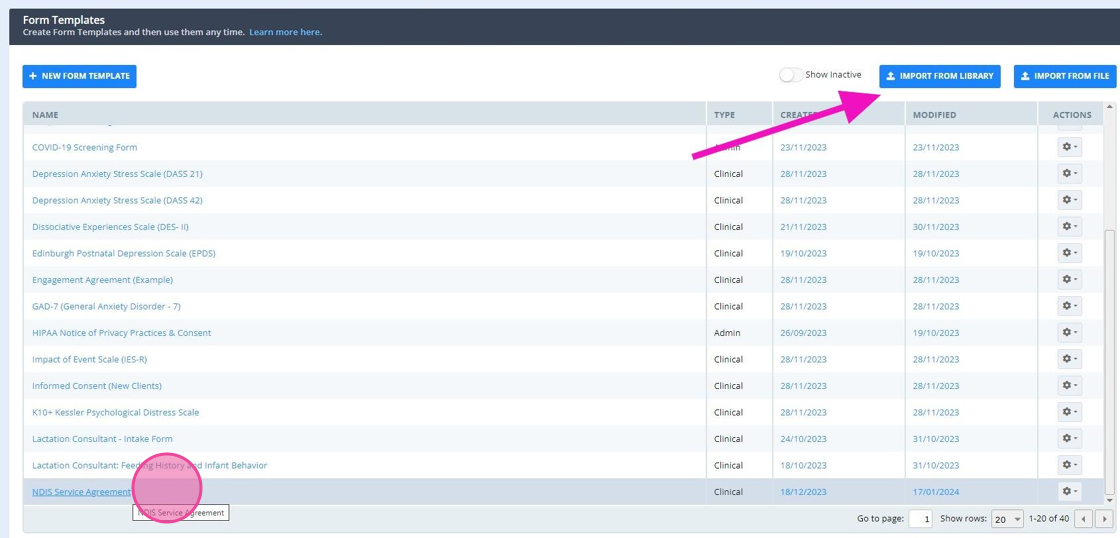
3. You can use the 'NDIS Service Agreement' form that we created for you (import it from the template library at the top-right), or update the form you already have:
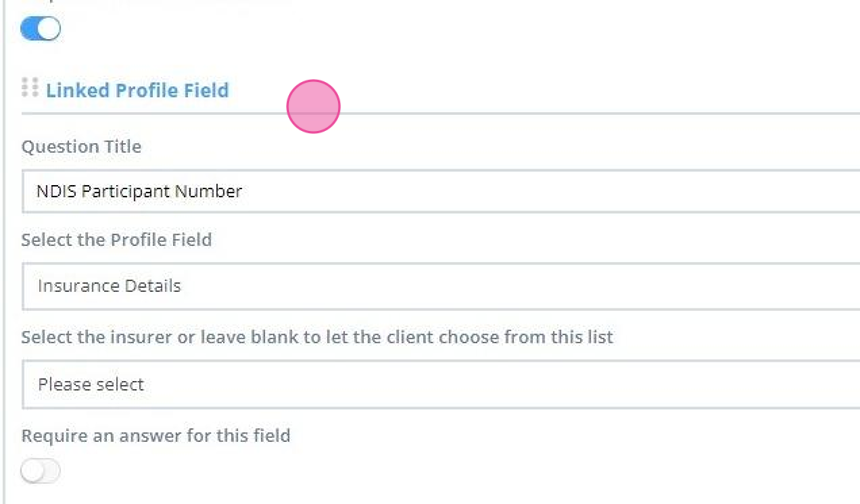
4. The 'Insurance Details' linked profile field, added to the online form template, will be used to automatically populate NDIS participant numbers in client profiles, cutting your admin time significantly:
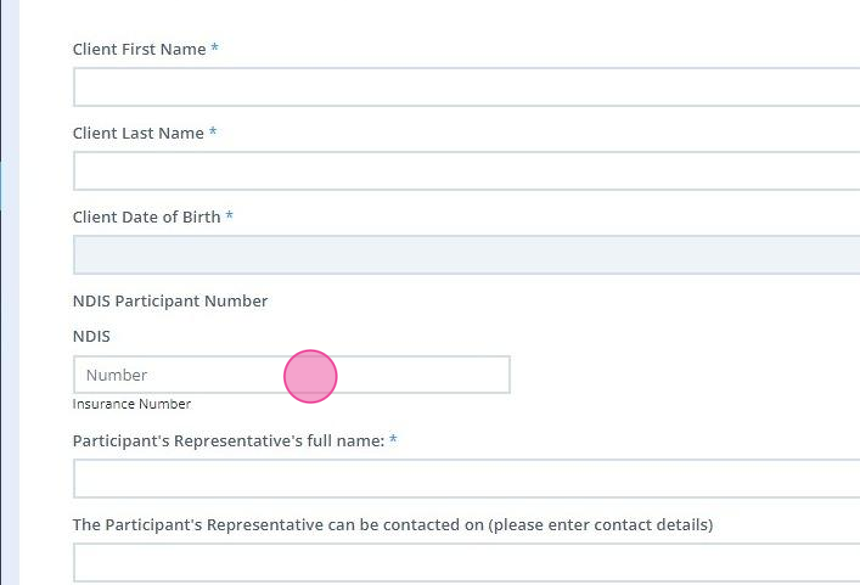
5. Here is an example of the online form that clients will receive and where they will be asked to enter their NDIS participant number:
Note
Refer to the Sending Online Forms to Clients article on full details about sharing online form links with your client's.
Entering NDIS Participant Numbers Manually
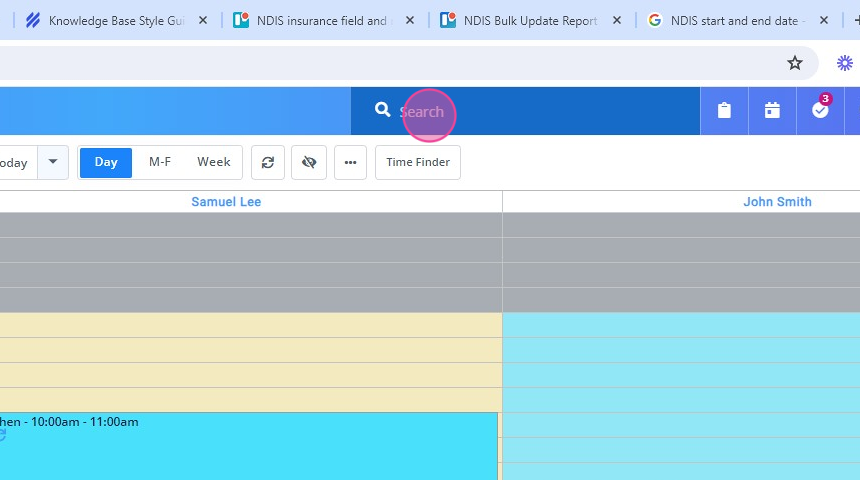
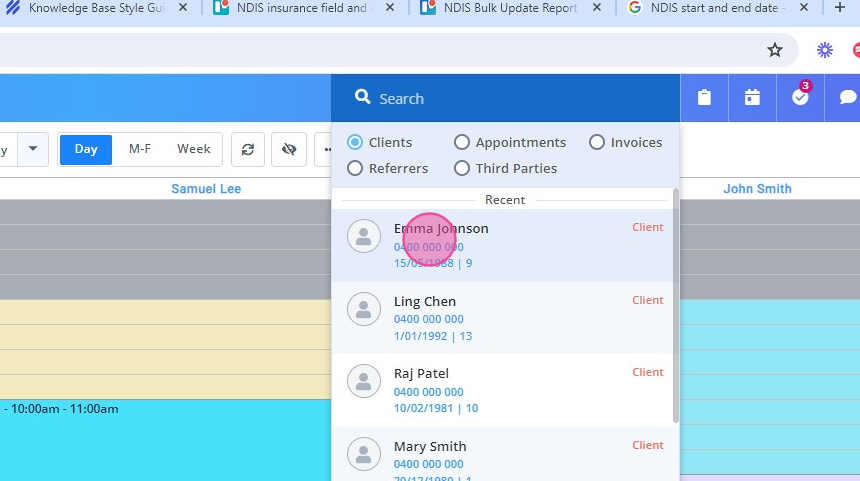
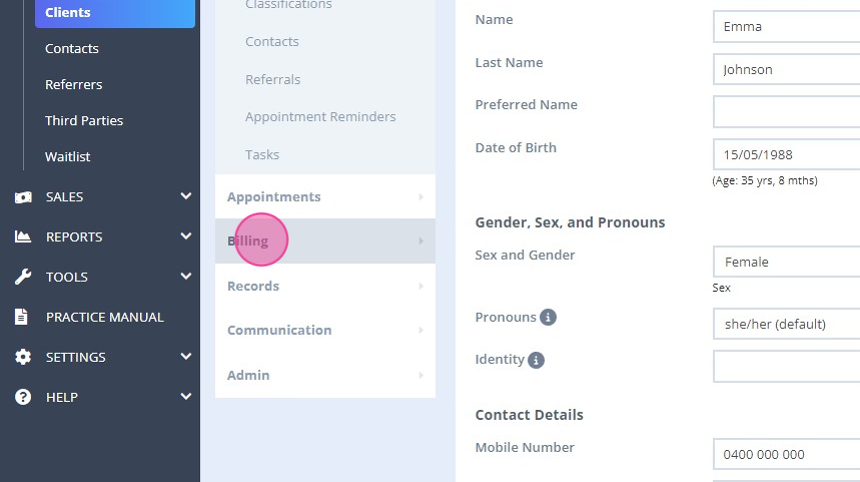
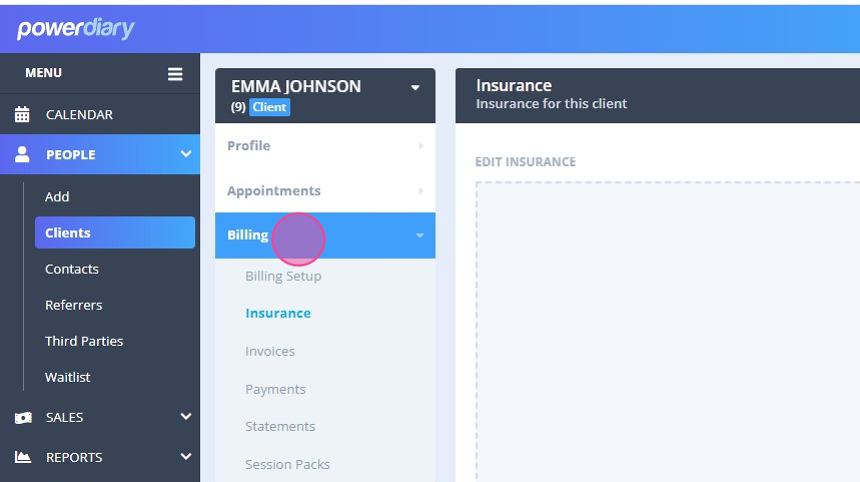
1. Search for the client to open their profile:
2. Click on the client name:
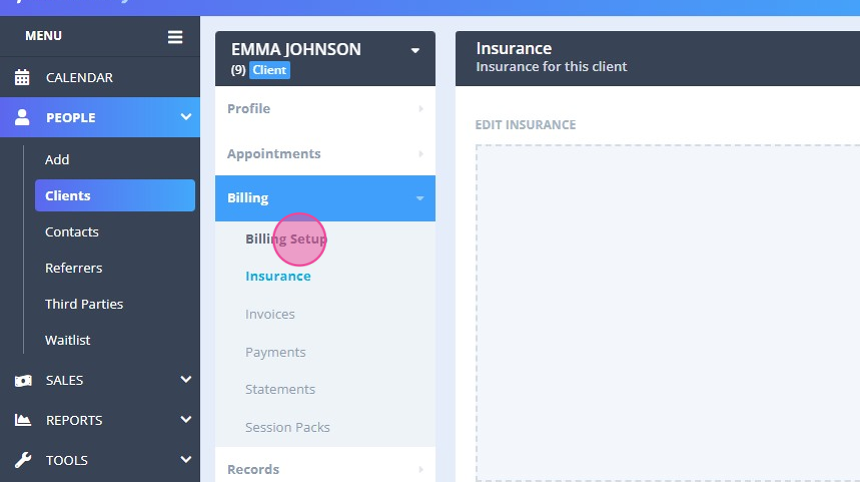
3. In the client's profile menu, go to Billing:
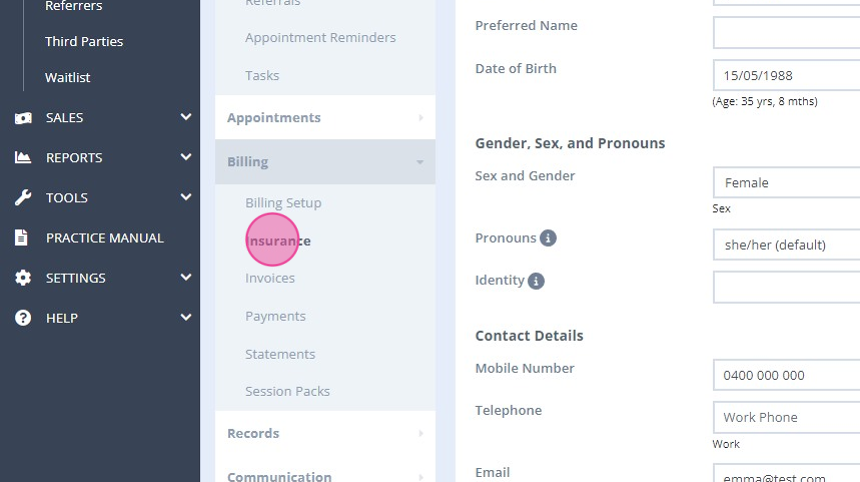
4. Click 'Insurance':
5. Click 'Add Insurance':

6. Click 'Select Insurer':
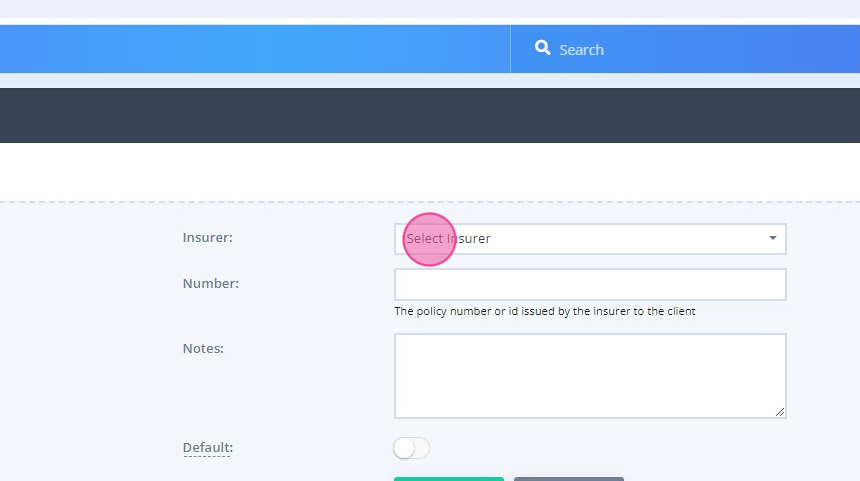
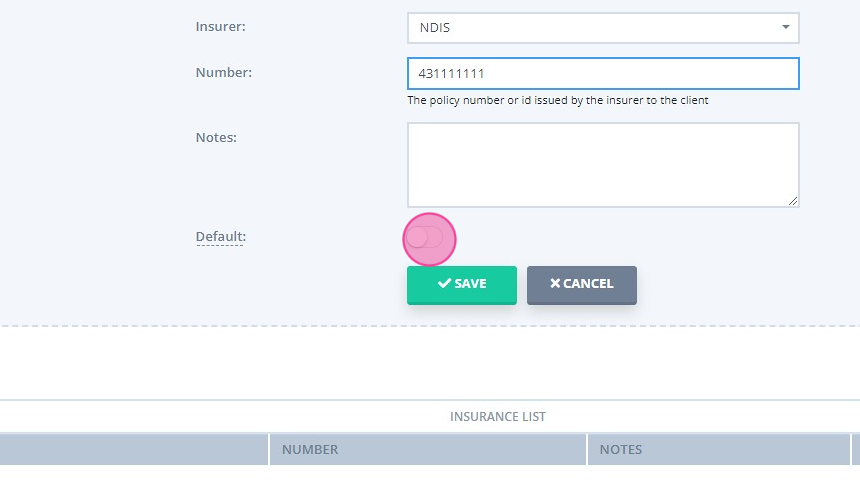
7. Select 'NDIS':

8. Enter the client's NDIS participant number:
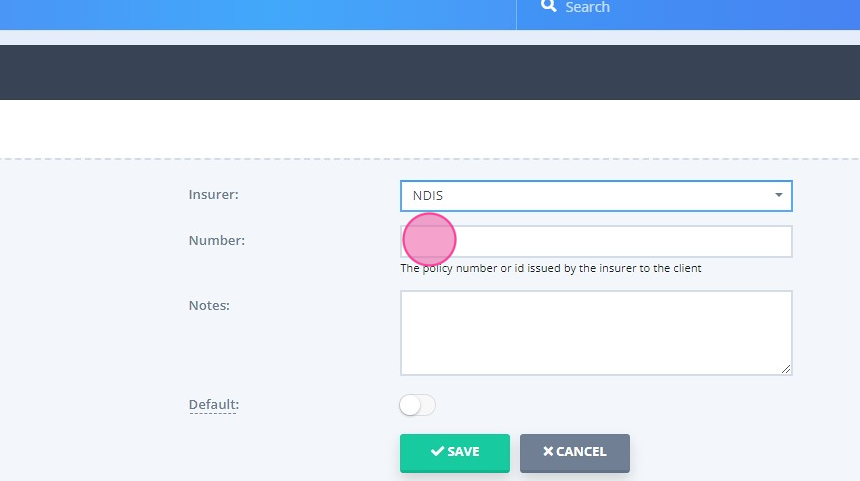
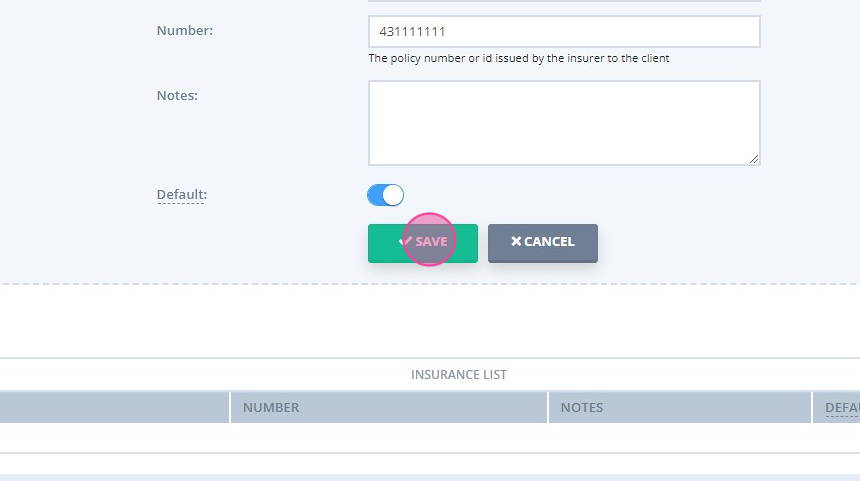
9. Activate the 'Default' switch to ensure that this number will be automatically included on the client invoices:
10. Click 'Save' to save the changes:
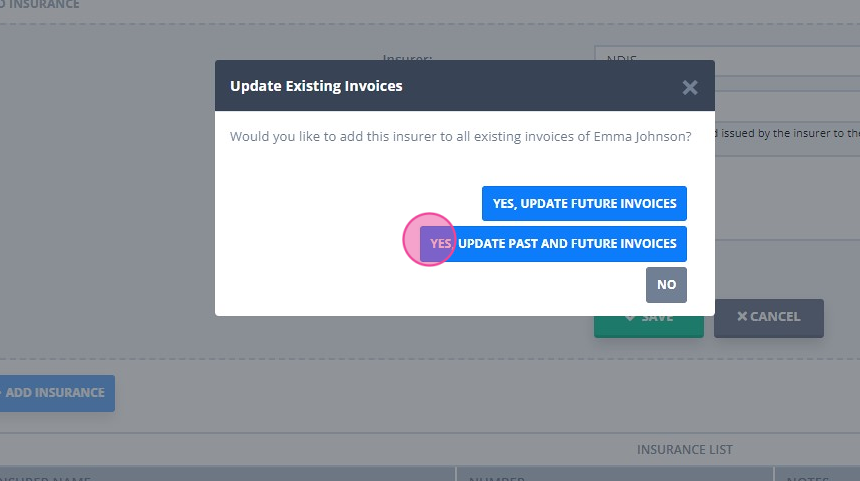
11. Select how you wish to update the existing client invoices with their NDIS participant number:
- update only future dated invoices;
- update past and future dated invoices;
- do not update the existing invoices:
Adding Client NDIS Plan Dates
To show clients NDIS plan start and end dates on their invoices, you will need to add them as 'Extra Invoice Text' in the client profiles. Here is how:
1. Open the client's profile and click 'Billing':
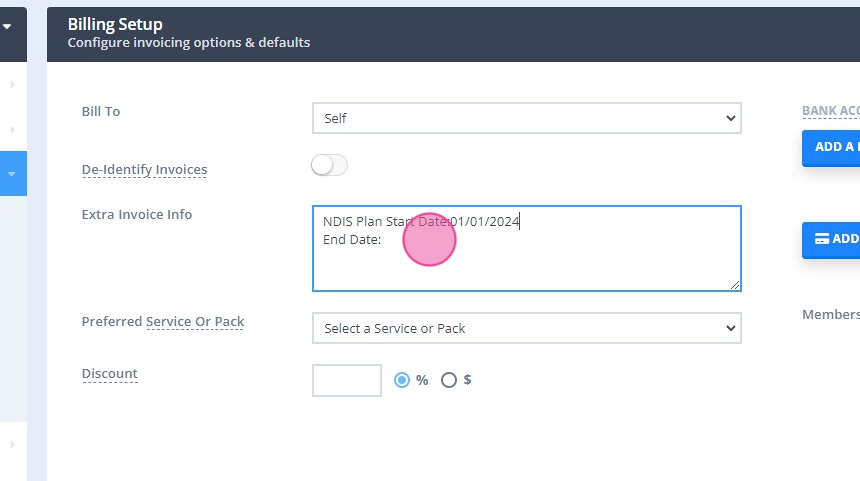
2. Click 'Billing Setup':
3. Click into the 'Extra Invoice Info' text box and enter the NDIS plan start and end dates:
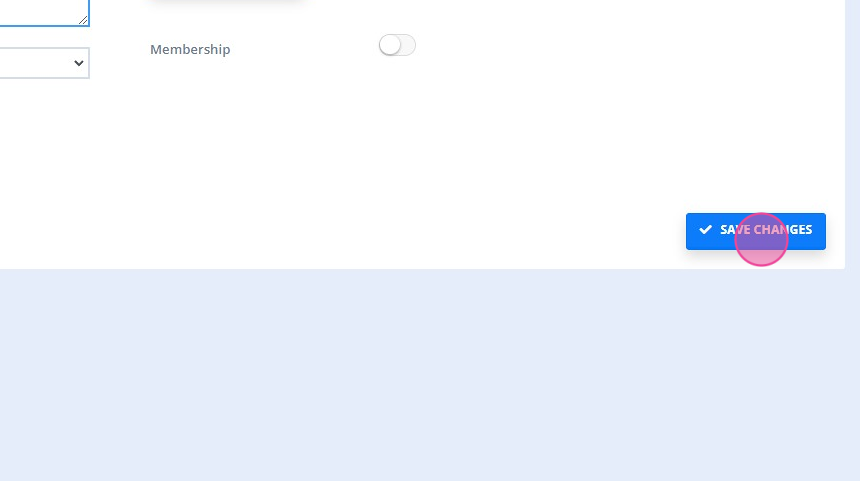
4. Save the changes:
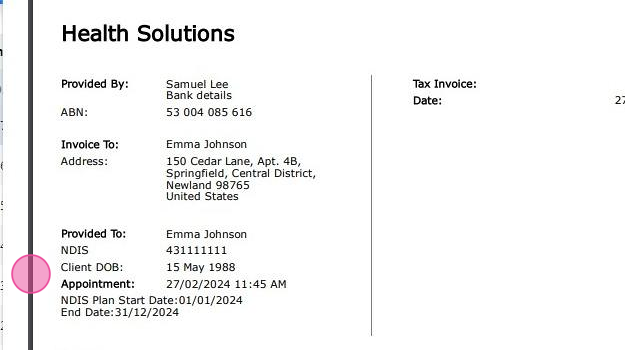
Viewing NDIS Client Invoices
After entering the above NDIS information as we instructed, it will be showing on their invoices when they are printed or emailed: