Learn how to send online forms to clients using email/SMS templates, manually, or through the Client Portal. Ensure secure and efficient form distribution with these steps.
In this article, you will learn how to send online forms to your clients. Before you start, make sure you have already created an online form template in the Form Designer.
In this article:
- Send a Form to your Client using an Email/SMS Template
- Manually Send a Form to a Client
- Automate Sending Forms to all Clients via the Client Portal
Send a Form to your Client using an Email/SMS Template
Hint 💡
By setting up your email/SMS template with a form merge field, you can quickly send a form to your client. No need to generate the form or copy/paste the link. This will be done automatically by the merge field inside the email/SMS template each time when sent.
Each form template you create in the Form Designer comes with its unique merge field. You can add this merge field to an email/SMS template. Upon sending such an email/SMS generated from a template, two things will happen:
- The form will be automatically created in the client's profile to whom the email/SMS template was sent.
- The merge field in the email/SMS will be replaced with an https link to the form. Clients can click this link to complete the form and submit the information.
Here's how you can set this up:
- Go to Tools → Communication → Templates. Open the email/SMS template of your choice or create a new one.
- Click the Available Merge Fields link at the bottom-left.
- Click the Links To Online Forms button.
- Copy the merge field code for the online form you need to embed.
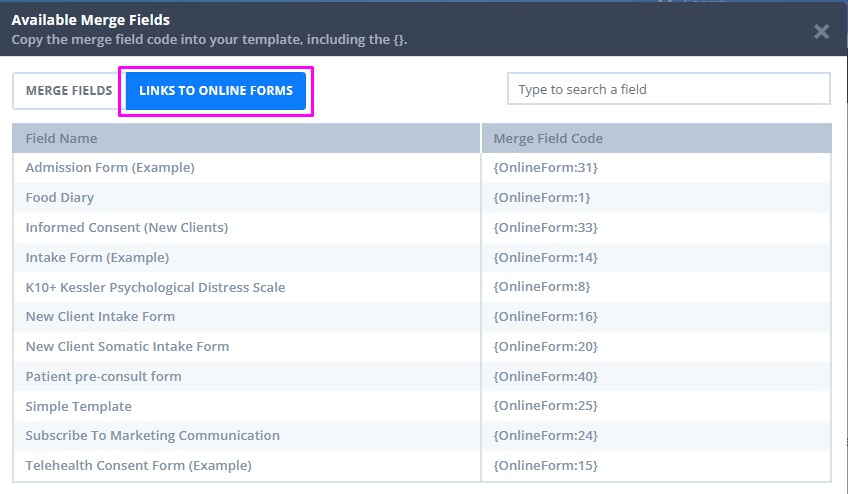
- Paste the form merge field code you copied earlier in the email/SMS template. (The form link will be displayed instead of the code when you generate an email/SMS template in a client profile.)
- Click Save.
Warning
Do not paste the Online Form merge field directly in an email/SMS in the client's profile. The link cannot be generated this way.
Instead, paste the merge field in the email/SMS template first in Tools → Communication → Templates - and then select the email/SMS template in the client's profile.
Warning
Never copy the generated client email/SMS with a form link and paste it into another client's new email/SMS. Always use a communication template with the form merge field when you send forms to clients.
Each link is unique and is directly connected with the client profile where it was generated.
When the form link is sent to the wrong client, the following issues may occur:
- when that client receives and submits a form with linked profile fields (like an Intake Form), their details will overwrite the client details of the profile where the form was generated;
- if the form has already been submitted by one of the clients who received the same link, the other clients will see an empty page when they click on the form, with a notification that the form cannot be found;
- when the form is submitted, it will be stored in the client profile where it was generated. This means that you may not be able to locate this form in the profile of a client who filled out the form, as the link was generated in a different profile.
Manually Send a Form to a Client
Before you can manually send a form link to your client, you will need to generate it in your client's profile. Here's how you can do this:
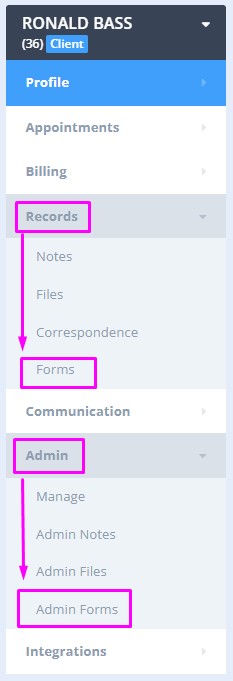
- Go to the client's profile to whom you want to send the form.
- Navigate to Records → Forms or Admin → Admin Forms based on the type of form you want to create. (Clinical forms are generated on the Records page. Admin Forms are generated on the Admin page).
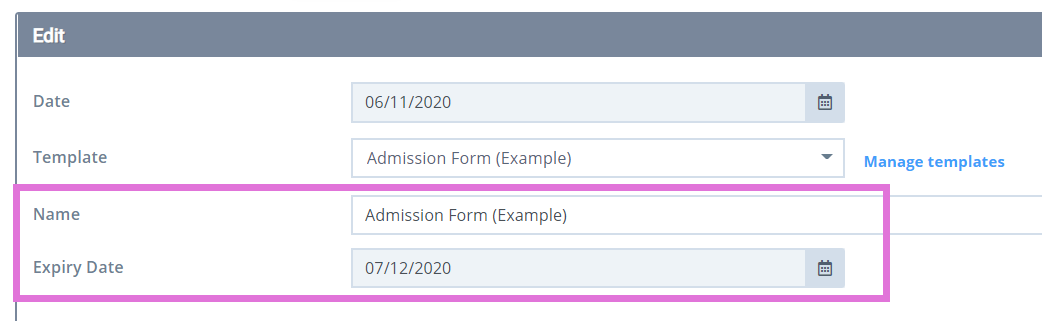
- Click + Create New on the top-left corner and choose a form template from the drop-down list.
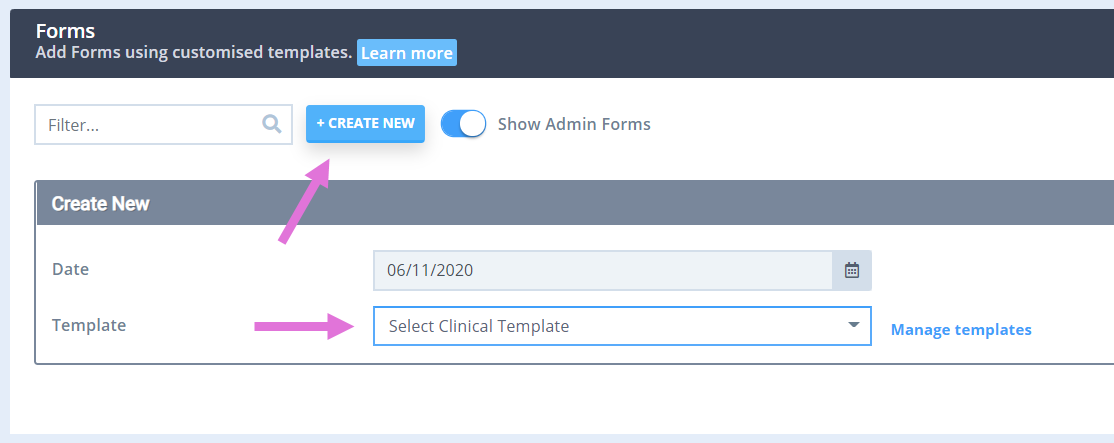
- You will see two new fields: Name and Expiry Date. Use the Name field to change the name of your form. And with the Expiry Date setting, select the date until which your client can access the form.
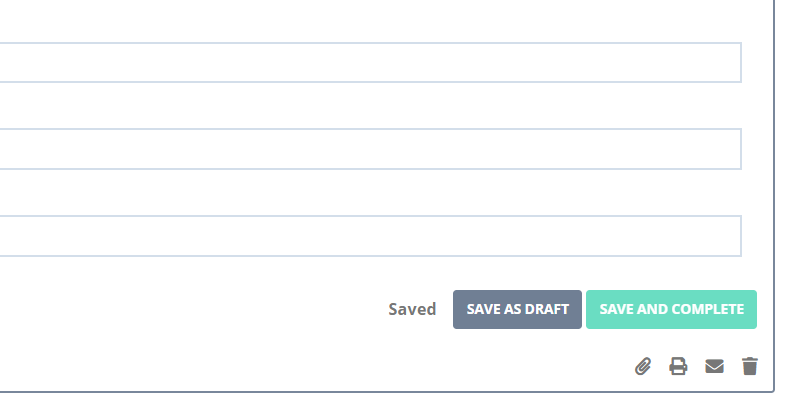
- Scroll down to the end of the form and click Save as Draft. Alternatively, the system will save a note automatically 5 seconds after it was created.
6. Once done, scroll up and click X on the top-right corner of the form to exit Edit mode. That's it. You have successfully generated the form!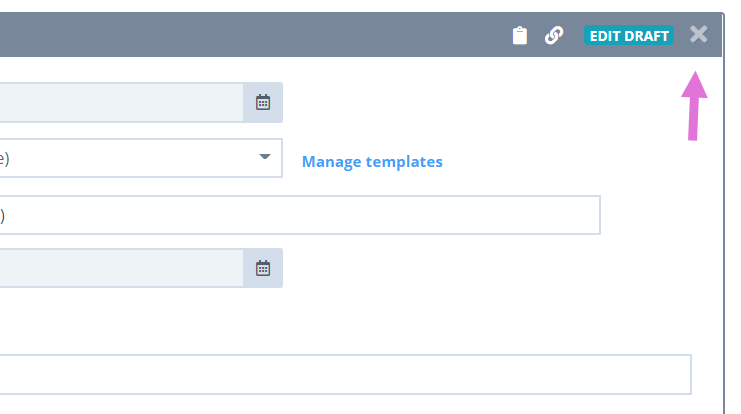
There are four ways you can send this generated form:
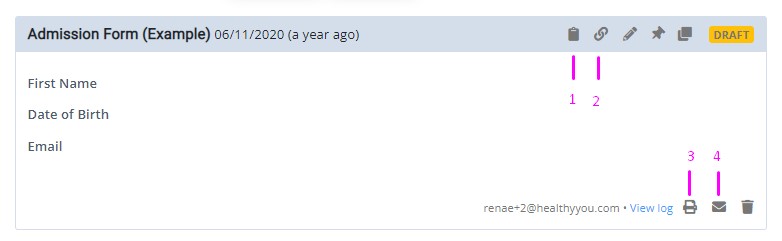
- Copy/paste the form link*: This will give you a link that you can share with the client with which they can fill the form directly from their computer/mobile phone.
- Go to Portal Form: This will open the form in a new tab. Use this option if you want the client to fill out their forms on the premises using your device.
- Print the form: This will allow you to print out a physical copy of the form or download the form as a PDF.
- Email the form as a PDF attachment: This will directly email the form PDF to the client.
Important
Do not share the same link with the other clients: each link is unique and is directly connected with the client profile where it was generated. When the form link is sent to the wrong client, the following issues may occur:
- when that client receives and submits a form with linked profile fields (like an Intake Form), their details will overwrite the client details of the profile where the form was generated;
- if the form has already been submitted by one of the clients who received the same link, the other clients will see an empty page when they click on the form, with a notification that the form cannot be found;
- when the form is submitted, it will be stored in the client profile where it was generated. This means that you may not be able to locate this form in the profile of a client who filled out the form, as the link was generated in a different profile.
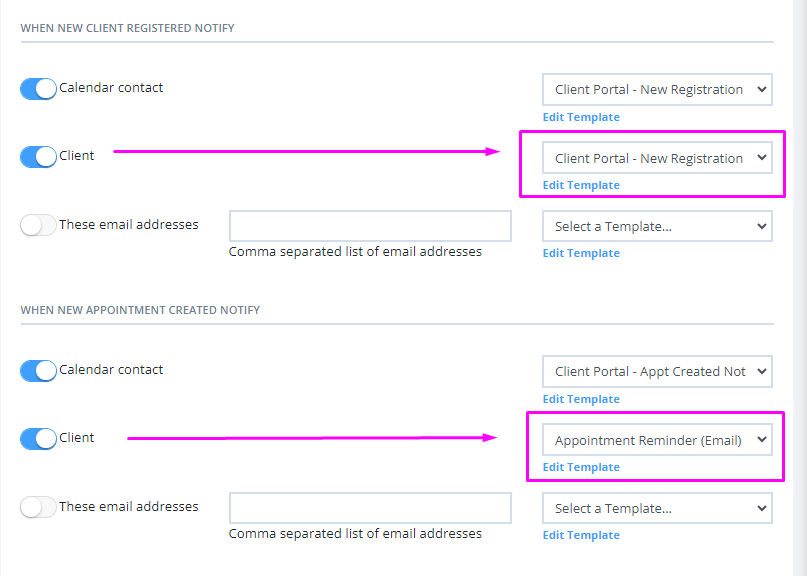
Automate Sending Forms to all Clients via Client Portal
Having Online Forms you've set up be distributed to either new clients or all appointments is possible via the Portal - here are the necessary steps:
- Go to Tools → Communication → Templates. Open the email/SMS template for the client portal or create a new one.
- Click the Available Merge Fields link at the bottom-left.
- Click the Links To Online Forms button.
- Paste the merge field code to the communication template. Save.
- Next, go to Settings → Schedule → Client Portal → Notifications and select the communication templates where you added the online forms for the client portal registrations and bookings.