Learn how to set up your Client Portal for online appointment bookings. Follow these steps to manage logins, calendars, payments, and more.
The Client Portal is a dedicated web page where your clients can book appointments with you online. This article will show you how to set it up.
In this article:
- Require clients to login first
- New clients can log in
- Show all calendars/practitioners
- Enable group bookings and classes
- Is item price listed
- Show invoices
- Show Business Name
- Credit card payment required when booking?
- Client Portal Appointment Flag
- Display Start Times Every
- Earliest time clients can make new appointments
- Limit how far in advance clients can make appointments
- Minimum gap between client appointments
- Cancelation policy
- How to verify new clients identity on registration
- Special booking instructions for your clients
- Terms and conditions
To activate your Client Portal, please follow these three steps:
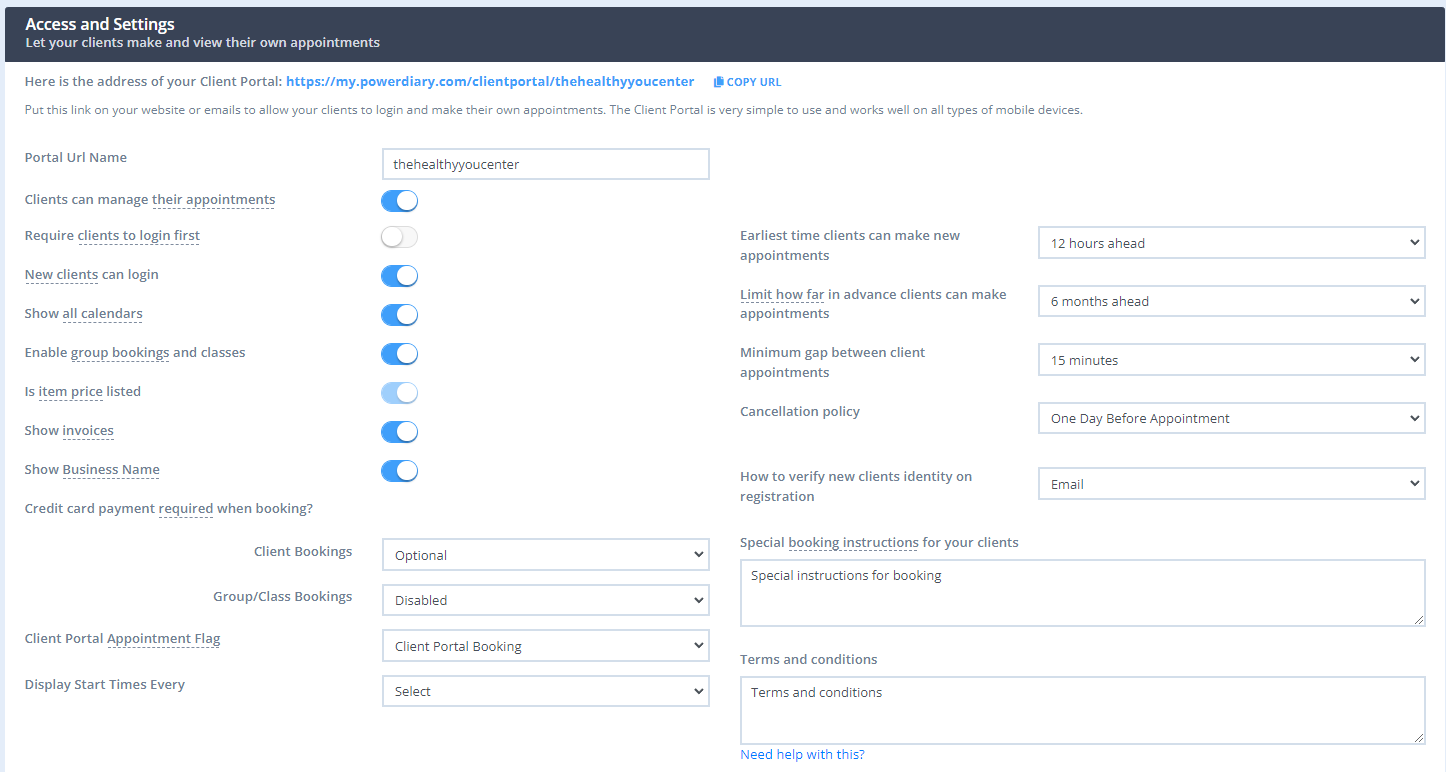
- Go to Settings > Schedule > Client Portal.
- In the Portal URL Name, type in the name of your clinic, or anything else you want. This will be displayed at the end of your Client Portal link.
- Turn on the Clients can manage their appointments switch.
After activating your Client Portal, the rest of the settings will become visible. Here is a quick rundown of what each setting does:
Require clients to login first
To successfully book an appointment, your clients will need to login to the Client Portal first. With this setting, you can set when your Client Portal asks them to log in: before they start booking an appointment, or at the end of the process prior to reaching the confirmation.
New clients can log in
Your clients will need a profile created in your account in order to login to your Client Portal and book an appointment. This is because their email address and password for the Client Portal is stored in this profile. However, new clients won't have a profile in your account and will need to register for one.
- If you enable this setting, new clients will be able to register via your Client Portal and create a profile in your account. This will then allow them to log in and book an appointment with you on their own.
- If you disable this setting, new clients who don't have a profile in your account won't be able to register. Existing clients can continue to login. If you want to give new clients access to your Client Portal while keeping this setting off, you will need to manually create a profile for them and send them your Client Portal link, so that they could create their password and start booking appointments. .
Show all calendars
This setting lets you control if your clients can book an appointment with any available practitioner on your Client Portal, or just their preferred practitioner. The preferred practitioner can be set in their profile in Admin → Manage.
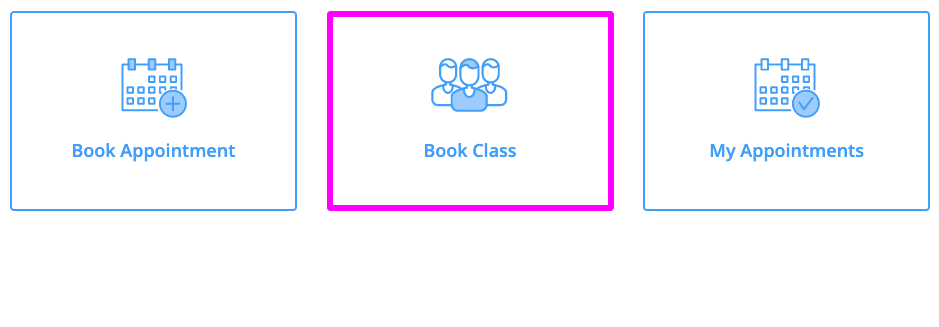
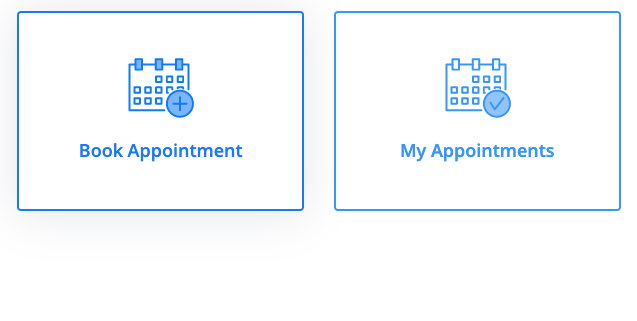
Enable group bookings and classes
When you have group appointments created in your calendar, it is possible to make them available for the clients to book online. If you enable this setting, your clients will be able to see all group appointments in your calendar and book themselves. Disable this if you want your clients to just book individual appointments only.
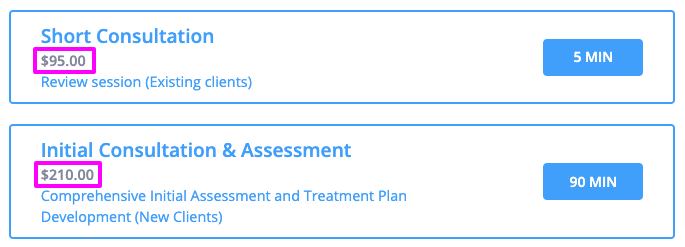
Is item price listed
- By disabling this, you can hide the prices displayed in the Services list on your Client Portal. Please note that prices will only be hidden on the main services list page. Your clients will see the price of the service they selected on the booking confirmation page.
- This setting cannot be disabled if you set the Credit card payment required when booking? below as Optional or Required.
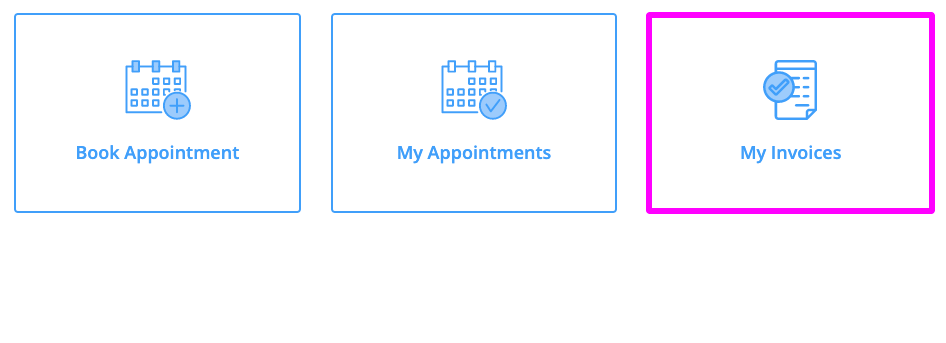
Show invoices
Enabling this option will activate the Invoices page in the Client Portal. Your clients will be able to log in and view both paid and unpaid invoices plus make payments by themselves if you have set up your Stripe integration to process credit card payments.

Show business name
If you want your business name to display on the top of your Client Portal, enable this option. To change/edit your business name, go to Settings > Practice > Business Info.

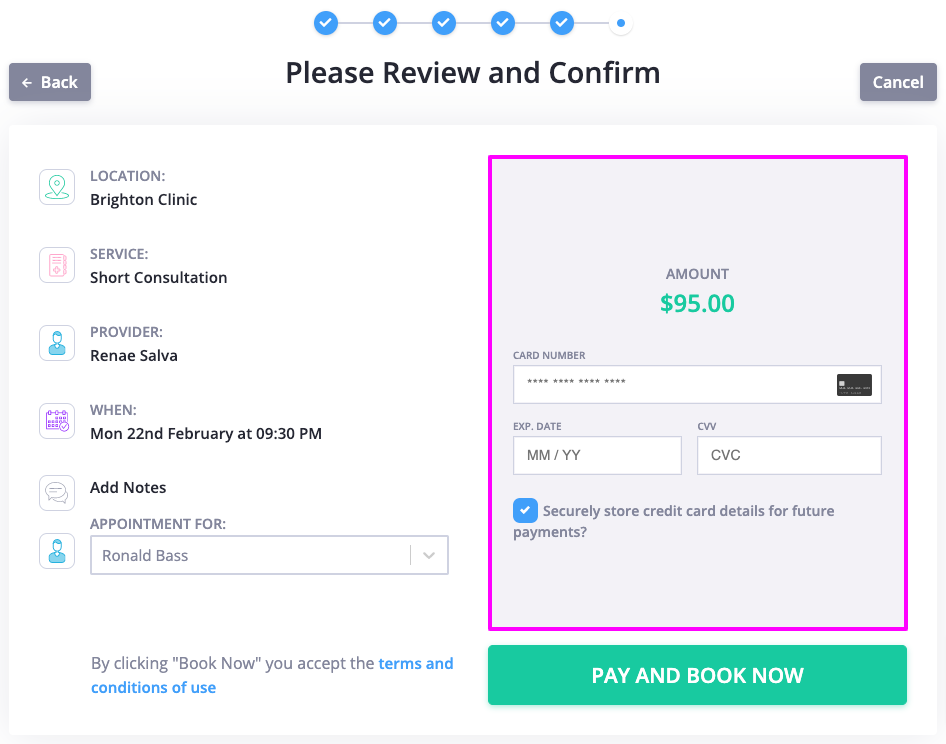
Credit card payment required when booking?
It is possible to set up credit card payments via the Client Portal when clients book individual sessions or book a class:

You have the option to have the payment of the associated individual or group service
- Disabled which means there will be no option to pay for a service online via the Client Portal.
- Required which means clients cannot book without paying upfront.
- Optional which means the credit card details are prompted but it is not compulsory to book an appointment.
As the payment is processed via Stripe, it's necessary to first set up your Stripe integration.
Client portal appointment flag
If you use appointment flags to categorize your invoices, this option lets you select a default appointment flag for all your appointments that are booked via the Client Portal.

Display start times every
With this setting, you can define the start times of available appointments from the first available time slot.
For example, your availability starts at 9 AM, your appointments last for 50 minutes, and you select the 60-minute interval in Display Start Times Every setting.
- When no appointments are booked yet, the available times will display as 9 AM, 10 AM, 11 AM and so on.
- When the first 50-minute appointment is booked, the client portal will display availability for this day as 9:50 AM, 10:50 AM, 11:50 AM and so on. If you still wish every appointment to start on the hour, add a 10-min gap between client appointments, as described below.
Earliest time clients can make new appointments
With this setting, you can dictate how soon your clients are able to book an appointment with you. For example, if you set this to 'three days ahead', your clients will not be able to see your availability in the next three days to book an appointment with you. If today is Monday, the clients will see your availability starting from Thursday this week.
Limit how far in advance clients can make appointments
With this setting, you can restrict availability to the period chosen. For example, if you set this to '3 months ahead', your clients will not be able to see your availability later than three months ahead to book an appointment with you. If now is January 1st, the clients will only see your availability up to March, 31st this year.
Minimum gap between client appointments
To understand how this setting works, first, we need to understand how your availability is displayed for your clients:
- Your appointment availability is shown in 'slots'. The slots that appear depend on the duration of your service that the client has selected, plus your availability.
- For example, if your service is 30 mins in length, and you've set yourself as available for 9:00-5:00 pm, your availability will display in 30 min slots from 9:00-9:30, 9:30-10:00.
- However, you might not want your clients to book appointments back to back with you and instead would like to add a buffer between appointments. To do that, you can use this setting.
- For example, if you select 15 mins, your appointment slots will display like this: 9:00-9:30, 9:45-10:15, 10:30 - 11:00.
Important
The gap between appointments does not apply to Personal Appointments. If you have a time slot blocked by a Personal Appointment, the Client Appointment will be booked straight after it without the configured time buffer.
Cancellation policy
- You can allow your clients to cancel the appointments they have booked via the Client Portal, or restrict them from doing so via this setting. You can even select the date range as to how many days before an appointment your clients can cancel an appointment - and not before that. They will instead receive a message asking them to contact you directly regarding the cancellation.
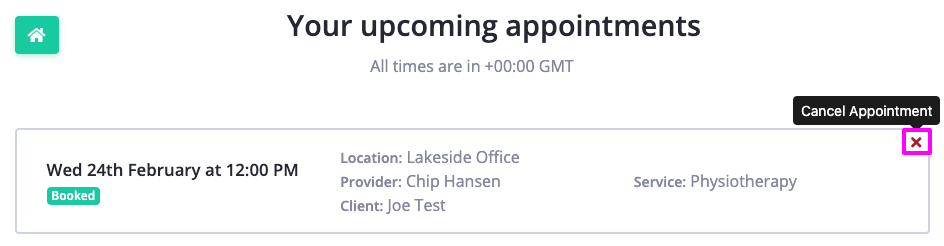
- If the 'Cancellation Policy' is set to 'No Cancellations Via Portal', clients will not see the 'Cancel Appointment' red X next to their appointment.
Important:
- If cancellations are allowed via the portal and there are no payments associated with the cancelled appointment, the generated invoice will be deleted.
- If a payment is associated with the appointment, the invoice and payment will remain active. In this case, you will need to unallocate the payment and delete the invoice manually if required.
How to verify new clients' identity on registration
Important
A dedicated Toll-Free Number (TFN) is required to send/receive SMS messages in the USA, Canada, Puerto Rico, Bahamas, Jamaica, Costa Rica, and Barbados. For more details, please click here.
If you allow new clients to sign up via your Client Portal and create a profile with you, your Client Portal will prompt them to confirm their identity first by entering a four-digit verification code. You can choose how and where this code is sent: to your clients' email address, or as an SMS to their phone which ensures they are not captured by their Spam/Junk filters via email.
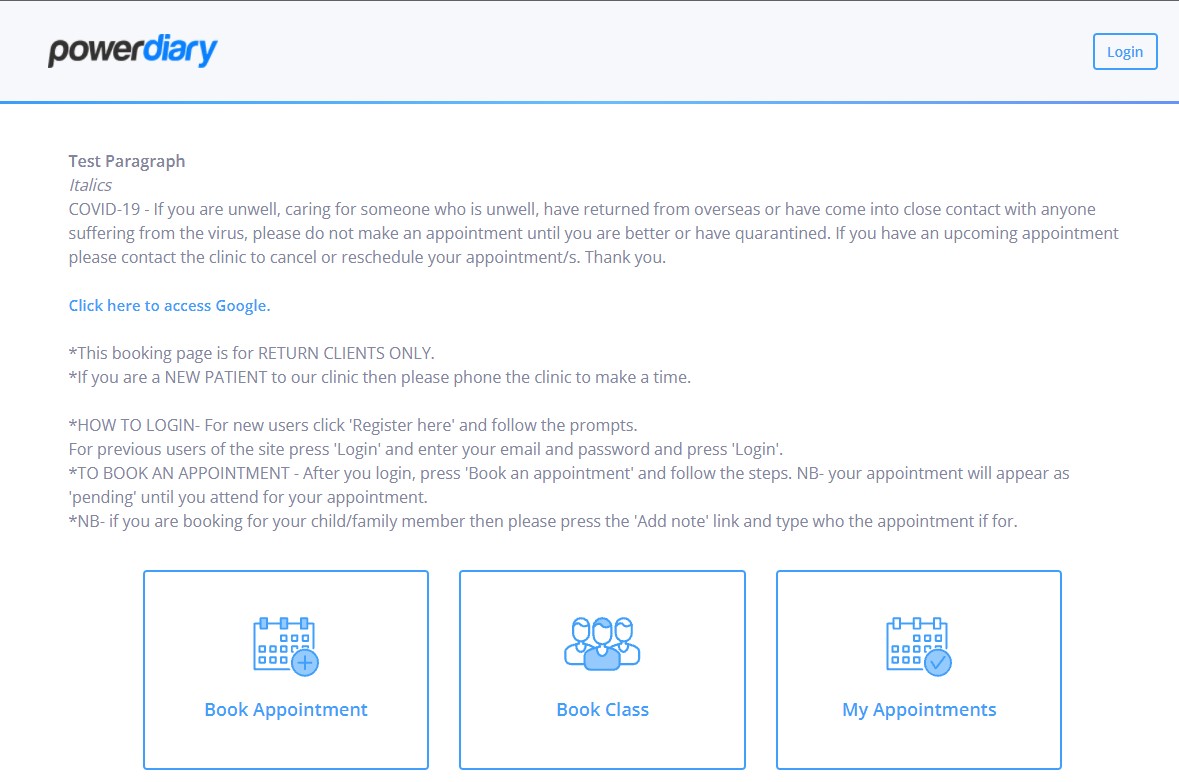
Special booking instructions for your clients
If you want to give your clients specific instructions regarding booking an appointment on your Client Portal or run an announcement you can do that here.
For more formatting options, please use these HTML codes:
- Bold font: <b> Test Paragraph </b>
- Italics: <i> Italics </i>
- Active/clickable hyperlink: <a href="https://www.google.com">Click here to access Google.</a>
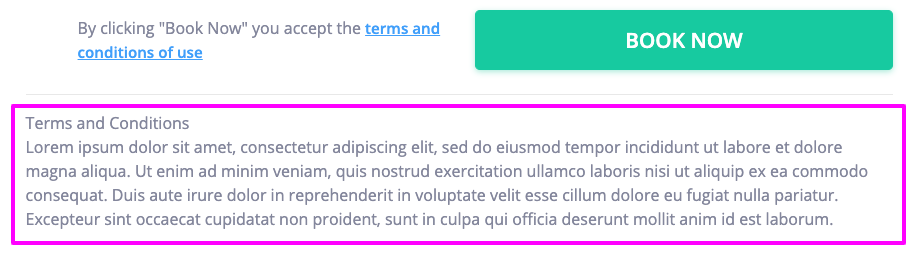
Terms and conditions
Any sensitive policies or conditions regarding booking/payments can be displayed here. Clients need to click the blue text " terms and conditions of use" in order for this to show and be read before clicking Book Now. The character limit for this field is 1900 characters, if your text exceeds this limit you are able to enter a hyperlink to link to a separate page.