
Learn how to effectively manage your Power Diary calendar by setting up and editing availability schedules.
Availability functionality is used to determine what times in each calendar is shown as available (white or custom) or unavailable (greyed out). This helps users to quickly identify availability in the calendar. Practitioners availability is also used to determine where and when they are available for appointments which are booked by clients on your Client Portal. Availability settings serve as a visual cue. Receptionists, for example, are still able to book appointments in the "greyed out" (not available) times if needed.
When client appointments are created in a practitioner's calendar the availability is used to set the location of the appointment. (If you are booking a client outside of the available hours, the practitioner's calendar's default location will be used. This can be found in Settings → Practitioners.)
If you have given your clients access to the client portal they will only be able to book appointments during times marked as "available" in the availability and have 'Client can book online' switch on. All other times will be greyed out and clients will not be able to schedule appointments during these periods.
In this article:
- Setting Up and Editing Standard Weekly Availability
- Using the 'Availability Override' feature
- Using Availability with Multiple Locations
- Cloning Availability
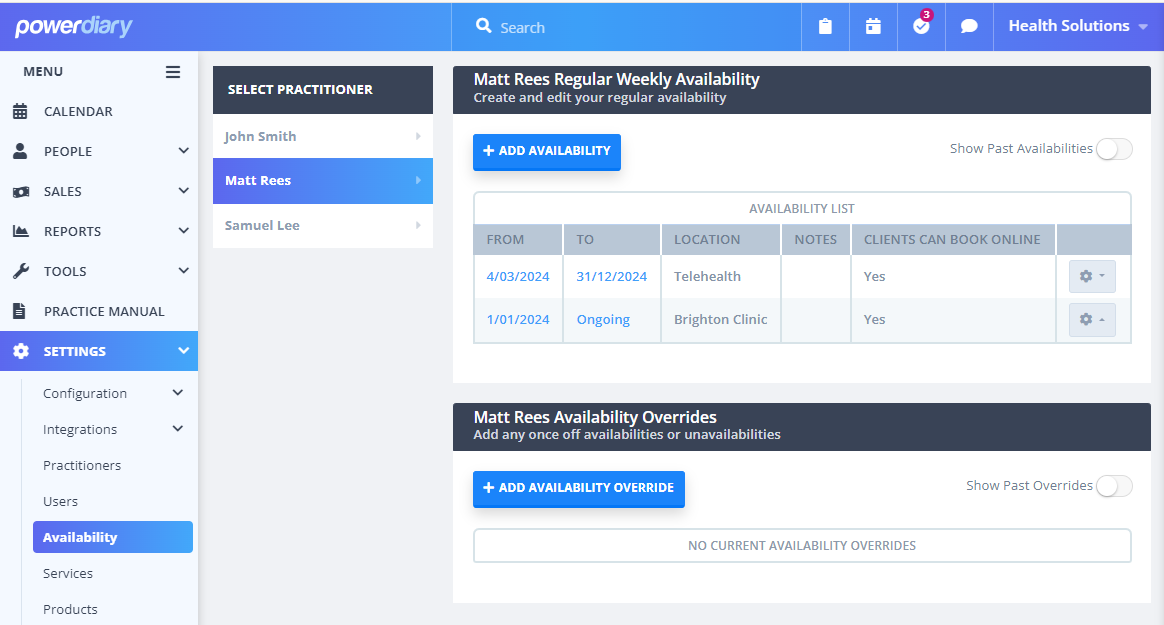
Setting Up and Editing Standard Weekly Availability
- Navigate to Settings → Availability.
- Select the calendar from the left-hand side menu.
- If there is an existing Weekly Availability, click 'Edit', otherwise click "Add New Availability".
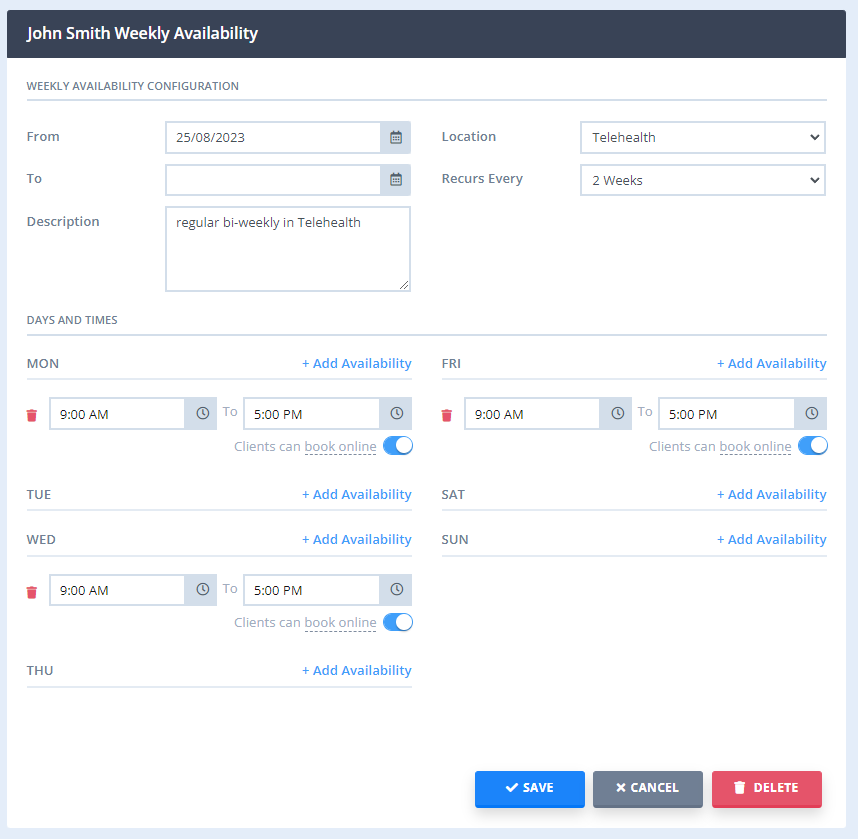
- Set the Period of the availability. This will require a start date of when this Availability will commence in the calendar. You can either enter an end date or leave it as 'Ongoing' so that the Availability is implemented for all future dates.
- Add an optional Description (this is only shown on the Availability page for your own reference).
- Set the Location for the Availability (new appointments booked during the available period will be linked to this location).
- Set the frequency that you would like this to recur (i.e. repeat after one week, two weeks (fortnightly), three or four weeks (monthly)).
- Under Days and Times, you can go through each day and add your availability. To add a block of availability for a day click "+ Add Availability" and then use the filter to set the start and end time of the block.
- If you use the client portal and would like to allow your clients to book in during this available time tick 'Clients can book online' and this will display this time block as available for the client. If this is not ticked, this time block will show as unavailable in the client portal.
- Click 'Save'.
Important
Make sure you have set your timezone correctly in your Power Diary account. The availability times you have set will display in the clients' local time zone in the Client Portal. To set the timezone properly, go to Settings → Configuration → Business Info.
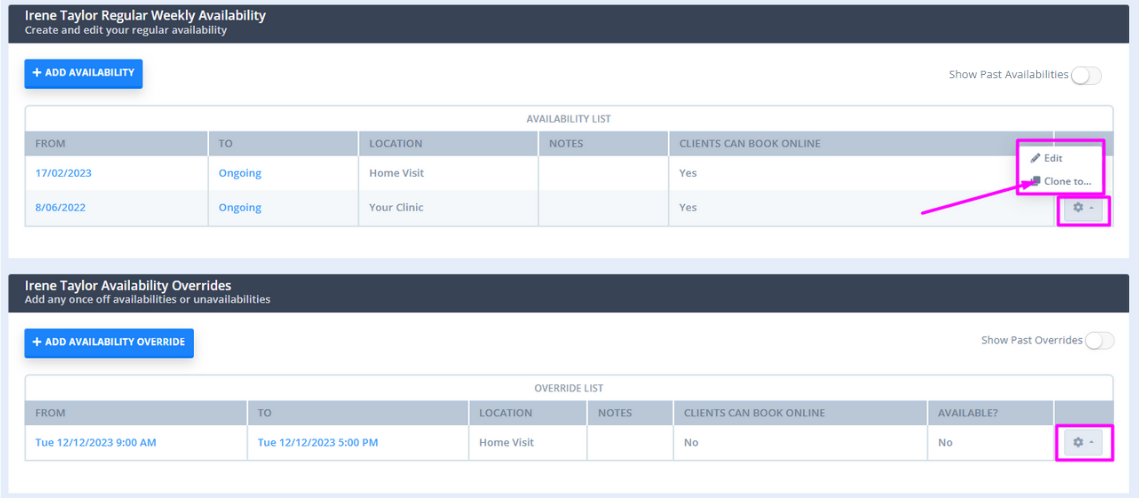
- The availabilities whose end date is in the past will be hidden from the list of availabilities. Use the 'Show Past Availability' switch at the top-right to see the list of past availabilities and edit them if necessary.

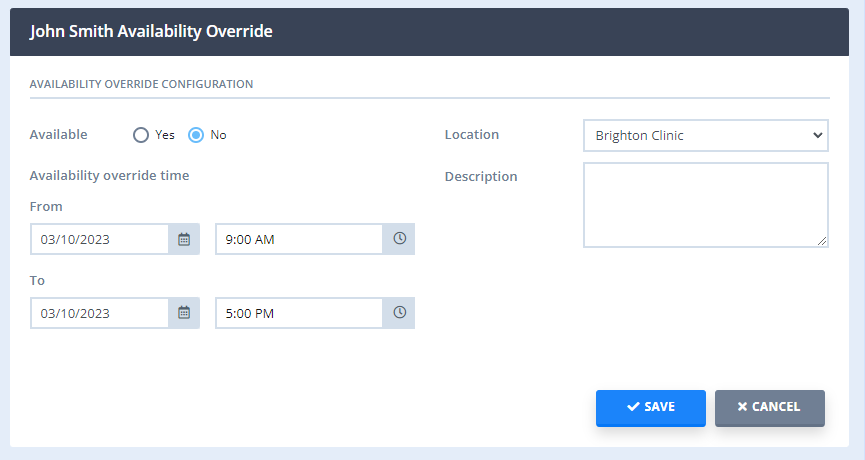
Using the 'Availability Override' feature
The Availability Override allows you to enter one-off exceptions to the main Availability for situations such as Public Holidays and Annual Leave. Availability settings in the Availability Override take priority over the main Availability settings:
- Settings → Availability.
- Select the practitioner.
- Select "Add New Availability Override".
- Select whether you will be Available or Unavailable.
- Enter the Period and Time.
Important
If you select a period longer than one day, all the hours between the From and To dates will be included in the Availability Override
6. Select the Location.
7. Enter an optional "Description" details for your reference.
8. Click Save.
Hint 💡
You can edit or delete your Availability Override settings at any time.
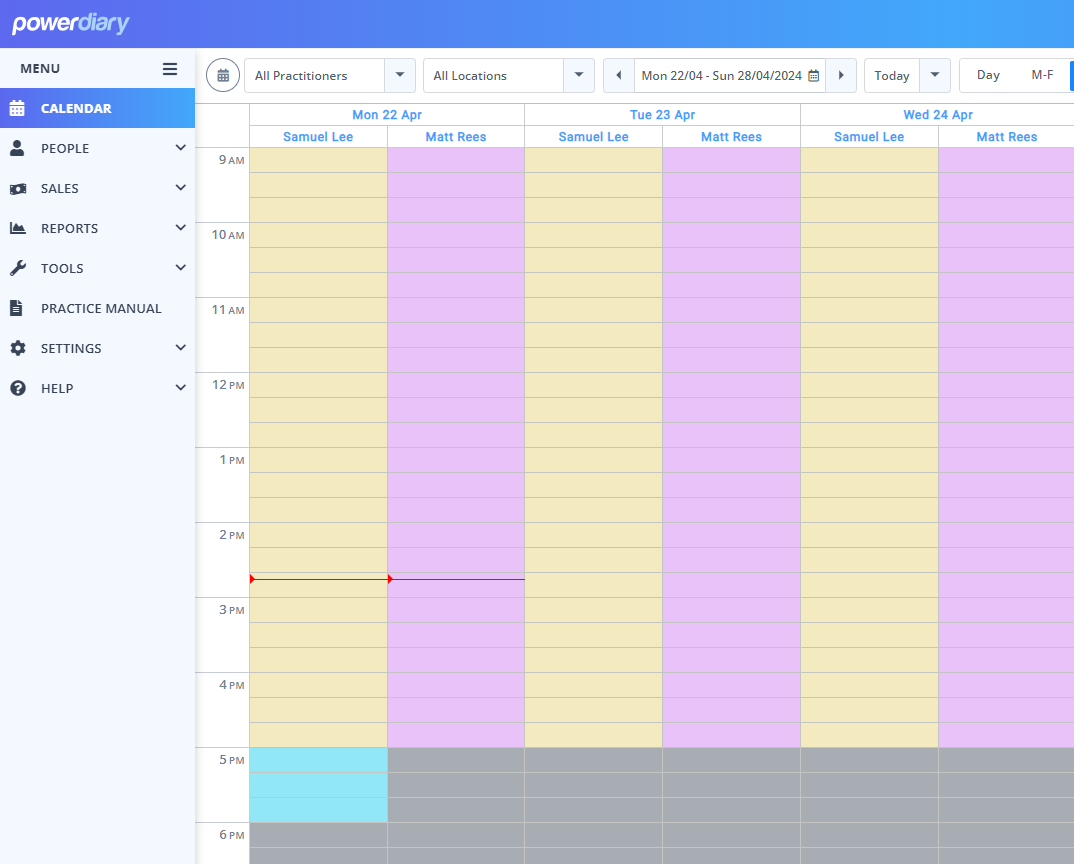
Using Availability with Multiple Locations
If you have more than one location you would create a Standard Weekly Availability linked to each location. This will allow you to reflect your availability at each location. Each location can have a colour attached which is reflected in the calendar to help you easily identify which location you are working in each day. To associate a colour with each location please follow these steps:
- Access the location via Settings → Configuration → Locations.
- Edit an existing location, or click "Add Location".
- Use the colour picker provided to select the desired colour for the location.

Once you have created an Availability for each location, your calendar would then be displayed with the background colour indicating which location they are available in for that time slot. Here is an example:
Cloning Availability to the Same and Other Practitioners
Power Diary's Clone Availability feature is designed to make it easier to manage and set up availability schedules for sole practitioners and practices with multiple locations and practitioners. This tool is especially useful in scenarios like duplicating availability for telehealth sessions and in-person appointments, or when adjusting weekly schedules, such as removing a day. Practitioners can quickly replicate their existing availability and apply necessary changes with ease. Additionally, this feature is a valuable asset for practice managers or administrative teams responsible for coordinating schedules across multiple practitioners and locations*.The following steps outline how to effectively use the Clone Availability feature:
- Navigate to Setup > Availability;
- If you just started setting up a practitioner, create a new availability or an availability override for them, or
- Locate the availability or the availability override schedule you'd like to replicate for this or other practitioners;
- Click on the cog icon for this availability;
- Select the 'Clone to...' option;
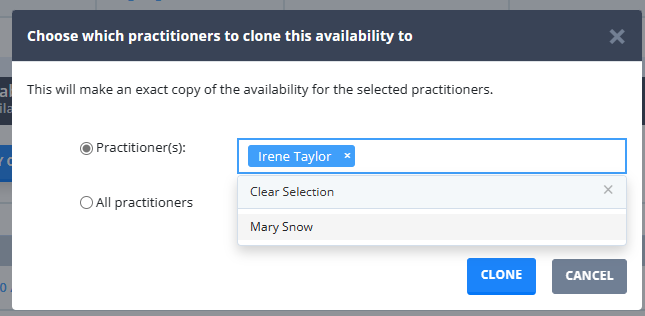
- A pop-up window will appear to allow you to select which practitioner(s) to clone this availability to, giving you the options to select
a) the same practitioner and/or other practitioners;
b) all practitioners in your account - Once the practitioners are selected and you are ready to proceed, click on the 'Clone' button, or select 'Cancel' to cancel the action.
- If you chose 'Clone', this will make an exact copy of the availability for the selected practitioners.
- Make any necessary adjustments (for example, you can change the Location of the cloned availability schedule) and save those changes.
*Note: Users accessing the availability via the practitioner profile will only be able to clone availability to that practitioner, not to all practitioners.