
Create and manage custom session note templates in Power Diary for efficient note-taking. Learn to design, edit, and use templates for clinical and administrative purposes.
Session Note templates allow you to create predefined note templates that include anything from text inputs and drop-down checkboxes through to body charts or drawings, designed for use during of after your appointments.
Already have a note template, but not sure how to use it? This article covers how to make a Session Note from a template. You can create and manage note templates by going to Tools → Note Templates.
In this article:
Creating a New Note Template
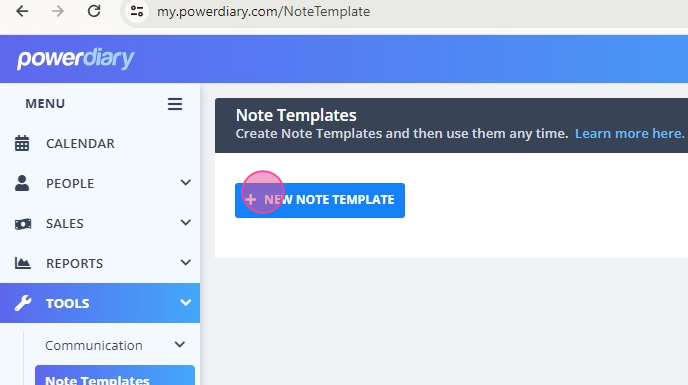
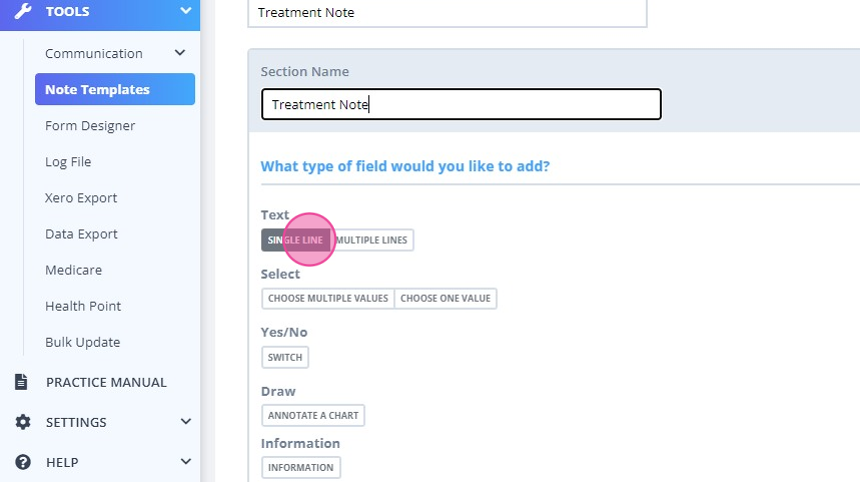
- Navigate to Tools > Note Templates

- Click + New Note Template.
- Begin designing your note template. Give it a name:
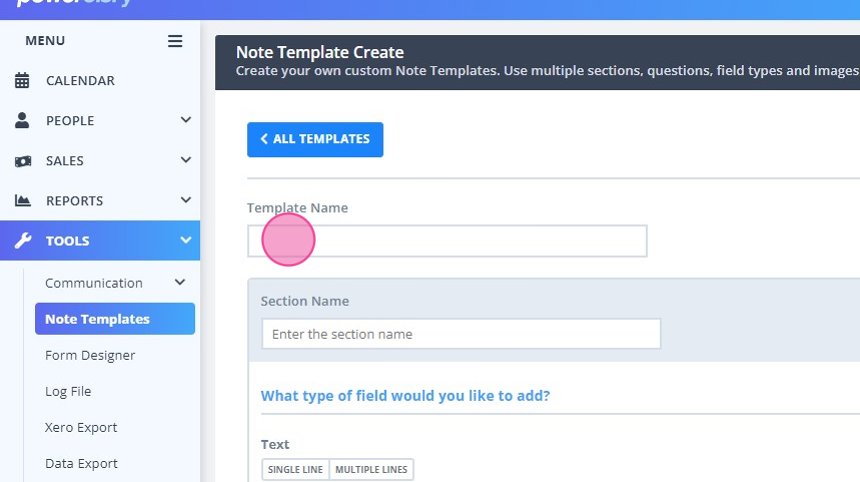
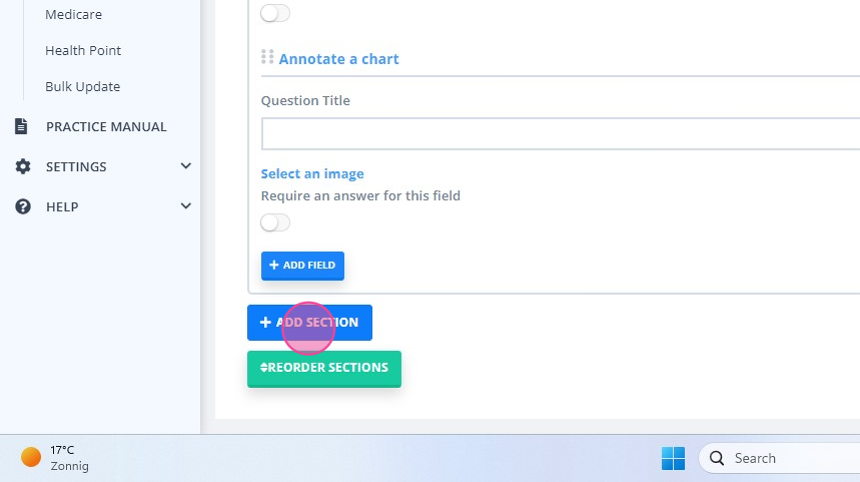
- A note template is comprised of sections and fields. Add sections to the note using the '+ Add Section' button
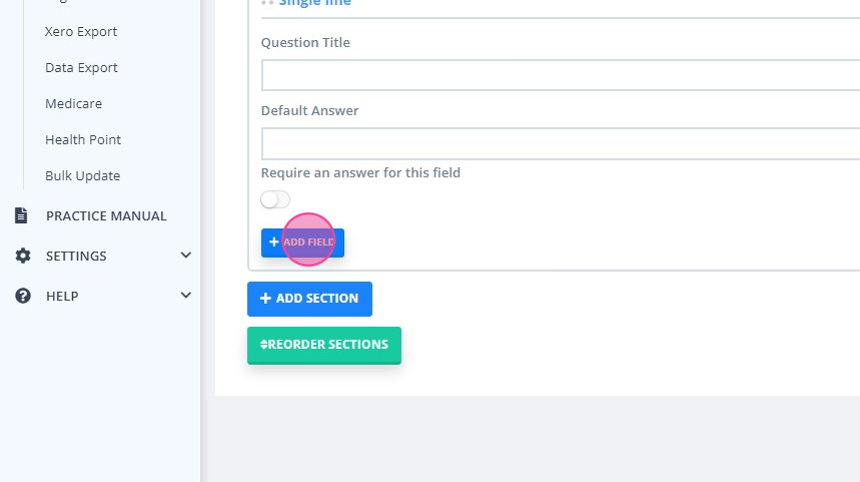
- Add fields to the note using the + Add Field button. You have the ability to add varying fields to the note. Each of these fields is explained below.
-
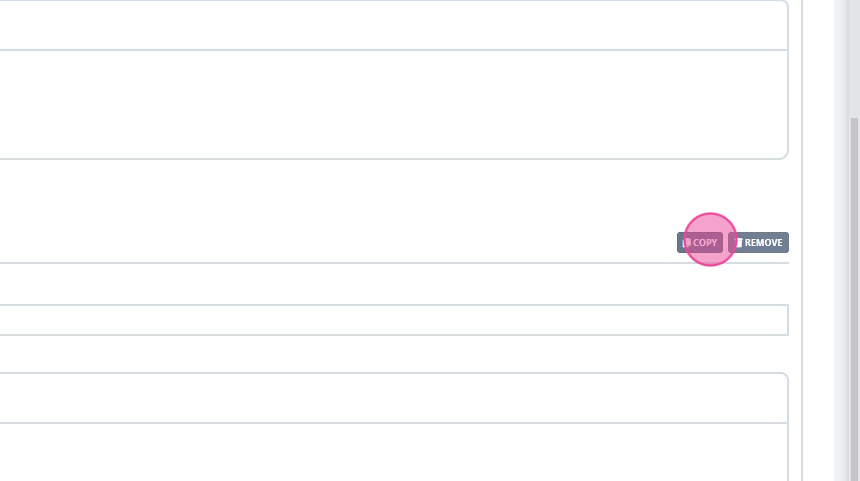
Use the 'Copy Field' button to copy the field you already created.
-
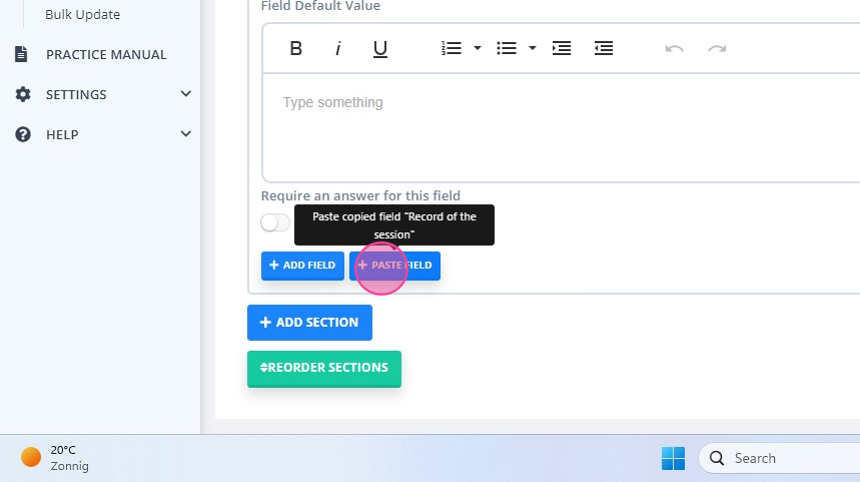
Use the 'Paste Field' button to paste the copied field. You will then be able to make changes to a copied filed. This feature improve your efficiency when you need to create a note with similar fields.
-
You are able to reorder fields and move each of them to any place in the note template. Simply grab the three dots in front of the field type and drag it to the desired position.
-
Use the 'Copy Section' and 'Remove Section' buttons for efficiency:
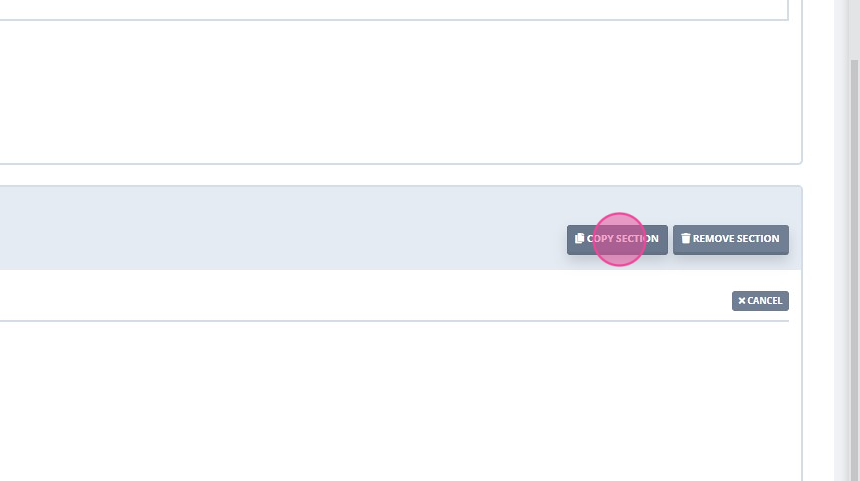
-
Use the '+ Paste Section' button to paste the copied section.
-
Use the 'Reorder Sections' button to move the sections around to the desired location.
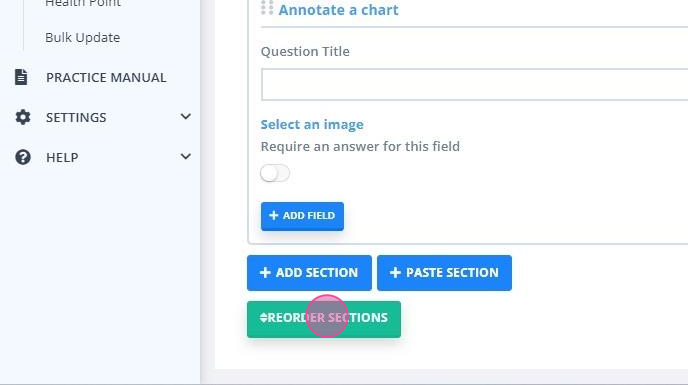
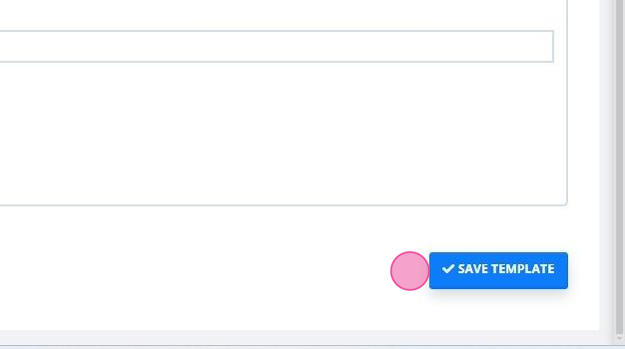
- Once happy with the template click ✓ Save Template.
Hint 💡
1. When you're creating or editing a Session Note template you can preview how the template will look when either: using the template to create a note for a client ( Data Entry Mode); or how the template will look once it has been saved to a client's record (Data View Mode).

2. When Printing Session Notes, if you have uploaded your Logo when setting up your Invoices: Settings > Configuration > Invoices - your Logo will appear on printed session notes
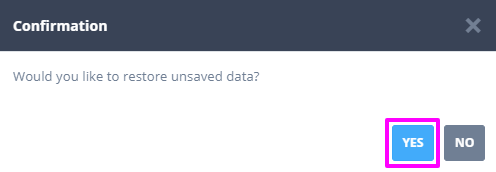
We recommend you always click Save Changes before navigating to something else. If you don't, however, you'll be prompted if you want to bring back any unsaved changes to your Online Forms;
Understanding the Fields
There are several fields to choose from to add to your note template. In the sections below we will describe how each of these fields function and can be used in your notes.

Text
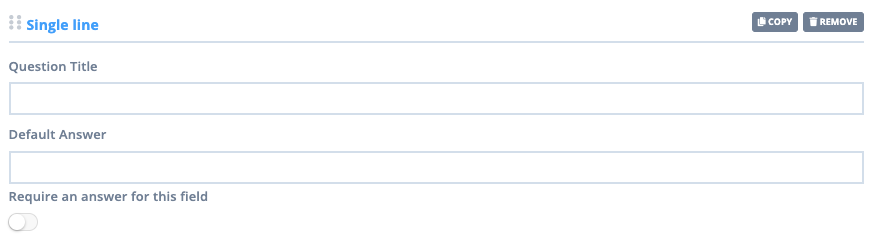
Single Line: A simple, one-line text line designed to ask questions during the appointment, and space to input the client's response.
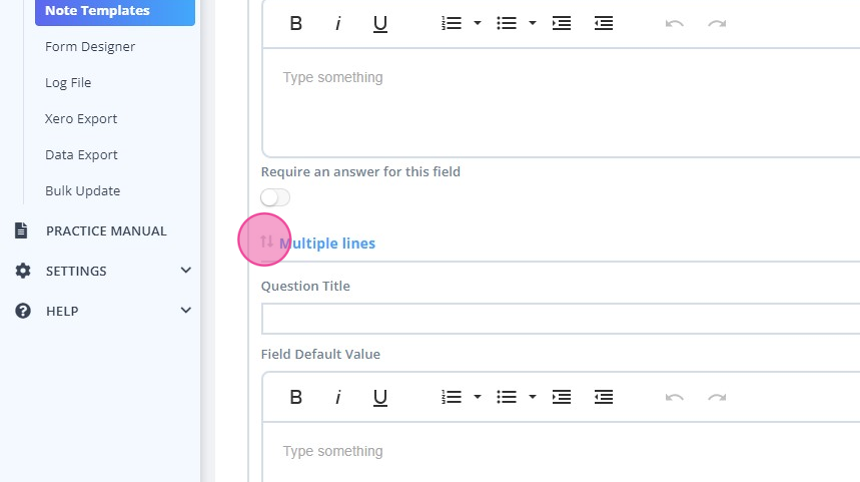
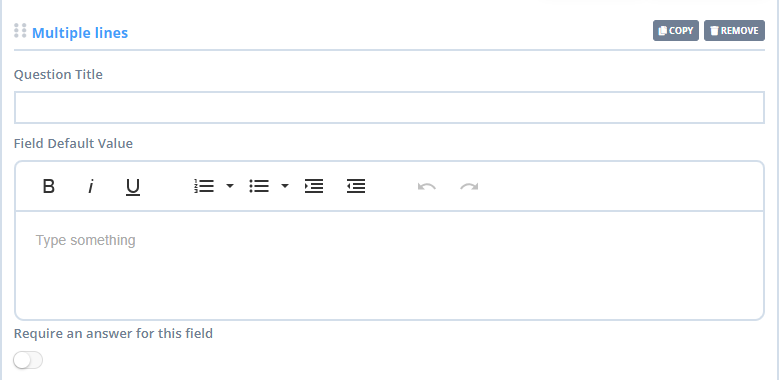
Multiple Lines: Similar to the text input, but used in situations where you will be writing more text into the field (i.e. multiple paragraphs). It includes text formatting tools (bold, italics, underline, ordered/unordered lists, increase and decrease indent and undo and redo buttons).
Select
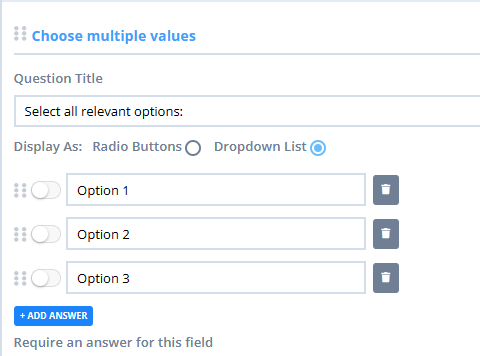
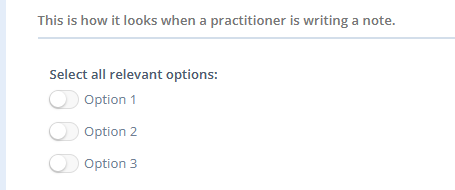
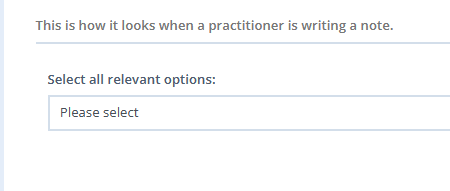
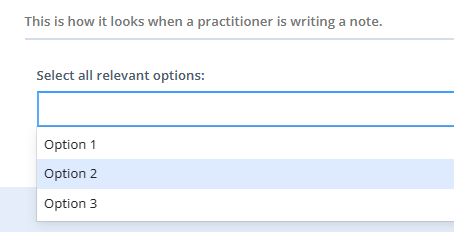
Choose Multiple Values: Used to create fields with responses already populated, presented as either a series of toggles or a drop-down box depending on your preference. When using this option you would be able to select as many options as you like when completing a note (i.e. 'choose all that apply').

Choose one Value: Similar to the Multiple Options field, except only one of the options can be selected at a time (i.e. 'Yes', 'No', 'N/A').
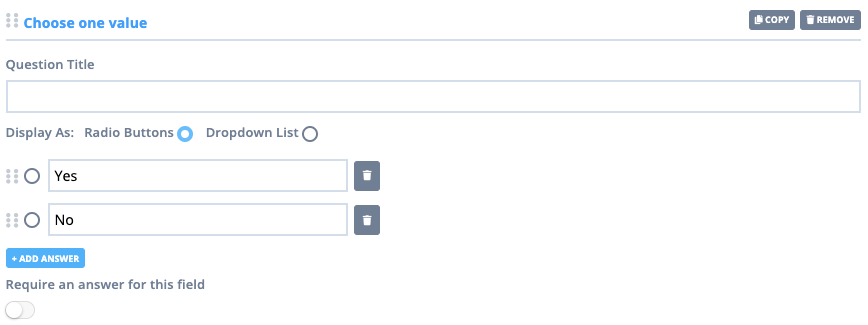
Radio Buttons VS Dropdown List
You may choose to display the answer values as radio buttons or dropdown list.
- This is what you will see when you are writing a note, when the radio buttons display mode is selected:
- This is what you will see when you are writing a note, when the dropdown list display mode is selected:
Yes/No
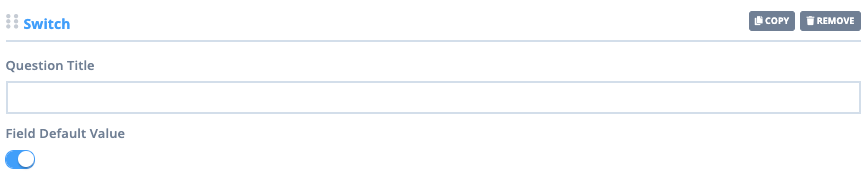
Switch: A toggle option (that is either active or inactive). Generally used for questions that can either be answered with a Yes or No or True or False response. Enabling the Field Default Value means it will stay Yes or True unless toggled.
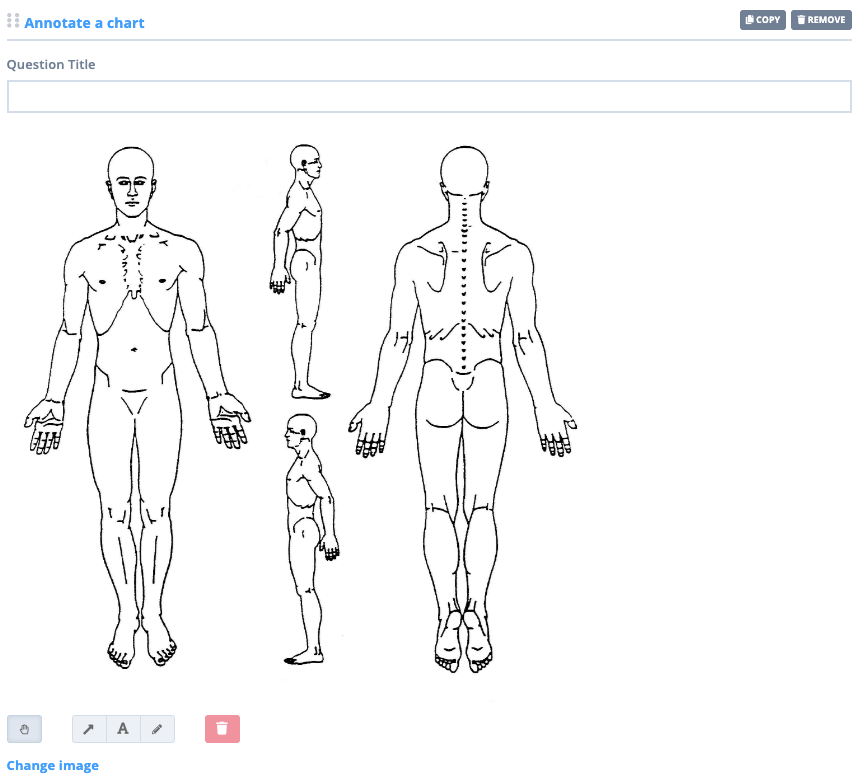
Draw
Annotate a Chart: This field allows you to upload your own image to be used for drawing and annotation. This is best used for reusable, common tasks such as body charting.
Note: if you are uploading your own images, make sure that they do not exceed the recommended dimensions: maximum Width: 800px; maximum Height: 1000px.
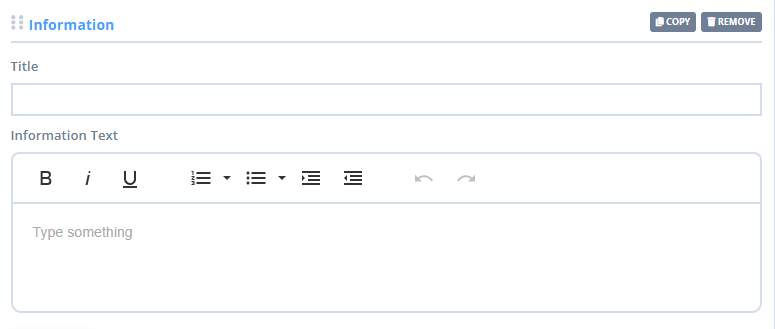
Information
Information: Use this field to add text that will be visible on the note but cannot be edited. Use the available text editing tools to format the information text.
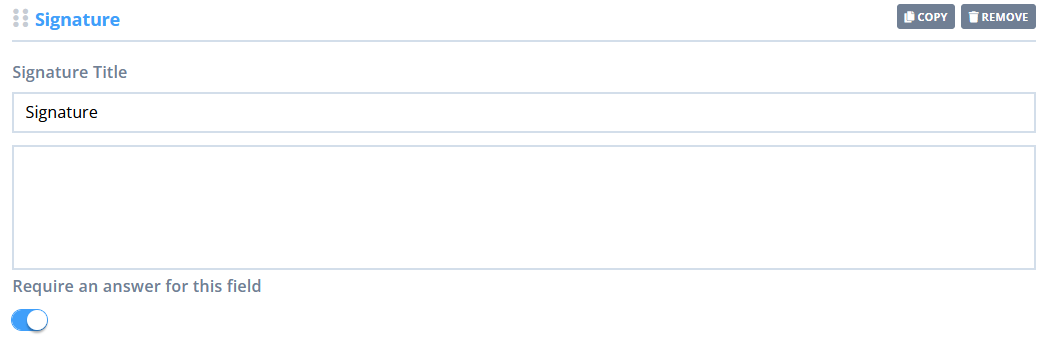
Signature
Signature: Add this field so that you can type your signature on a note. This is useful for meeting compliance requirements, such as co-signing a student practitioners notes.
Managing Note Templates
You can manage your Note Templates by clicking on their name which will take you to the edit view, allowing you to make changes to your existing note templates. If you'd like to change the 'type' of a note template (i.e. from Clinical → Admin) you can do so by editing the template and using the toggle in the top right-hand corner of the page. The only difference this applies is where they can be generated from, and where they are filed inside a client's profile.- Clinical-type Notes are created and filed inside Records → Notes and - being of a more sensitive nature - can be restricted to only certain users based on given permissions.
- Admin-type Notes are created and filed inside Admin → Notes and are designed to be used by front-office staff and receptionists/administrators to log telephone calls, emails etc.