Learn how to create and manage Personal, Client, and Group Appointments on your Power Diary calendar for effective scheduling and invoicing.
There are three types of appointments you can make on your Power Diary calendar:
- Client Appointment
- Personal Appointment
- Group Appointment (also called Classes).
Each appointment type is meant for a specific purpose, and using all three effectively can help properly schedule your appointments on your calendar.
Here's the video:
Here's the overview:
To create an appointment, simply drag your mouse over the time blocks in which you'd like to schedule the appointment. (Or, you can also click any block in your calendar and set the right date/time in the appointment settings panel). In the appointment settings panel, the first thing you want to do is fill in the information in the When and Where section.
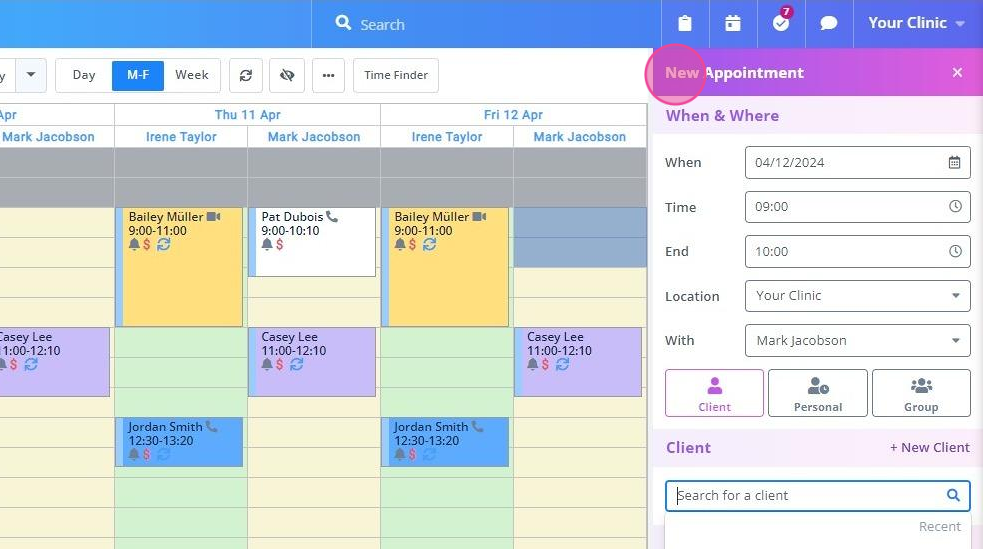
No matter what type of appointment you create, these details are necessary:
- Date: What date will the appointment take place on?
- Start: At what time will the appointment start?
- End: At what time will the appointment end?
- Where: If you have multiple locations, which location will this appointment take place?
- With: Which practitioner is this appointment with?
After confirming that these details are correct, you can select the type of appointment you want to create.
1. Client Appointment
If you are having a one-to-one appointment with your client, you can create a client appointment
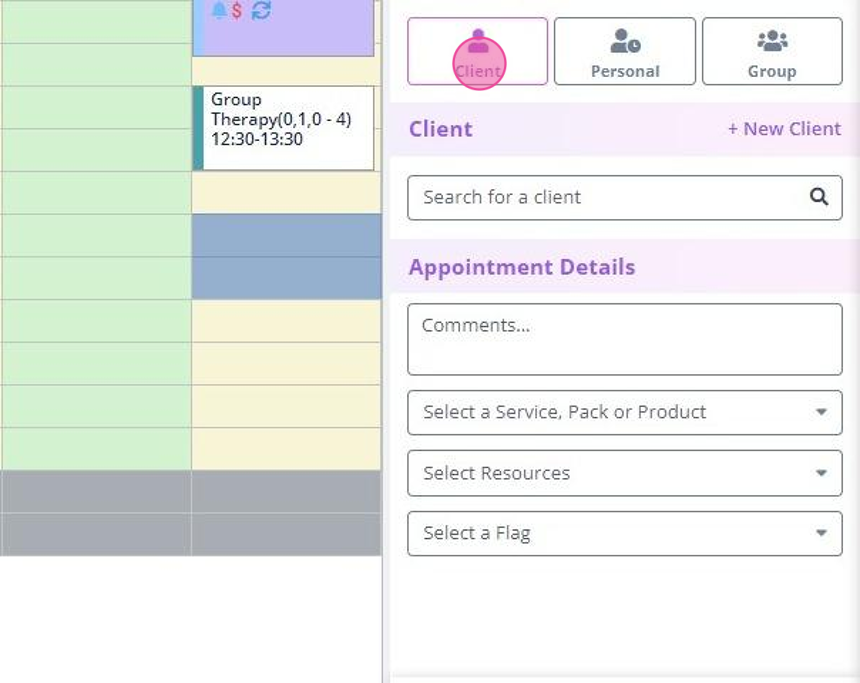
- To create it, you will first have to search and select the client's profile in your account. If this is a new client, click the + New Client button on top-right corner to create a new profile for them. Without a client profile, you won't be able to book an appointment for them.
- Once done, add any noteworthy comments related to the appointment.
- Choose the service, session pack or product you're providing the client in the appointment. Doing so will automatically create an invoice for that appointment with the services and its prices listed.
- Then, select an appointment flag (optional) and click Save.
When you click Save, the appointment will be added to the calendar, along with a record of it and its invoice to the client's profile.
2. Personal Appointment
If you have a personal appointment that's unrelated to your client bookings, like a yoga class, or your child's school event, you can create a personal appointment.
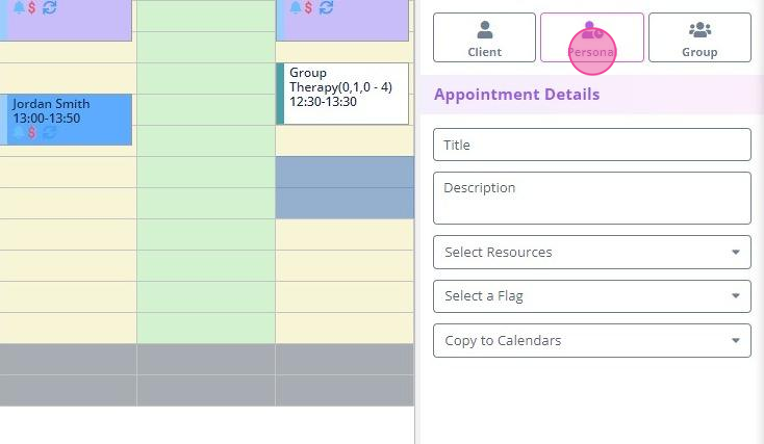
In this type, you need to add the title i.e. what is the appointment for, and its description i.e. when and where it is (plus, any other details you want to add). If you want, you can flag the appointment with a specific label. Also, you can copy the personal appointment to other practitioner's calendars (such as if there's a national holiday you all are sharing). After adding the details, click Save.
3. Group Appointment (Classes)
If you have an appointment that's with more than one client at the same time i.e. a group session or class, you can create a group appointment. Start by naming the group appointment, then add a flag (optional) and click Save.
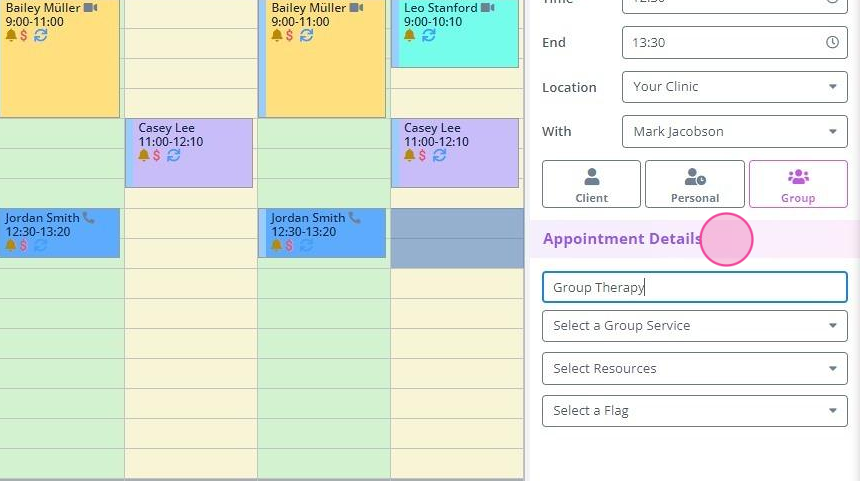
Once done, add your group participants. Type a client name and add each individual client.
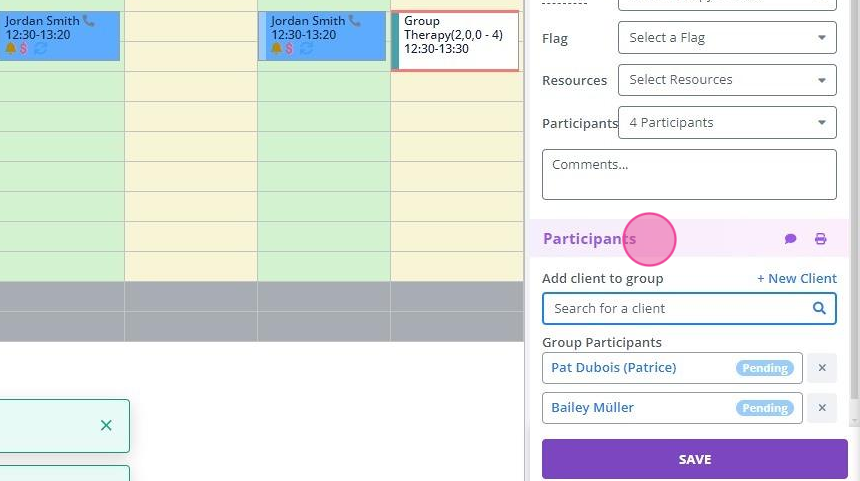
Then, click on each client name in the list - and add the products/services you are charging them for.
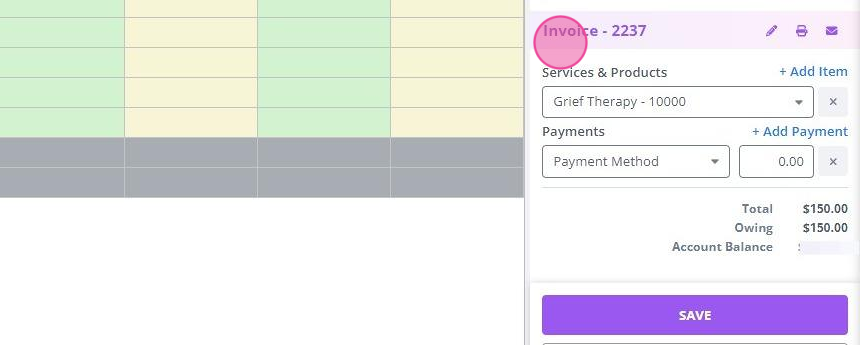
Click Back to group and select another client to add products/services to.
Repeat this process until you've invoiced all the clients in the group.
Finally, click Save to finalize your changes and add the group appointment to your calendar.
