Ensure your emails, SMS, and invoices display up-to-date business information by adding your details in Power Diary. Customize your settings and calendar display.
To make sure your emails, SMS and invoices display up-to-date information about your business, you need to add your business information.
Watch The Video
💡We are real people here and we love helping health practices!
- Just getting started with Power Diary and not quite sure whether it’s right for your practice? Want to see the highlights and ask us some questions?
Join one of our customer success team members for a walk-through of Power Diary. Start with a free 12-minute demo - Or, Schedule a One-on-One Call
- You may also be interested in “Power Talks” Practice Management Webinars:
All of our past and upcoming “how-to” and practice management-focused webinars are in one place!
In this article:
- Add Your Main Business Information
- Add Your Location(s) Information
- Customise Your Calendar Display
- Add Your Business Email Address
Add Your Main Business Information
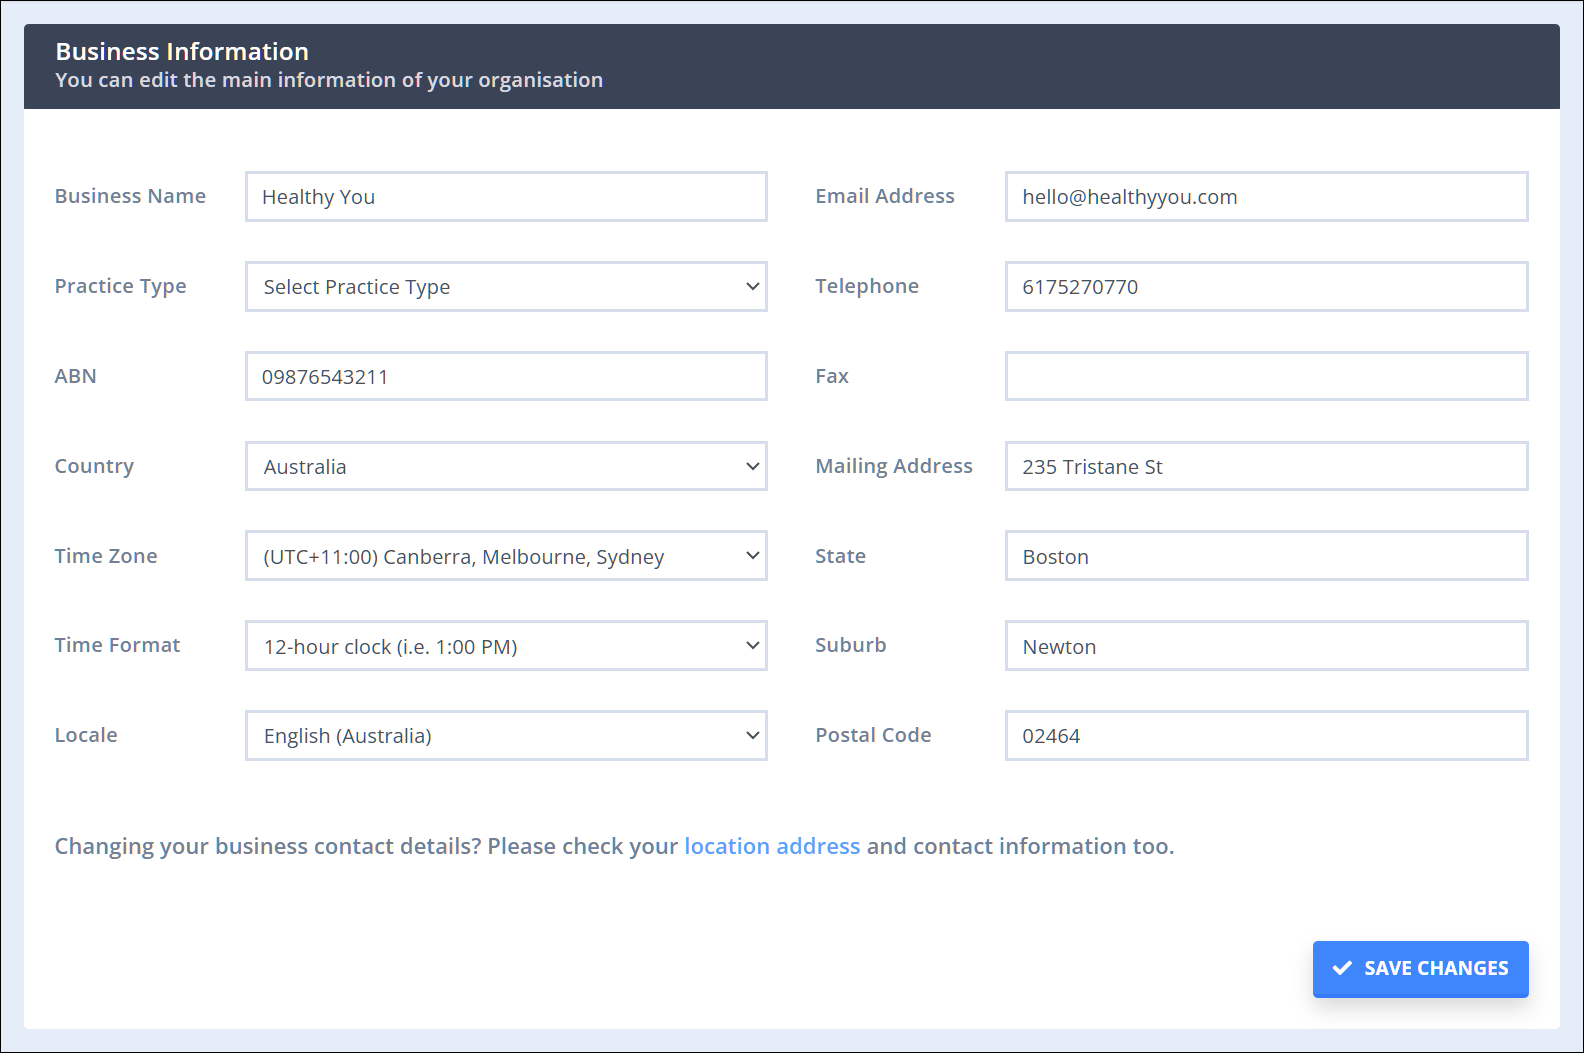
To add the main information about your business, go to Settings > Practice > Business Info. Here, you can add/change:
- Your Business Name: This is the primary name associated with your account.
- ABN/Tax ID/VAT Number: The business registration number of your business (based on Locale you selected, see below).
- Country: The primary country in which your business is situated.
- Timezone: This is the timezone in which your appointments will display in the Client Portal.
- Time Format: This is the time format that you wish to use throughout your Power Diary account.
- Locale: Add your primary region here to change the date and currency format.
Note 💡
The accounts set up in the USA (when United States is selected in the Country field), will see a section on the Business Info page for capturing the Practice Billing Provider Information which includes their organization NPI number and Taxonomy code.

7. In addition, you can also add your business email address, the physical address and postal code

Add Your Location(s) Information
After adding your main business information, you will want to set up your locations. The location you set up here appears in your Client Portal and allows you to set the default location for an appointment you're having with a client. The location set up here is also used to define a practitioner's availability.
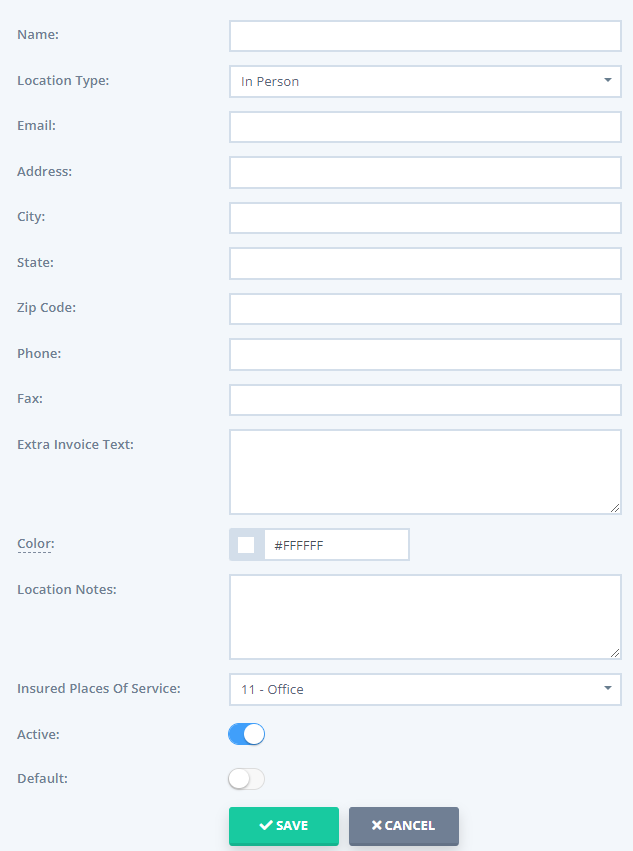
- To add your location, go to Settings > Practice > Locations. Here, click + Add Location and fill in that location details and click Save.

- Choose a colour for your location. Any availability set for that location will be colour-coded with that location's colour.
- Make sure that it is set to Active, otherwise, it won't show up in settings and options.
- And finally, make the location your default if you want (there can only be one default location at a time). Once done, that default location will be automatically selected when you create a new appointment on your calendar.
Customize Your Calendar Display
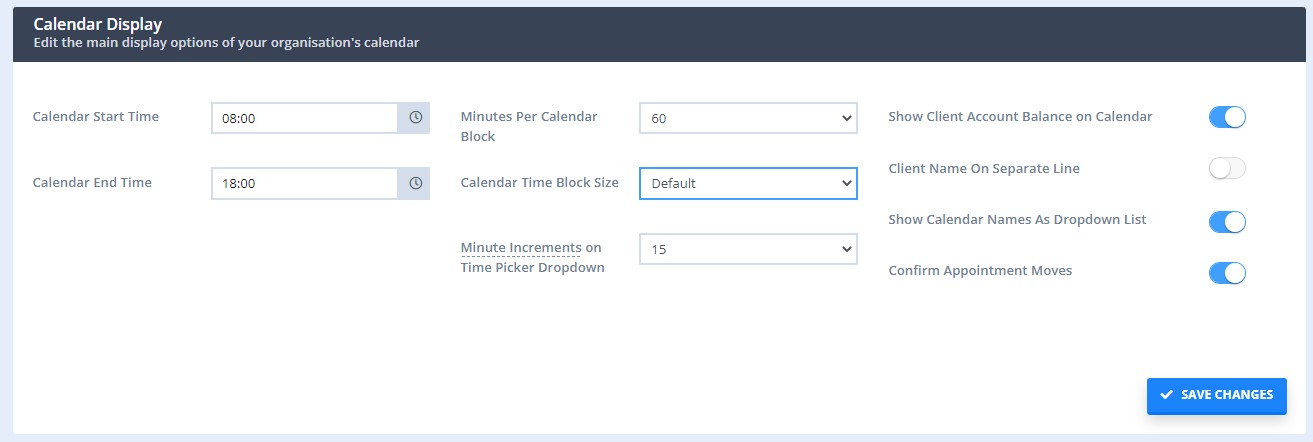
After adding your business information and setting up your locations, you will want to customize your Power Diary calendar display. To do that, go to Settings > Schedule > Calendar Display. Here, you will be able to set:
- Start Time and End Time: This setting is important as this will determine which appointments will show up in your calendar.
- Minutes Per Calendar Block: Your calendar is divided into blocks. You can set how much time each block represents.
- Calendar Block Size: You can set how big a block looks on your calendar.
- Show Client Account Balance on Calendar: If a client has pending invoices, turning this option on will show a red $ sign on their appointments.
-
Client Name On Separate Line: When turned on, the client's name will be shown on the line below in the calendar appointment.

Add Your Business Contact Details
It is a good idea to add your default business email which will be used as the default sending address when sending an ad-hoc emails (templates each have their own pre-defined from address). To do that, go to Settings > Communication > Communication Options and add your business email address in the top-right corner.

- Last but not least, you can set up your MailChimp integration and a custom SMTP server here as well.
