Set up recall automations in Power Diary to ensure clients rebook after a specified interval. Automate follow-up messages or tasks for clients with no future appointments scheduled.
Create an automation for Recalling for your clients. Recall Automations are messages sent or tasks created at a scheduled interval after the client's last booked appointment where they have no future appointments booked. This is a great tool for following up on clients to ensure they rebook after a certain interval.
Note:
Recall Automations will only be created for clients with an appointment that meets all automation conditions and have no future appointments booked.
Follow these steps to create an automation:
- Navigate to Settings > Communication > Automations
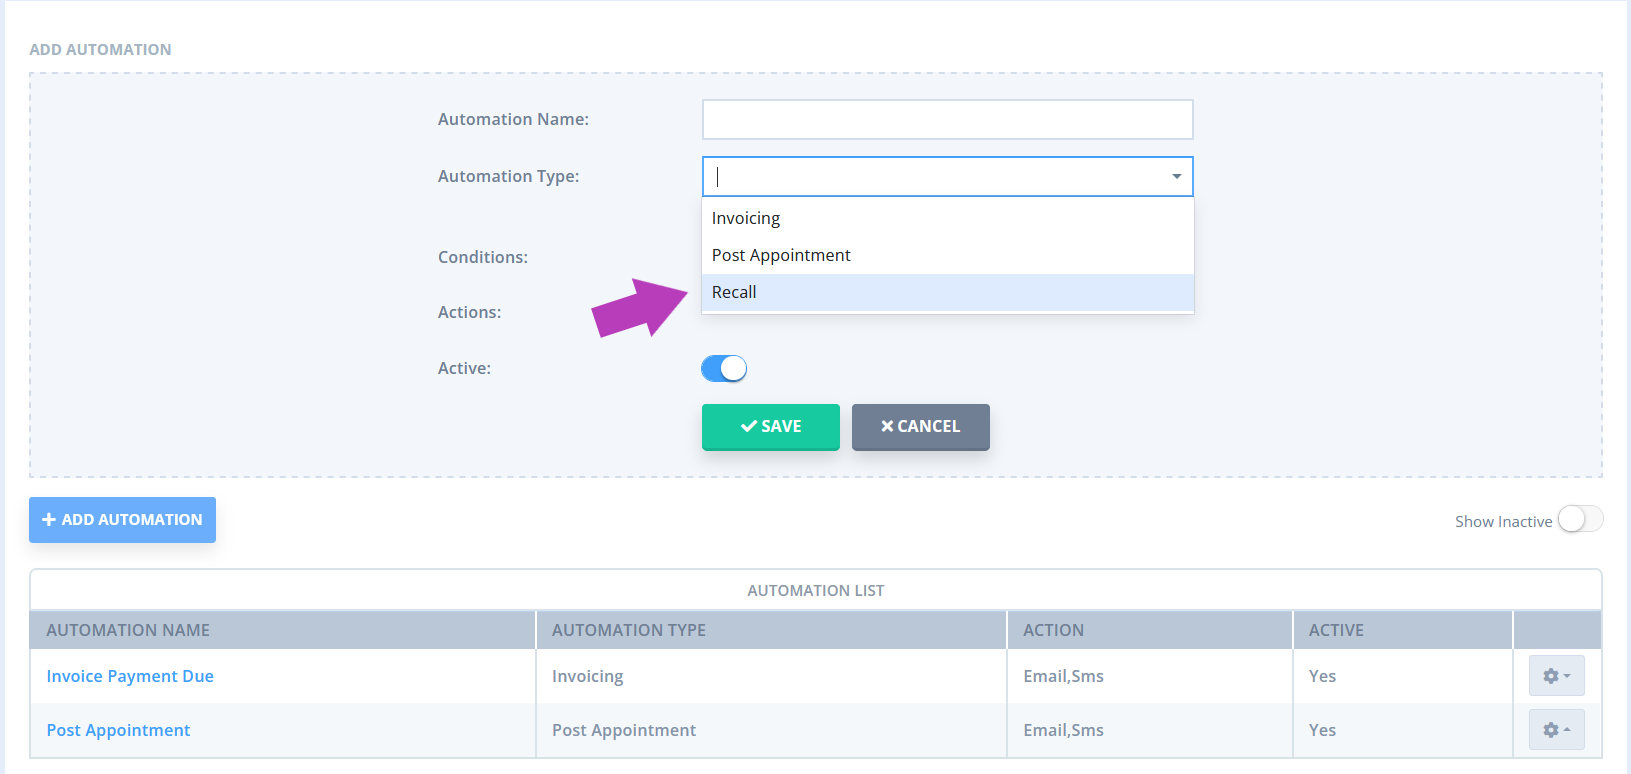
- Click on '+ Add Automation'

- Give the automation a name (e.g. "3 month recall")
- Select the 'Recall' Automation Type.

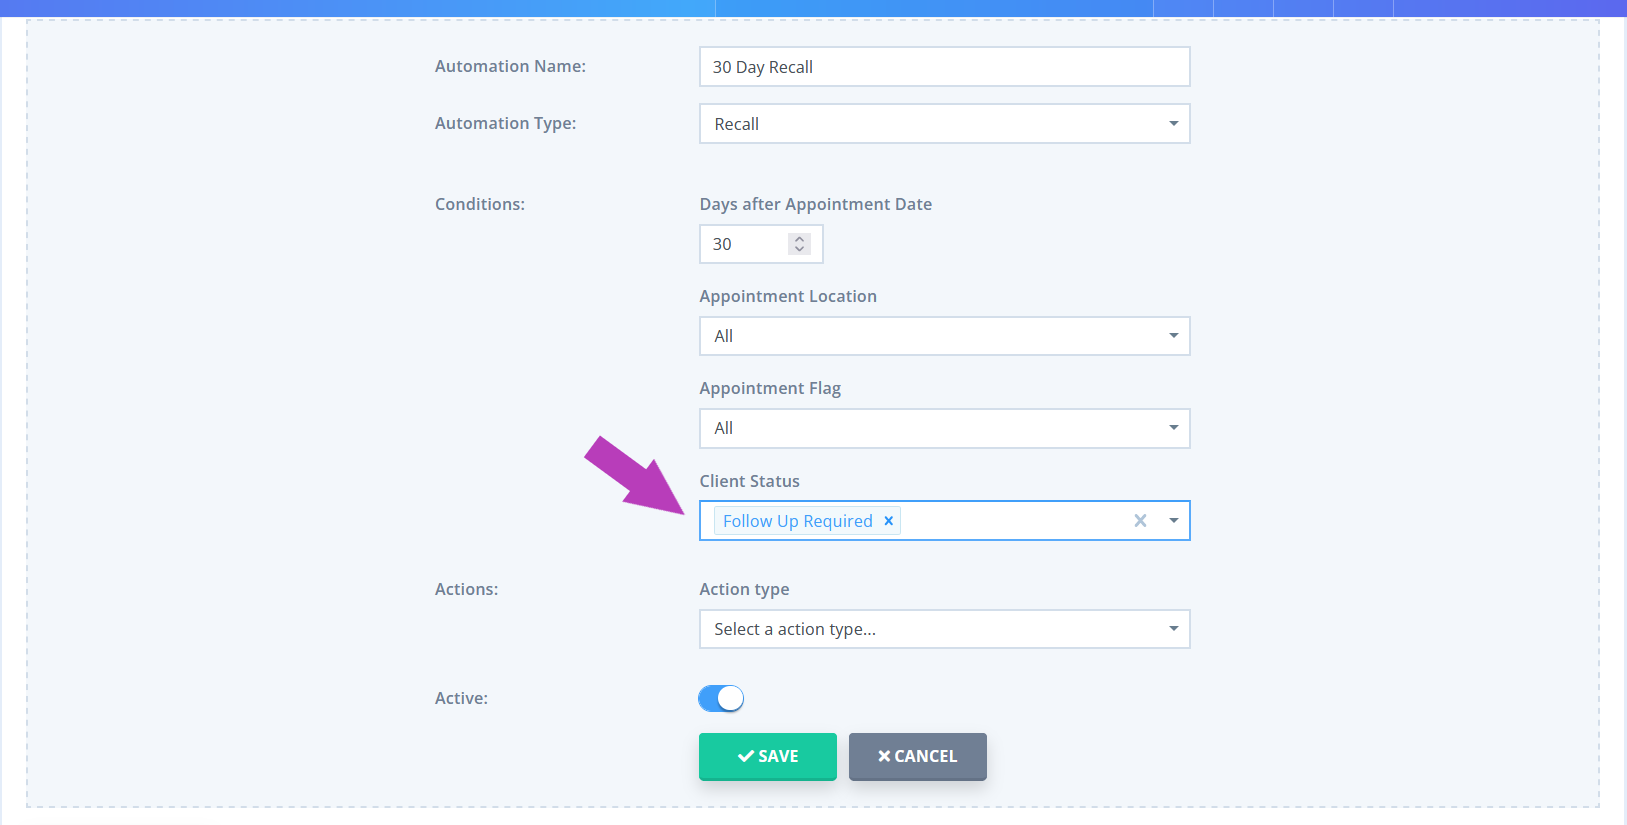
- Set the Conditions for this automation. All conditions must be met for an automation to be triggered for clients that have no future appointments booked. The following conditions can be set:
- Days after Appointment Date - this is when the automated message will be sent.
- Appointment Location. Leave it as all, or select one or many locations.
- Appointment Flag - leave it as all, or select one or many appointment flags.
- Client Status - leave as all, or choose a status to filter out clients who do not need a recall created.

- Click on the 'Action Type' dropdown to set the action type, SMS, email, or task and select the communication template you created to use for this Automation. The email or SMS will be sent to the client that the appointment is booked for. The task will be created in context of the client so that you can review the task and make contact as required.
- Save the changes. The automation will start sending in the next daily batch for client's that meet the conditions going forward.
