Learn how to create and manage client statements in Power Diary, including Activity, Outstanding Invoices, and Payments. Customize and print with ease.
Statements allow you to show multiple paid or unpaid invoices for a certain period of time for a client. Statements are found in each Client's profile, which can be accessed by searching for the client (Clients → Search) or by double-clicking on a client's appointment in the diary.
There are two different statement types to choose from, which work as follows:
- Activity: Both paid and unpaid invoices in that period
- Outstanding Invoices: Unpaid invoices in that period only
In this article:
Creating a Client Statement
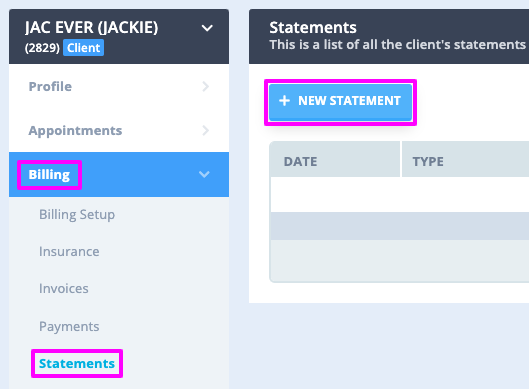
The statements feature is found in the Client profile under Billing → Statements.
1. In the Statements tab, click "New Statement".
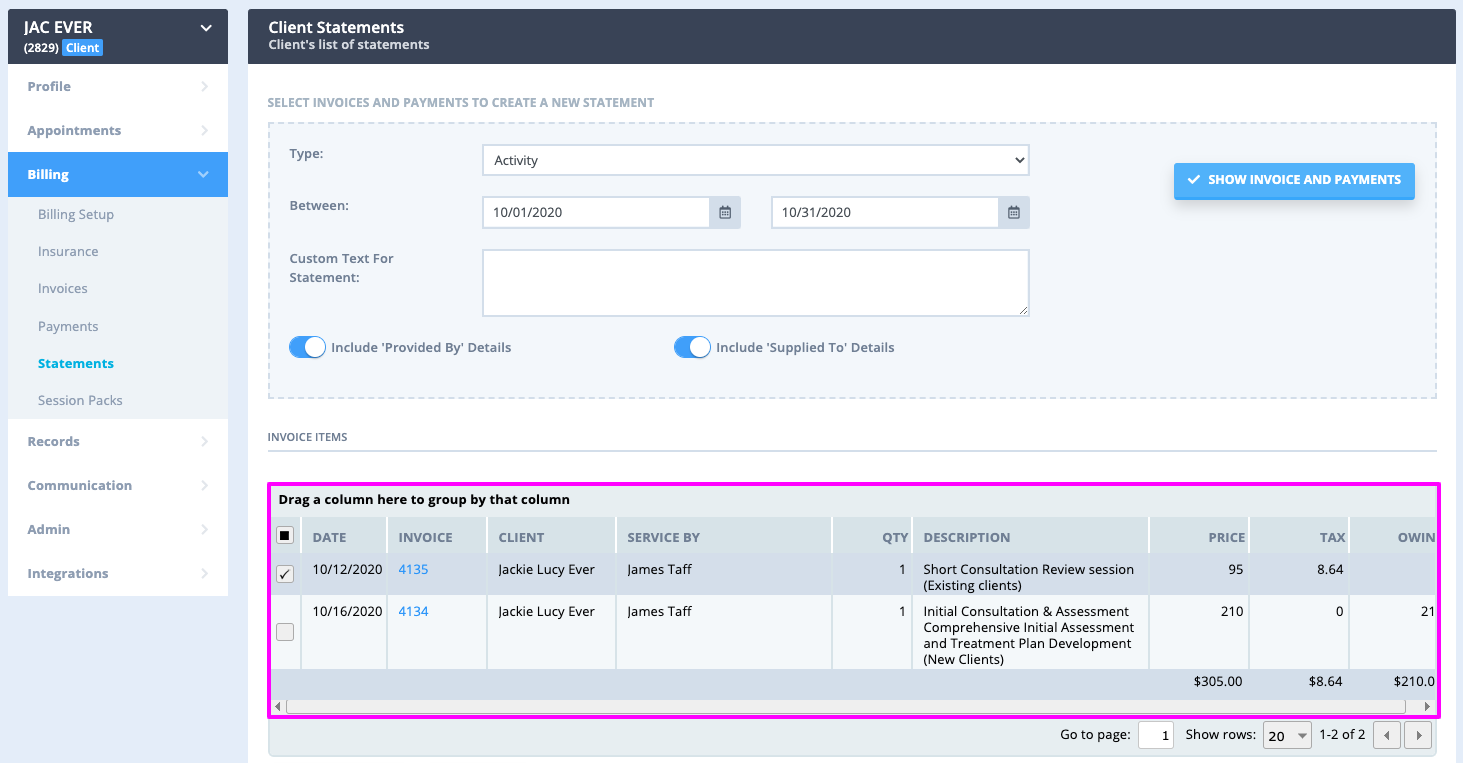
2. Select the Statement Type: Activity or Outstanding Invoices.
4. Optional: You can also type some text which will print at the bottom, like payment instructions for example.
5. Click "Show Invoices and Payments".
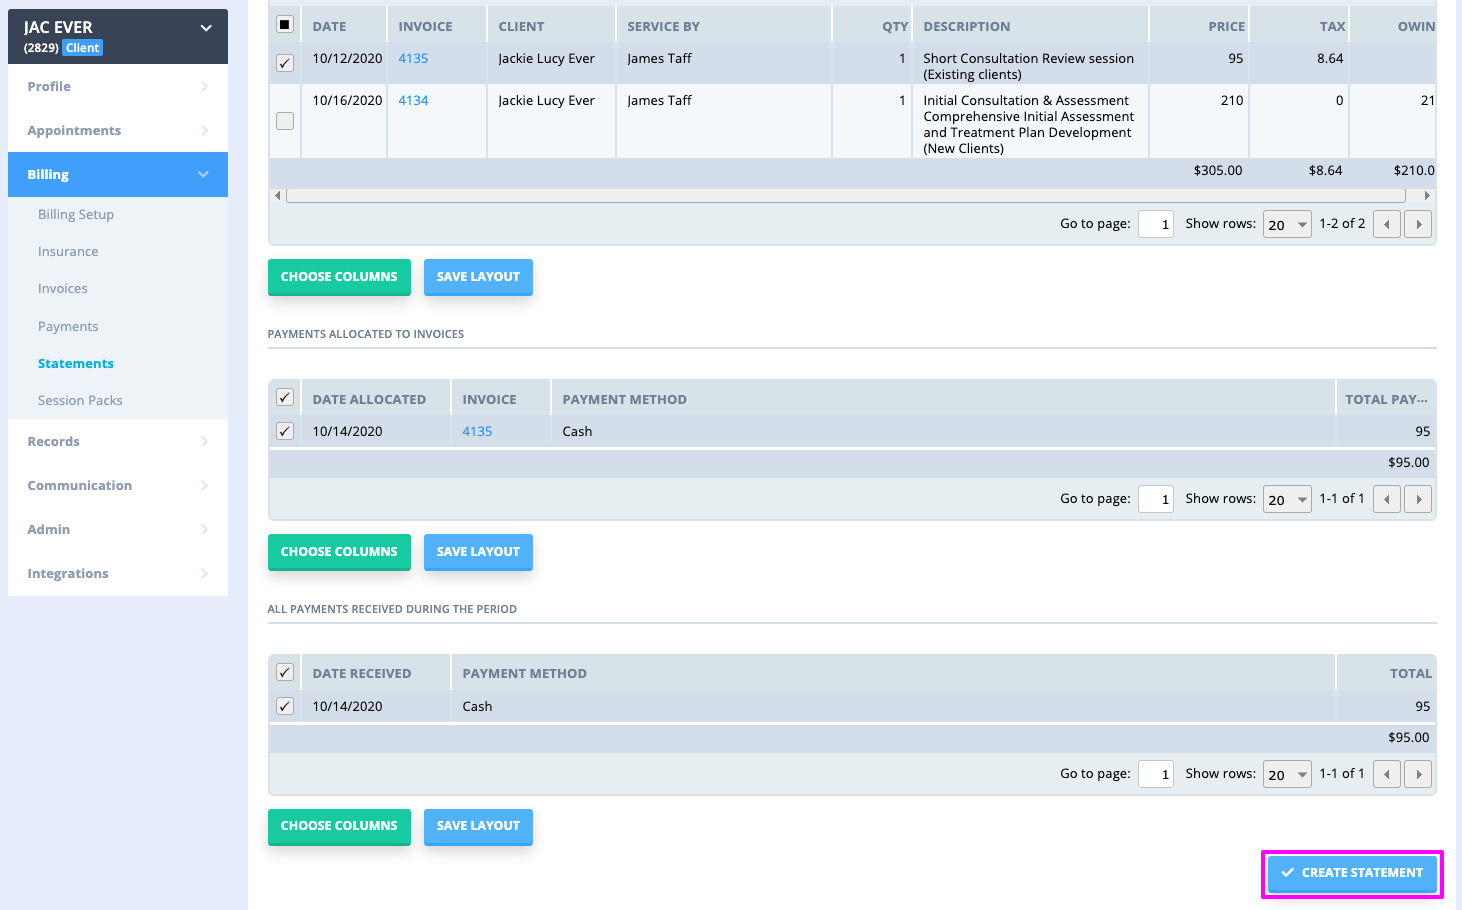
6. Tick the invoices and payments which you would like to combine into the statement.
 7. Click "Create Statement".
8. Once you have created your statement you have the option to show the Referrer on the statement, which you can do by ticking "Referral". This will show the referrer details at the top right hand of the Statement (the same place that it is shown on a normal invoice).
9. You also have the option to either Email, Print or Delete the Statement.

Statement Layout
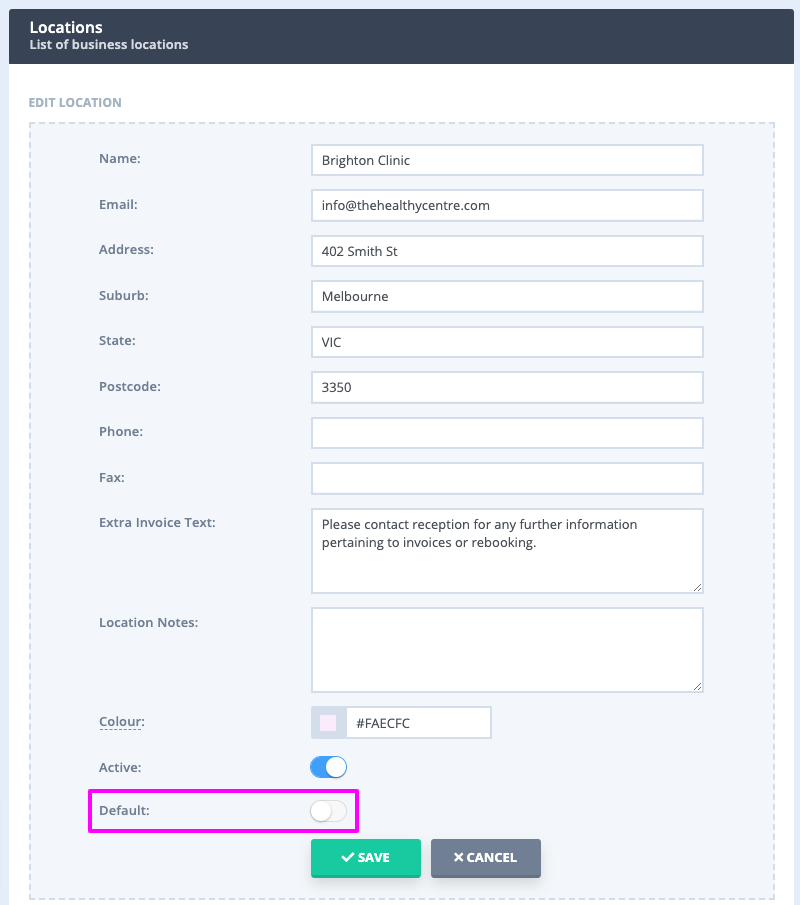
Each Statement is designed to print the default Location configured in your account into the header of the document.
If you are using multiple Locations, you can modify the default Location (and the clinic details printed on Statements) by navigating to Settings > Practice > Locations and alter which of them is the Default.

If you would like to find out how to create a statement that is billed to a third party, please read our article here.
