
Streamline administrative tasks with Power Diary Automations. Learn to configure automated SMS, email, and task actions based on specific conditions to enhance efficiency.
Power Diary Automations feature enables you to configure automated message sending or task generation based on particular conditions that you can choose. They are a fantastic tool for automating administrative tasks.
Note:
- The number of automations in one account is unlimited.
- The estimated time of day when the automation messages will be sent is after 2 PM, your local time.
In this article:
Automation Actions Overview
Automation actions determine what occurs when your automation is triggered. There are three different options: SMS, Email, and Tasks.
- SMS: When you select SMS as your action, an SMS will be sent to your clients based on the conditions you have set. You can create custom SMS templates to be automatically sent. Templates can include merge fields which will automatically populate client information into the SMS, so each message is personalised. You can also use merge fields to include links to download and pay for an invoice.
- Email: When you select Email as your action, an email will be sent to your clients based on the conditions you have set. You can create custom email templates to be automatically sent. Templates can include merge fields which will automatically populate client information into the SMS, so each email is personalised. You can also use merge fields to include links to download and pay for an invoice.
- Tasks: When you select Task as your action, a task is created with the automation name as the task name. Tasks are created without any specific user assigned and are linked to a client based on the conditions that are set. The due date for the task is the date automation created the task. Learn more about tasks here.
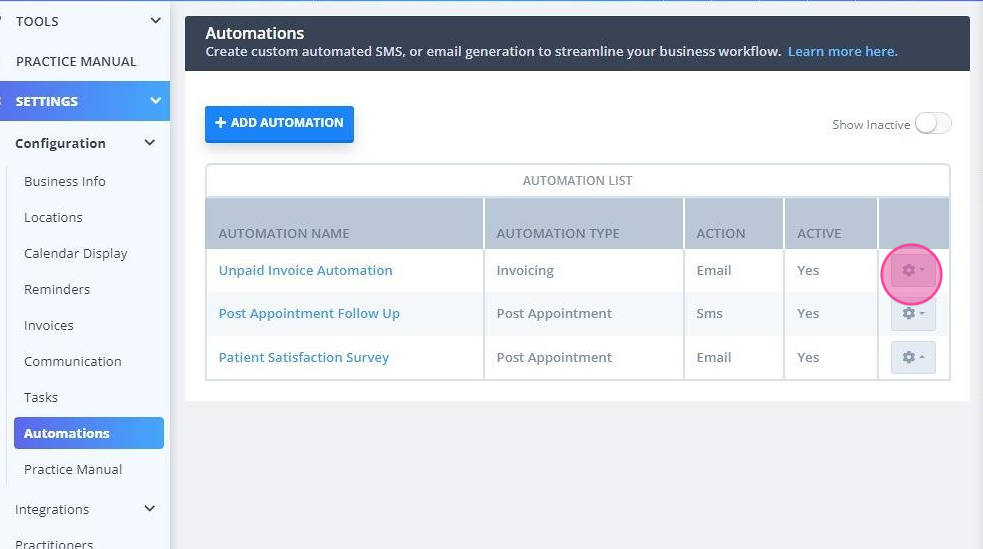
Managing Automations
Each existing Automation can be edited, deactivated, and reactivated.
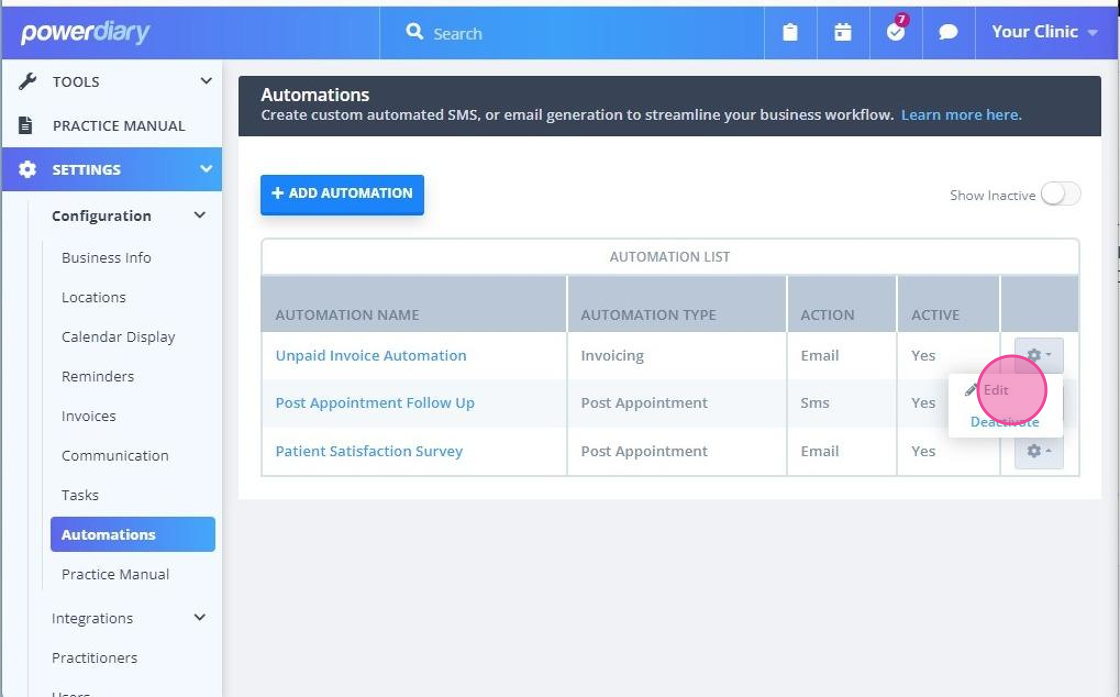
- Click the gear icon next to an Automation in the list:
- Click "Edit" to access the Automation for editing:
- Or, click "Deactivate" to make this Automation inactive.

- Click "OK" to confirm.

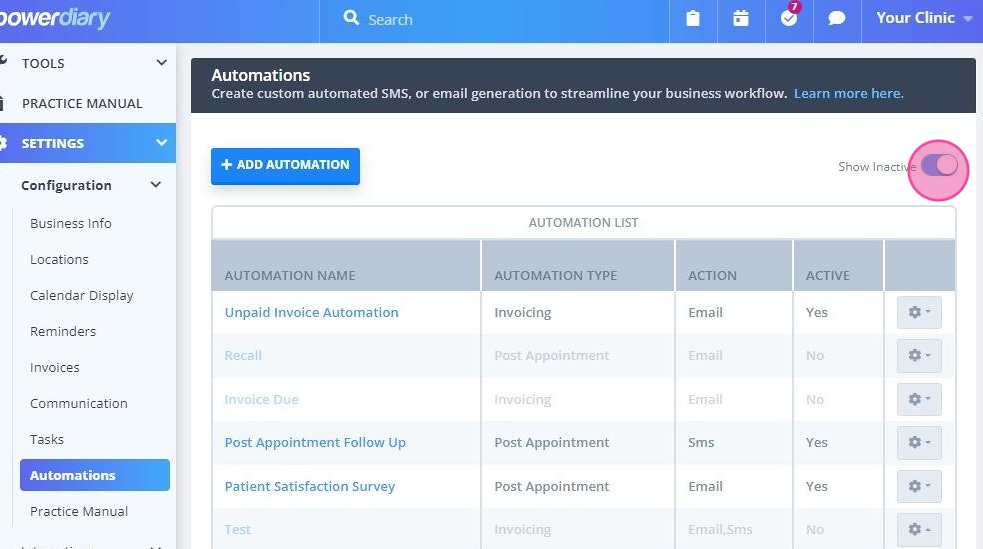
- To activate an Automation that was made inactive, turn on the "Show Inactive" switch
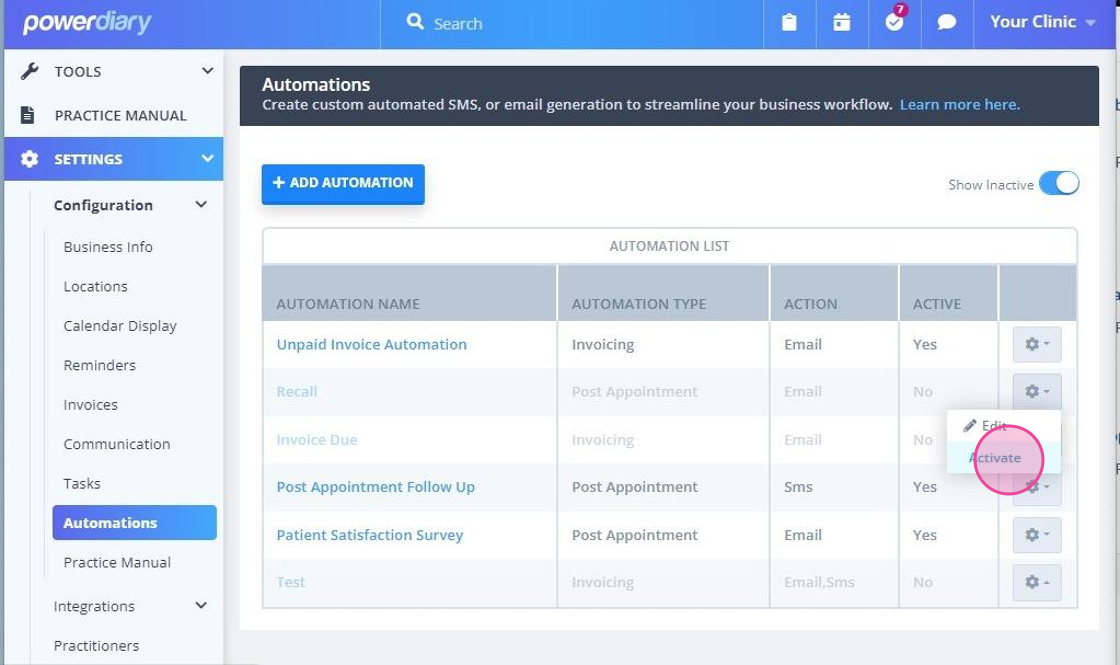
- Click the inactive Automation's gear icon and select "Activate" to make the automation active again.
Types of Automations
You can access more information on the specific automation types in the following articles: