
Learn how to set up and use Power Diary's Telehealth Plus+ feature for secure, multi-participant video sessions.
Power Diary Telehealth Plus+ feature allows you to conduct telehealth video sessions with up to eight participants that can run to up to three hours, making it suitable for one-on-one appointments, couples and family counselling, group therapy, coaching, training, and other remote services.
In this article:
- Enabling Telehealth Plus+ in Your Account
- Enabling Telehealth Plus+ on Client Appointments
- Inviting Participants to a Telehealth Plus+ Session
- Setting Up for a Telehealth Plus+ Session
- Starting a Telehealth Plus+ Session
- Sharing a screen in a Telehealth Plus+ Session
- Using the Chat Function in a Telehealth Plus+ Session
- Telehealth Plus+ Records Reporting
- Telehealth Plus+ Pricing
How to Activate Telehealth Plus+ in Your Account
While Power Diary Telehealth Lite is available by default on all client appointments, you can choose to activate or deactivate the Telehealth Plus+ feature.
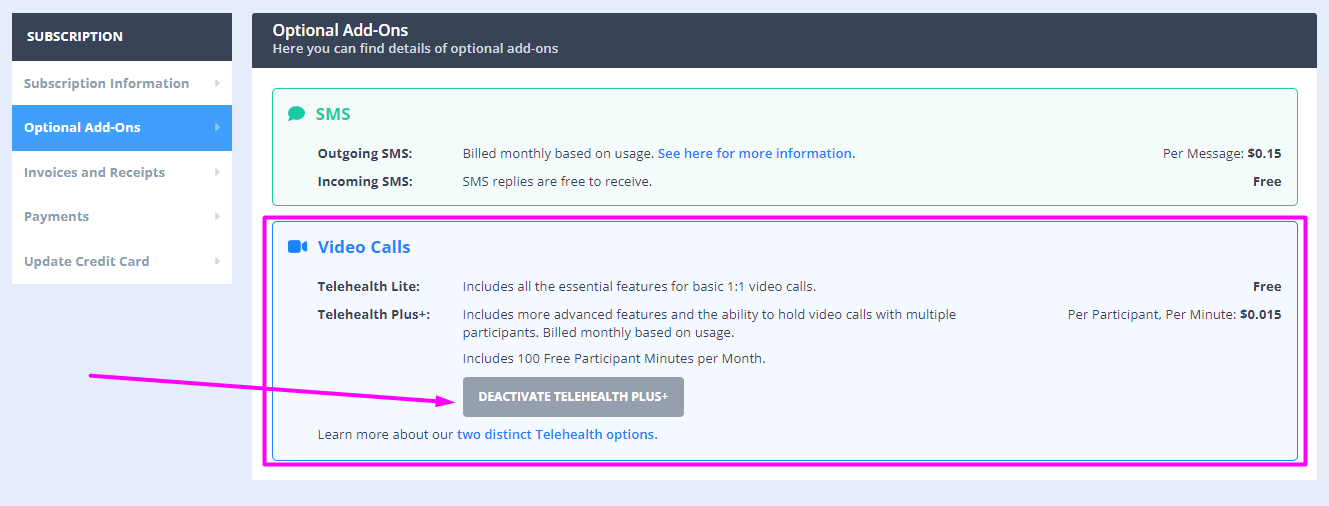
- When you convert your trial into a paid subscription, you will be prompted to Settings > Subscription > Optional Add-Ons page where you can deactivate the Telehealth Plus+ feature, if you think it is not a necessary tool for your practice:
-
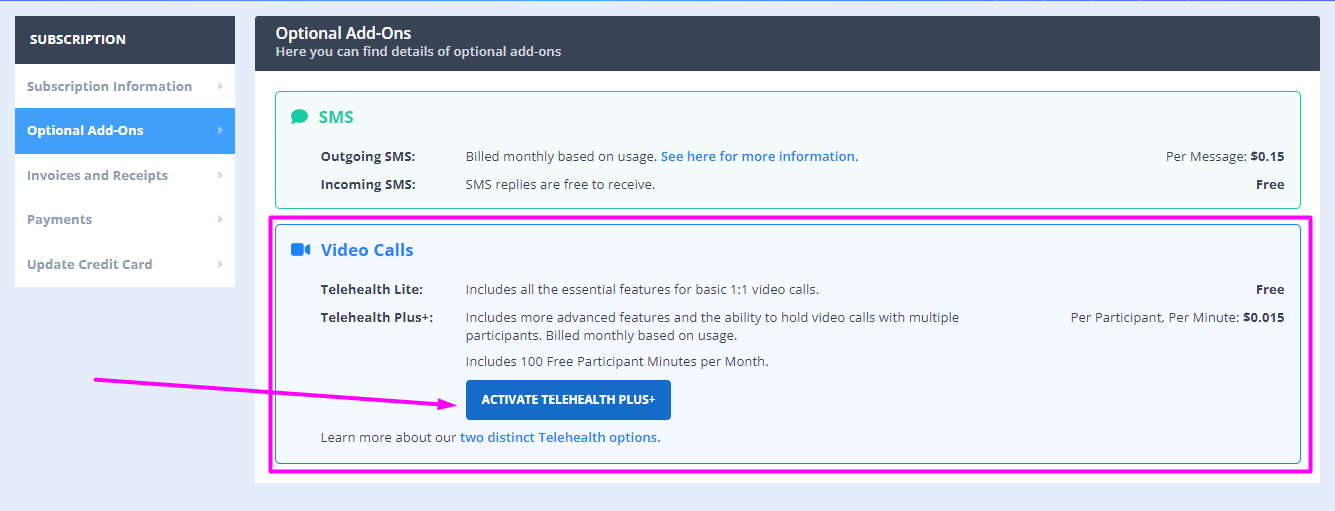
You will be able to activate the Telehealth Plus+ add-on at any time, in Settings > Subscription > Optional Add-Ons:
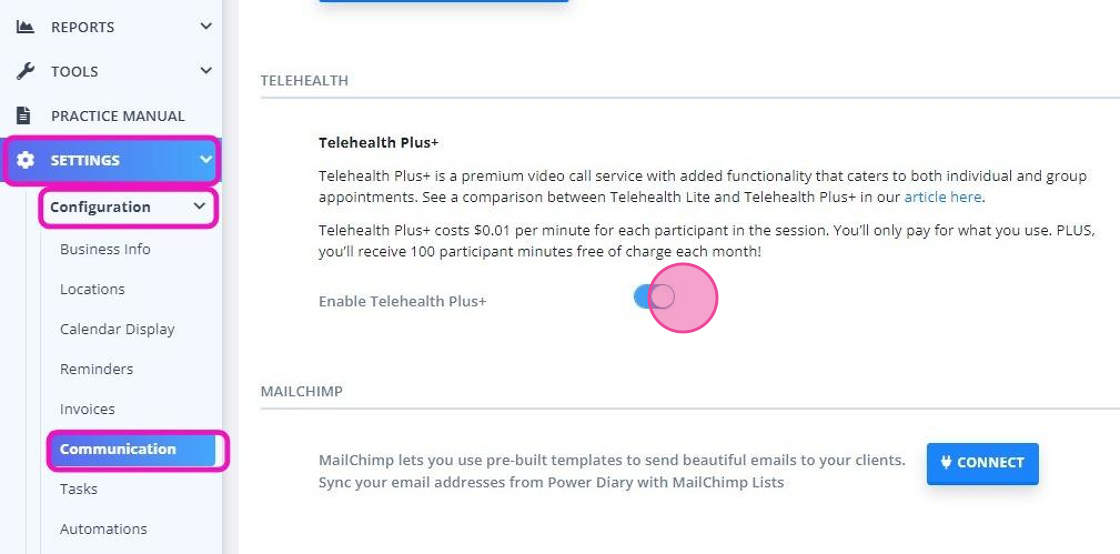
- This can also be done via the Settings → Configuration → Communication menu:
How to Enable Telehealth Plus+ on Client Appointments
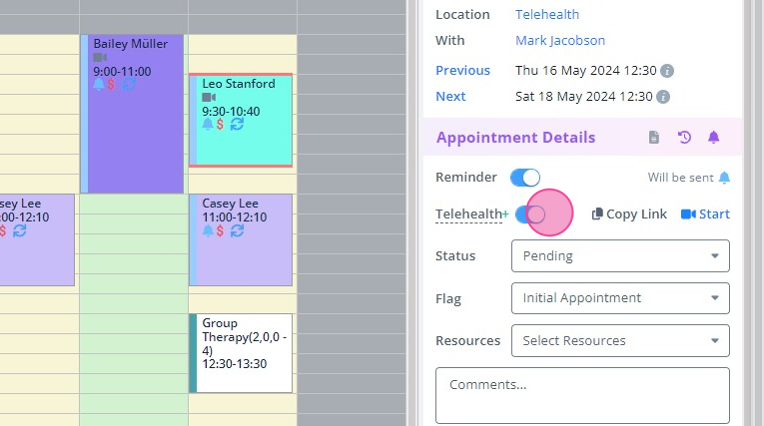
When you enabled Telehealth Plus+ in the Settings → Configuration → Communication settings, the Telehealth Plus+ toggle will appear on every client and group appointment panel.
- Turn the toggle on to enable Telehealth Plus+ on a particular client or group appointment**.
- This will generate an individual Telehealth Plus+ link* for that specific appointment that you will be able to share with your clients.
- When it is the time to start the session, bring up the appointment panel and click on the Telehealth Plus+ 'Start' button.
*Important:
- The Telehealth Plus+ switch must be enabled on the appointment panel for the system to generate and send the video session link to the client/group of clients.
- If the Telehealth Plus* switch is off, and the Telehealth merge field is included in reminder templates, the client's unique Telehealth Lite link will be sent.
**Note💡
You will still have the option to use one-on-one Telehealth Lite sessions with your individual clients – these will always remain free of charge:

How to Invite Participants to a Telehealth Plus+ Session
Each appointment on your calendar will have a unique link for Telehealth Plus+ that will need to be shared with participants.
- You can set up your communication templates to include the {ClientTelehealthUrl} merge field. This merge field will automatically add the appointment Telehealth Plus+ or client's Telehealth Lite link, depending on the particular appointment's settings. This way you can automatically send Telehealth Plus+ or Telehealth Lite links to your client with their appointment reminders, or use the communication templates to manually message or email a client to send them the link. ⚠️Ensure that you enabled the Telehealth Plus+ switch on the appointment panel to generate the Telehealth Plus+ link!
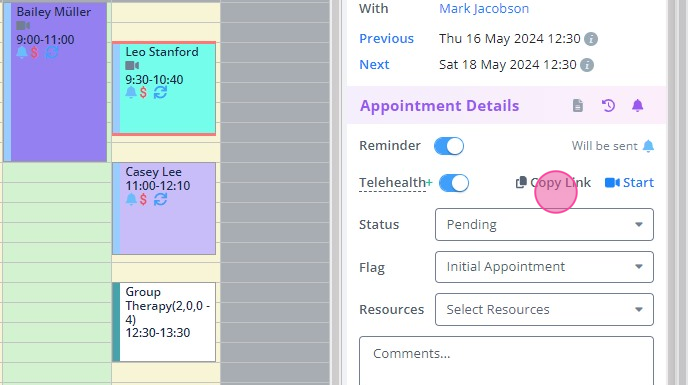
- If you wish to manually send the link to a client without the use of a Power Diary communication template, or via your own SMS or email, you can copy the link directly from the appointment panel:
- Find the appointment on the Calendar display and click on it once to bring up the appointment panel on the right.
- Click on the Copy Link button on the appointment panel, to copy the link to clipboard. This allows you to paste the link into an SMS or email message to share with your participants.
Alternatively,
- Click on the Telehealth Plus+ 'Start' button on the appointment panel and confirm in the pop-up dialog.
- A new tab will open which contains all the information and settings for this particular session.
- Click on the Copy Link button to copy this session's unique link.
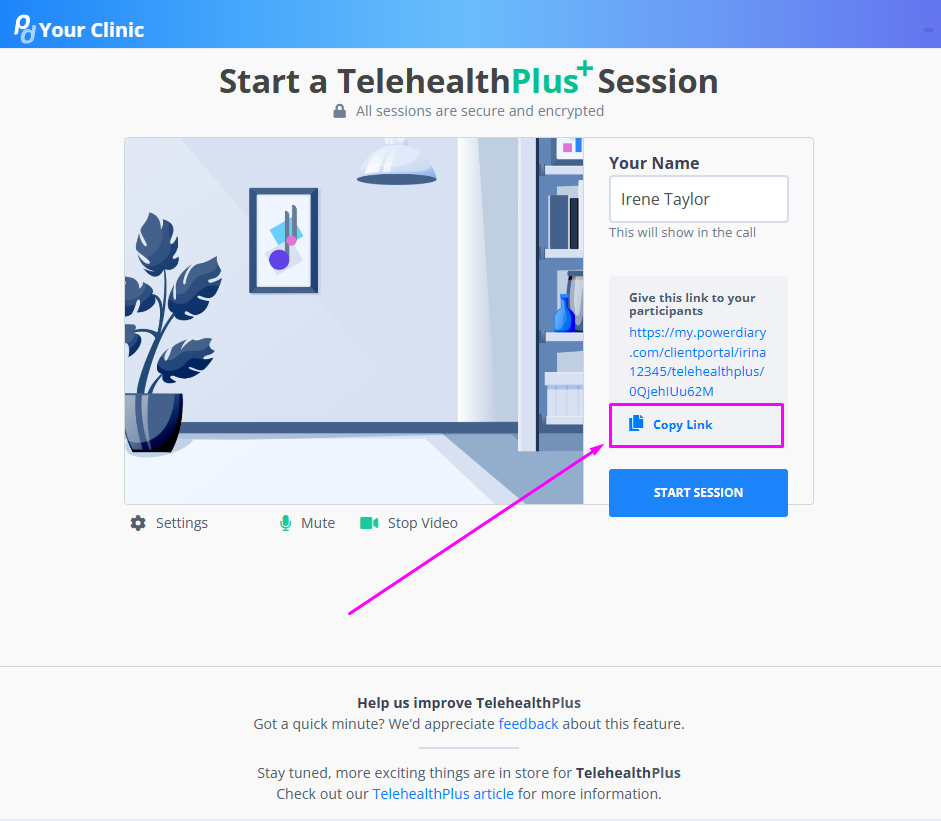
4. Share this link with the participants using Power Diary SMS or emailing feature, or any other way that you prefer to use when communicating with your clients.
Hint💡
You can send an SMS or email to all the participants of a group appointment directly from the group appointment panel!
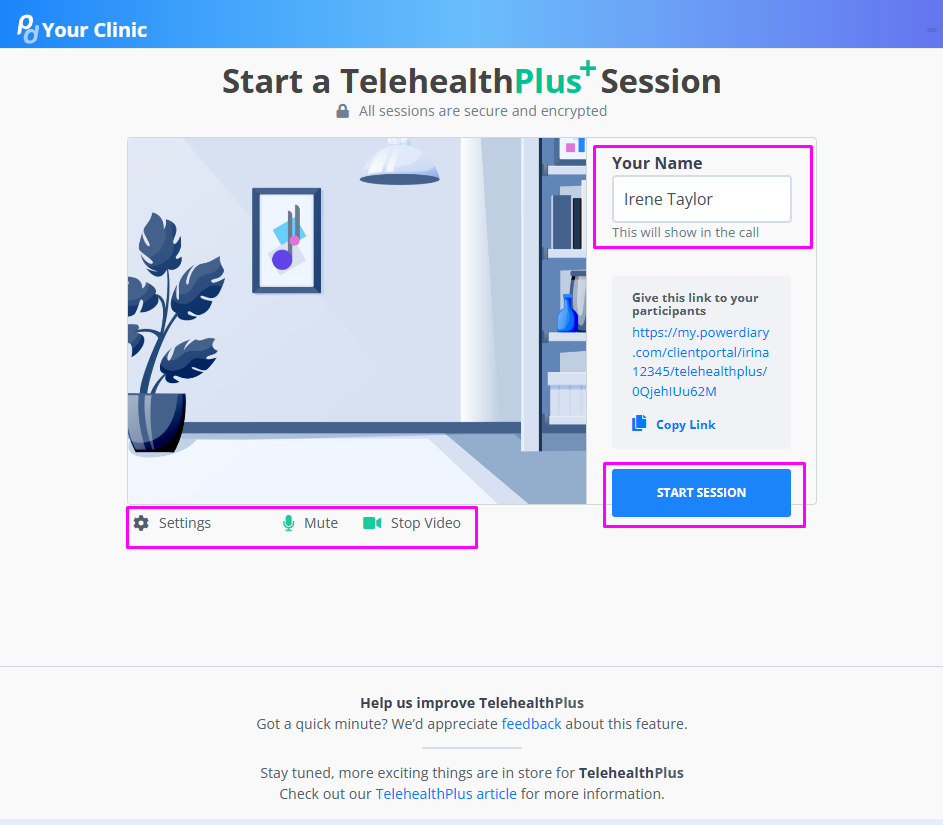
Setting Up for a Telehealth Plus+ Session
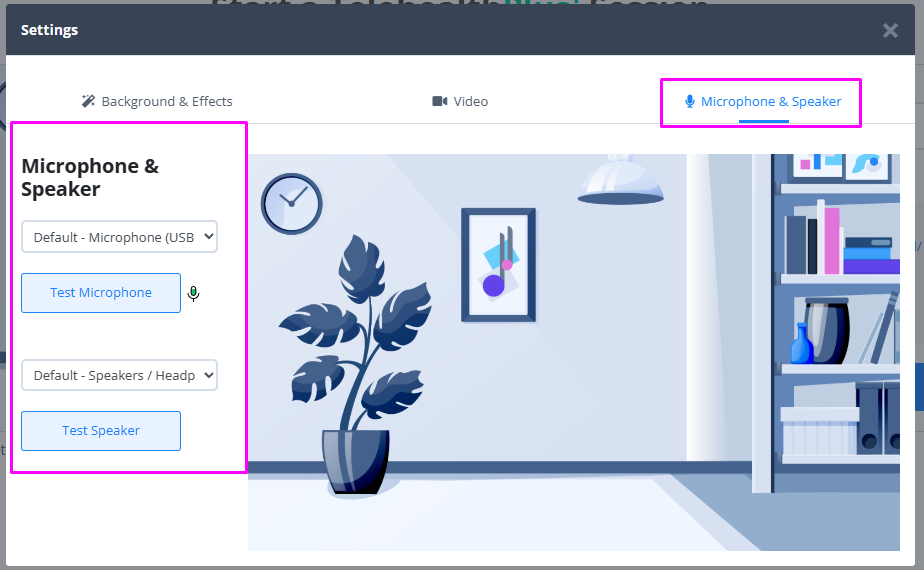
When you click on the blue Settings text, a new pop-up dialog will open. Use the Settings menu to:
- Select a virtual background or a blur effect for your video background, if necessary. We have already provided you with a selection of virtual backgrounds to use:

- Select a video camera to use for this session, and mirror the video if you'd like to:

- Select and test your microphone and speaker:
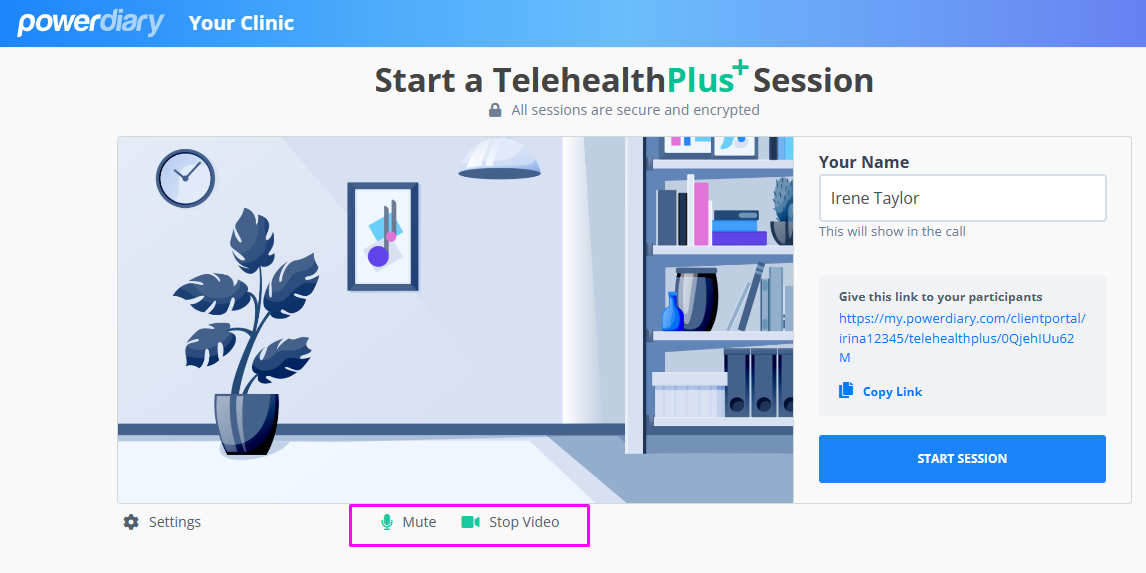
- You can also choose to mute your microphone and turn off the video before starting a session:
Hint 💡
You can update your session name in the relevant field on the settings screen before each session. The name that is added by default is pulled from the Settings > Practitioners > open practitioner > Details: Practitioner Name field. If you'd like to update your Telehealth Plus+ session name permanently, please update the Practitioner Name in the Practitioner settings mentioned above. It is worth mentioning that the 'Practitioner Name' will also be appearing in your calendar and on the Client Portal.
- Your clients will have the same ability to set up for their session from their Telehealth Plus+ waiting room:
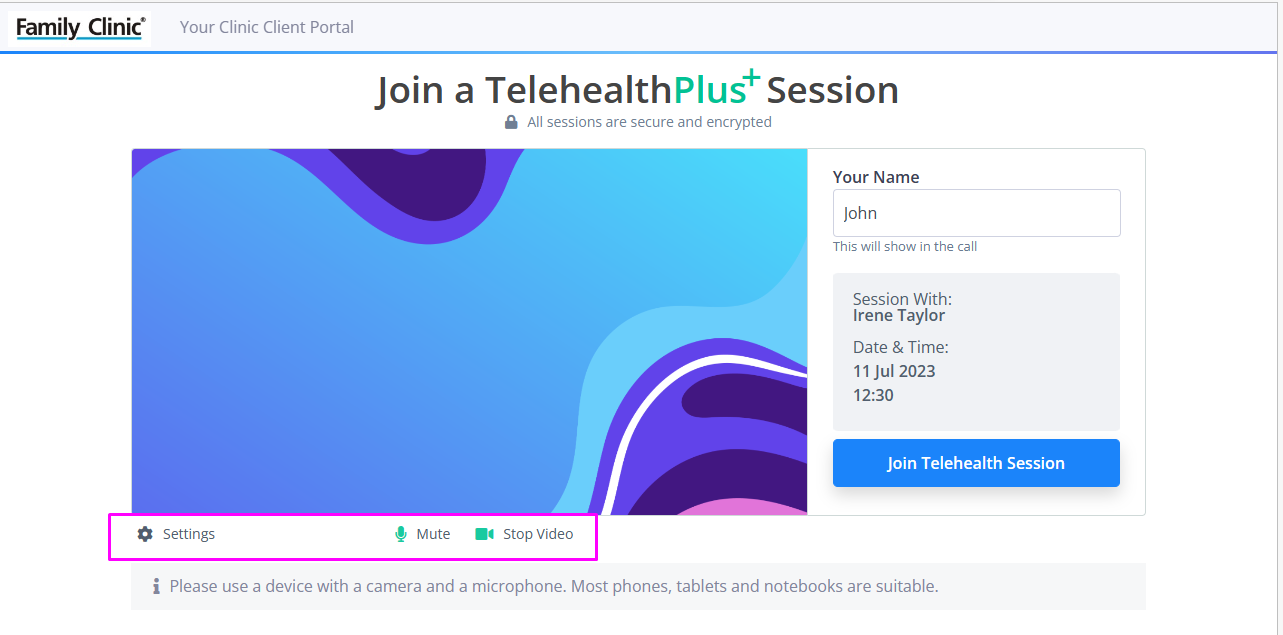
How to Start a Telehealth Plus+ Session
When it is time to start your Telehealth Plus+ appointment,
- Find the appointment on the Calendar and click on it once to bring up the appointment panel on the right.
- Click on the Telehealth Plus+ 'Start' text on the appointment panel and confirm in the following pop-up dialog.
- A new tab will open that contains all the information and video, microphone and other call settings for this particular session.
- Edit your name (if necessary).
- Click on the blue Start Session button.
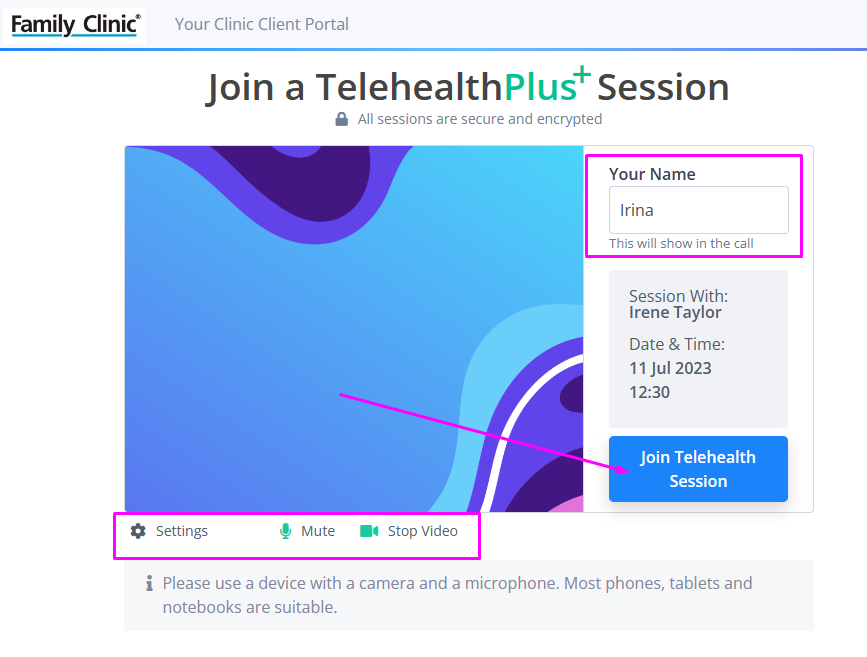
6. Each participant will need to click on the session link you shared with them. They will get to the start page, where they be able to go over the call settings and will need to enter their name and click on the Join Session button:
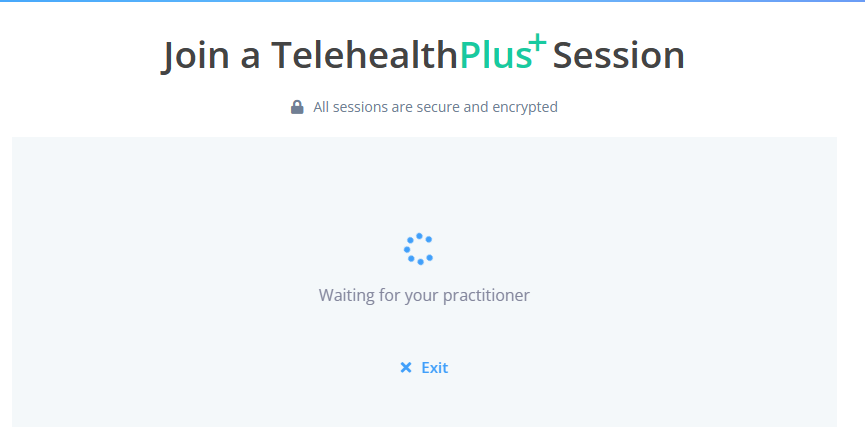
7. If the practitioner has not started the session yet, the participant will see the 'Waiting for your practitioner' message:
8. When the practitioner and participants join the session, this is what they all see:
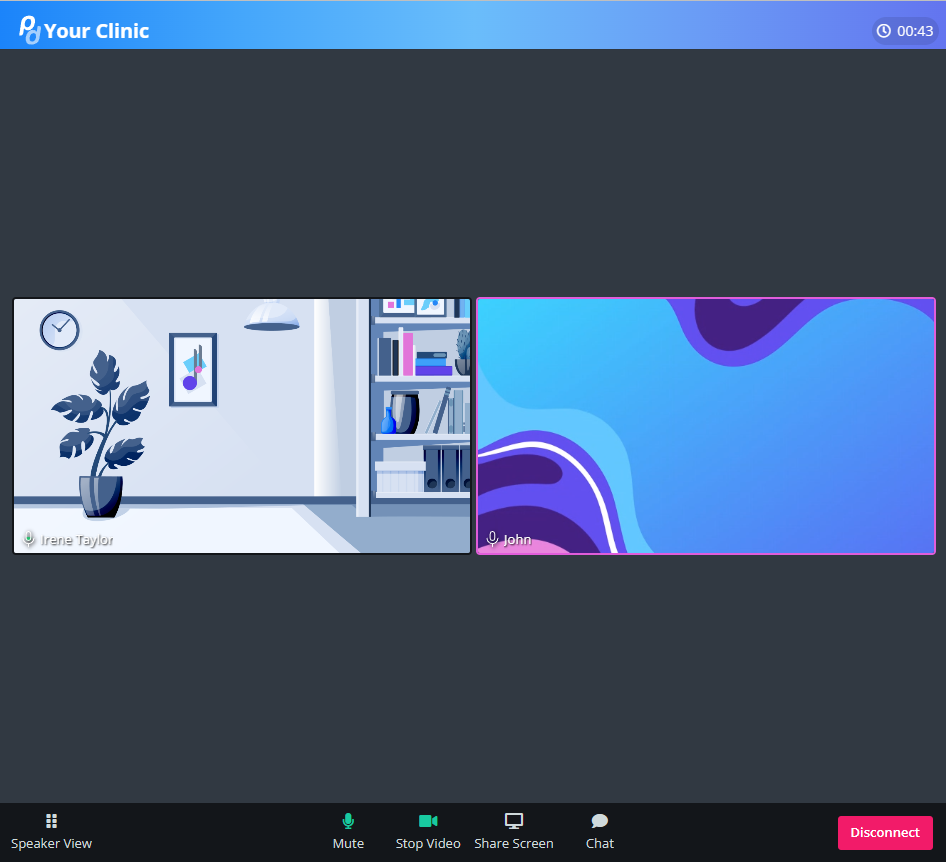
Select the pin icon in the upper right-hand corner of the desired speaker's video feed to utilise this feature. Their video will be pinned as the primary display throughout the session:

Important
Telehealth Plus+ session links expire after 12 hours following the appointment start time. If a client tries opening an expired link, they will see a notification, 'This session link has expired'.
How to Share a Screen in a Telehealth Plus+ Session
When already in a session, the practitioner or a participant are able to share a screen of their choice with all the other participants. Currently, this feature is available on stationary devices and laptops, but not when a Telehealth Plus+ session is started or joined via a smartphone. To do so, please;
1. Click on the Share Screen button at the bottom of the Telehealth Plus+ screen:
2. A pop-up window will open, where you will be able to select which screen you would like to present. Depending on your individual web browser, you can see a preview of the shared screen before you start sharing it: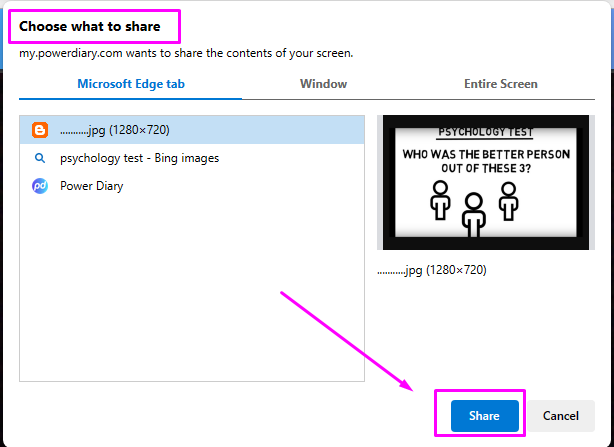
3. Once you click on the Share button, the screen share will begin.
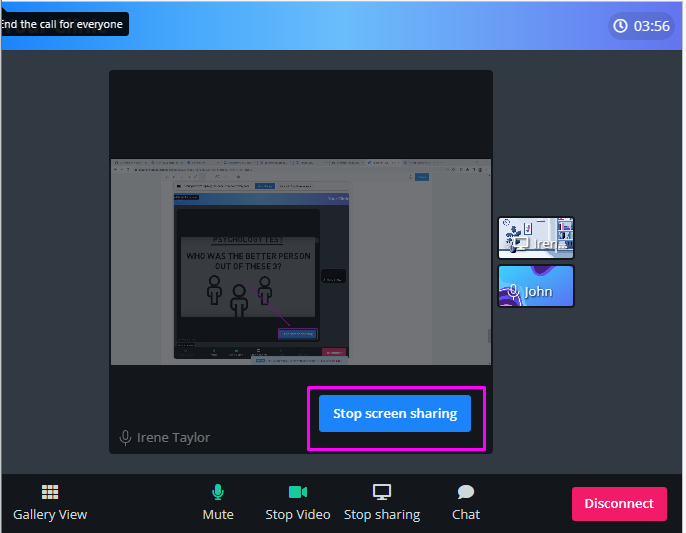
4. It is possible to view all the participants and the shared screen in the same window. Click on the Stop screen sharing button at the bottom-right to stop the sharing:
How to Use the Chat Function in a Telehealth Plus+ Session
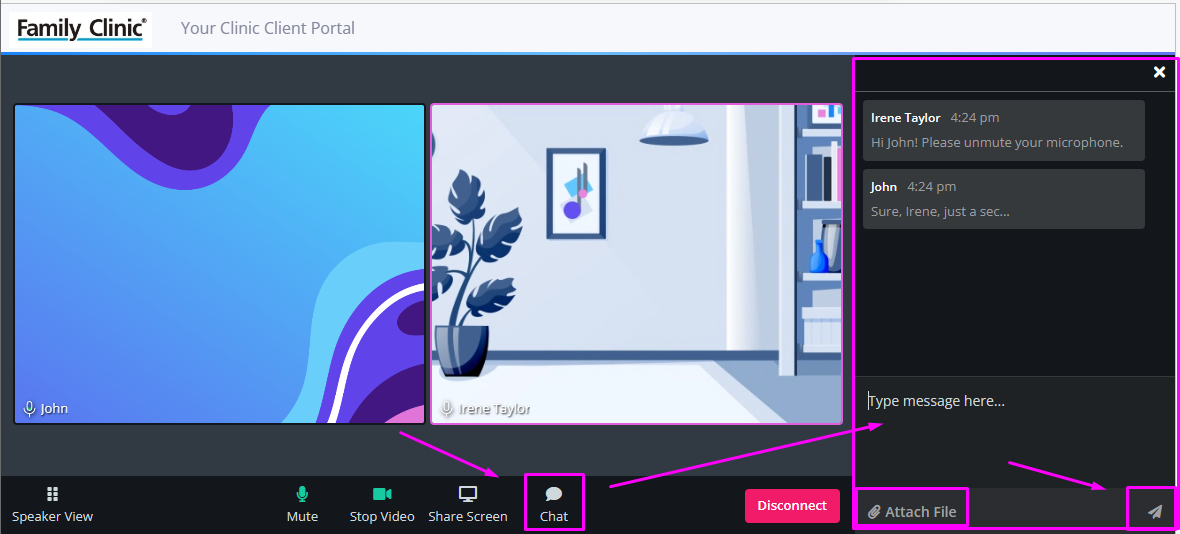
When the session began and participant(s) joined it, both the practitioner and the participants have an option to use the Chat function:
- Simply, click on the Chat speech bubble icon to open the Chat window on the side;
- Type in your message;
- Click on the arrow icon to send it.
- The message will be visible to every participant of the session.
- Use the 'Attach File' button to select a file from your device and send it to all the participants via the Chat. The shared files will be available to download.
How to Use the Telehealth Plus+ Records Report
In Power Diary, you are able to review the records of the Telehealth Plus+ sessions you conducted within a certain time frame.
- Navigate to Reports → System → Telehealth Plus+ Records to find that report.
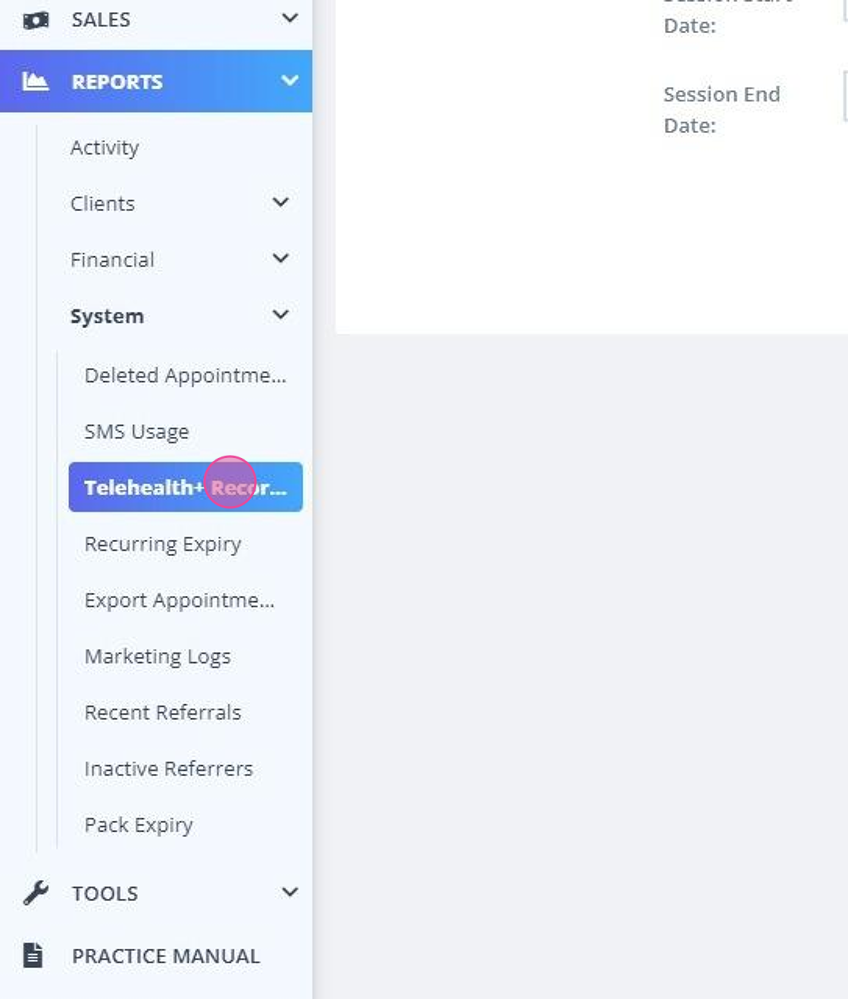
- Use the Session Start Date, Session End Date and Calendar filters to narrow down the data you'd like to see.
- Click on the Run Report button to generate the report.

- Use the Choose Columns button to select the columns you'd like to include into your report.
- Save the selected report layout with the Save Layout button, so that the data you selected is included in the report the next time you generate it.
Telehealth Plus+ Pricing
Each account will have 100 participant* minutes for free each month, and a minimum per-participant per-minute charge will apply for this feature. The pricing per participant minute is as follows:

*Note
Participants are all participants of a Telehealth Plus+ session, including the practitioner/host.