
Optimize your Power Diary calendar with tips for adding lunch breaks, booking team events, configuring alternating availabilities, blocking out annual leave, and more.
Availability schedules are an important part of keeping your calendar organized, so it's equally important to understand how they can be best utilized. In this article, we'll cover a few tips, tricks and ideas for improving how you utilize availability in Power Diary.
In this article:
- Adding lunch breaks to a calendar
- Booking team-wide events like meetings and training sessions
- Configuring alternating availabilities
- Entering and blocking out annual leave
- Adding New Appointments Outside Of Regular Working Hours
- Easily distinguishing different locations in the calendar
- Keeping availability organized
Adding lunch breaks to a calendar
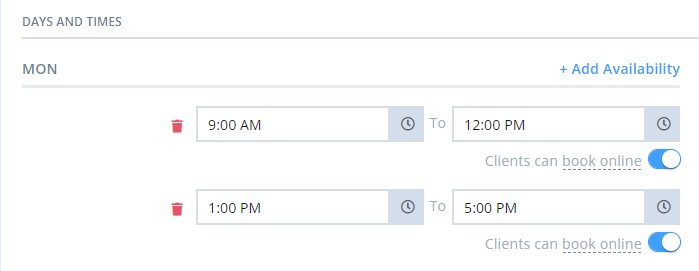
In Power Diary there are two different ways to record lunch breaks to your calendar. Whether you have your breaks at a consistent time each week or if they're more sporadic will determine which method is best for you.For more consistent break times:
- Go to Settings → Availability and select the relevant calendar from the list on the left.
- Edit your active availability.
- On the day that you're wanting to add a break, click + Add Availability and segment your day to include a gap for the break.
For less consistent/sporadic break times:
- Navigate to the calendar.
- Add the break as a personal appointment to the calendar.
Booking team-wide events like meetings and training sessions
Team-wide events like meetings, training sessions, shared time off or even public holidays can quickly be added to every calendar in the account at once. To do this:
- Open the calendar and select the time that you're wanting to block out in any calendar.
- Select Personal as the appointment type.
- In the Copy to Calendars field, select any calendars that you want the appointment added to.
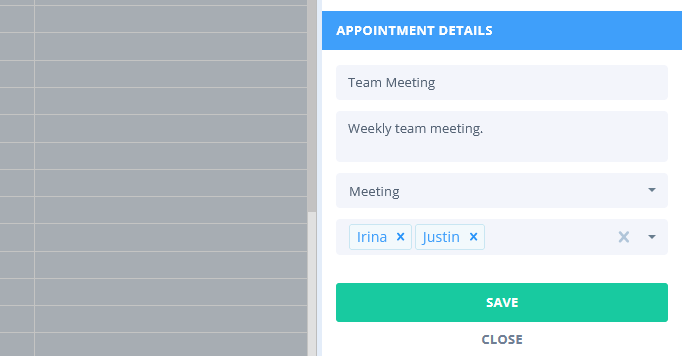
- Click Save.
Configuring alternating availabilities
If you need to configure your availability to alternate (ie. your availability differs bi-weekly) you can configure this by simply staggering the dates of two separate availabilities and ensuring that the Recurs Every setting is set to the correct option for each availability.
- As an example, you could set one availability to begin on 01/12/2021 and recur every two weeks, with another starting on 8/12/2021, also recurring every two weeks. This would result in an availability that differs each week.
- To make this even easier to set up, create the first availability, clone it for the same practitioner and simply adjust the From date as required.
Entering and blocking out annual leave
Annual leave is generally added to a calendar in one of two ways.
As a recurring personal appointment:
- Open the calendar and create a personal appointment that blocks out the entire day on the date that the annual leave begins.
- Right-click and select Make Recurring.
- Configure recurring options to recur the appointment until the end of the annual leave period.
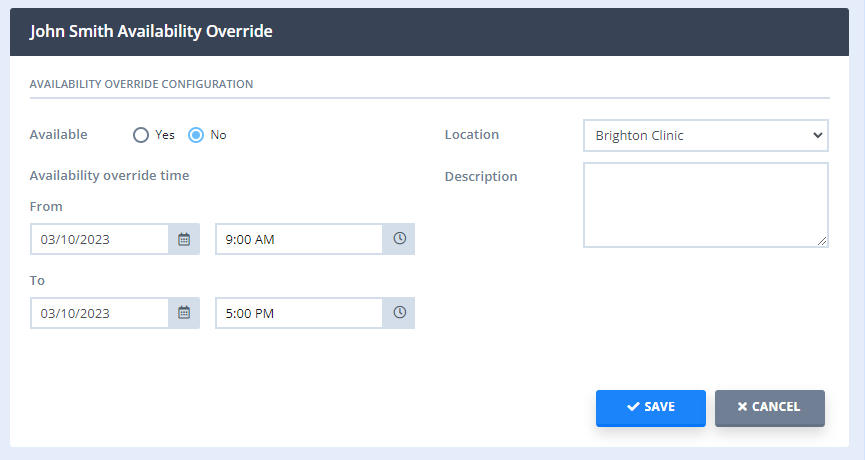
As an availability override:
- Settings → Availability .
- Select the desired practitioner.
- Select "Add New Availability Override".
- Select whether you will be Available or Unavailable.
- Enter the Period and Time.
- Select the Location.
- Enter an optional "Description" details for your reference.
- Click Save.
Adding New Appointments Outside Of Regular Working Hours
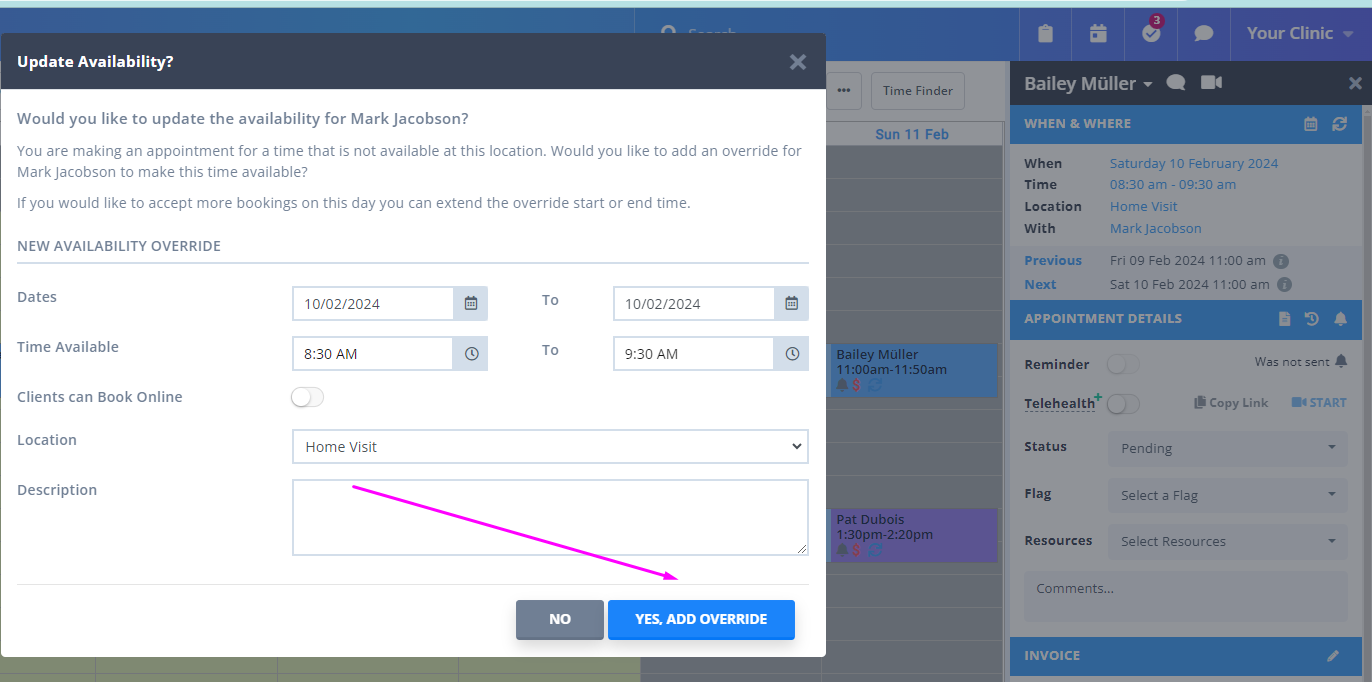
Power Diary users are able to manually enter new appointments on the main calendar screen in the grey time slots that represent the time slots outside of the regular working hours. This is how it works:
- Click on the time slot when the appointment should start, or click and drag to highlight more than one time block for an appointment with a longer duration;
- Enter all the necessary appointment details and click Save on the appointment panel.
- You will see a pop-up message asking you if you'd like to add an availability override for this otherwise unscheduled time. You can select 'Yes, Add Override' or 'No'. Adding an override will enable you and your team members to see this appointment when the All Locations filter is selected.
-
If you selected 'Yes, Add Override', it will be saved and listed in Settings > Availability > Practitioner's list of scheduled availabilities and overrides.
Easily distinguishing locations in the calendar
If your business operates across multiple locations then be sure to set a colour for each location. This will mean that whenever a calendar is made available to that location the background of the calendar will display in that colour. You can do this by:
- Going to Settings → Configuration → Locations
- Editing your Location
- Setting a colour.
- Clicking Save.
Keeping availability organized
We highly recommend adding notes to your Availabilities that briefly describe what their purpose is so that you can always understand what Availabilities are performing what duties are in your calendar at any given time. Once you begin to add more and more Availabilities things can get a little convoluted without this, so it's best to take a little time when creating availabilities to save you a lot of time later on when trying to understand what they're for!
 Did this answer your question? Thanks for the feedback There was a problem submitting your feedback. Please try again later.Yes No No results found