
Explore various methods to create session packs for clients in Power Diary, set default services, and manage session pack expirations with ease.
By this time you should have already set up your Session Pack Templates. Here, we will discuss the various ways of creating individual clients' session packs and the most common scenarios when and how they should be used.
In this article:
- Method # 1: Adding a Session Pack From an Appointment
- Method # 2: Adding a Session Pack From a Client’s Profile
- Method # 3: Adding a Session Pack From an Invoice
- Method #4: Assigning a Session Pack as a Client’s Default Service
- Setting Up System Tasks To Notify When A Session Pack Expires
- Using The Session Packs Expiry Report
Method # 1: Adding a Session Pack From an Appointment
You can assign a new Session Pack to a client through their already-created appointment in your Power Diary calendar. Use this method when
- You received a new referral, and are booking the client's first appointment within this referral. The number of allocated sessions or amount of money/hours within the referral is equal to the Session Pack Template Maximum units.
- The client is buying a pack of services and booking the first session within the package.
Here’s how to use this method:
1. Go to your Power Diary calendar and click on the client’s appointment to which you want to add a Session Pack, or create this appointment.
2. The Appointment Panel will open on your right. Scroll down and click on the Select a Service or Pack drop-down menu.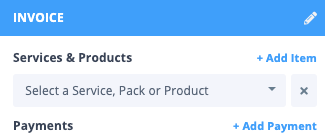
3. Choose a Session Pack Template from the list and click on the Save button. This will open a new Pack based on the pre-made Template.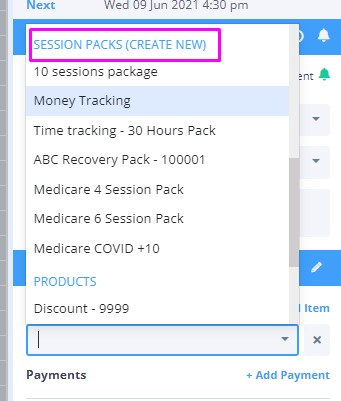
4. Select the Service or Product, if there is no default one that comes with the session pack
5. Save.
Important
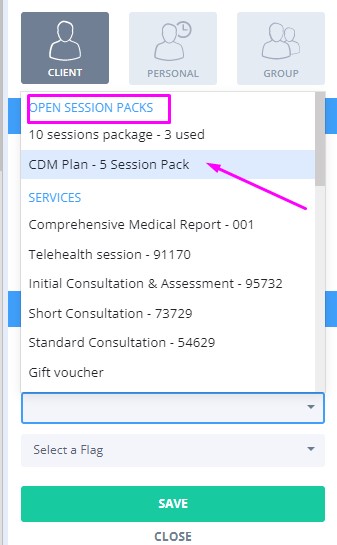
The above steps should be used only for the first appointment within the session pack. For the following appointments, select the session pack from the top of the drop-down list, under the Open Session Packs section
Method # 2: Adding a Session Pack From a Client’s Profile
This method is more suitable in the following scenarios:
- You received a new referral, but there is no booked appointment for this client yet;
- You are taking in a new client who has already used a part of their referral with a different practice;
- A client has bought a pack of sessions and has not been booked for an appointment yet
Using this method you will create a session pack for this client and have it ready to be applied to their first appointment with you. Follow the below steps to create the pack:
1. Open the client’s profile page by either using the quick search bar on top of Power Diary - or by right-clicking their appointment and then clicking on Client Details.
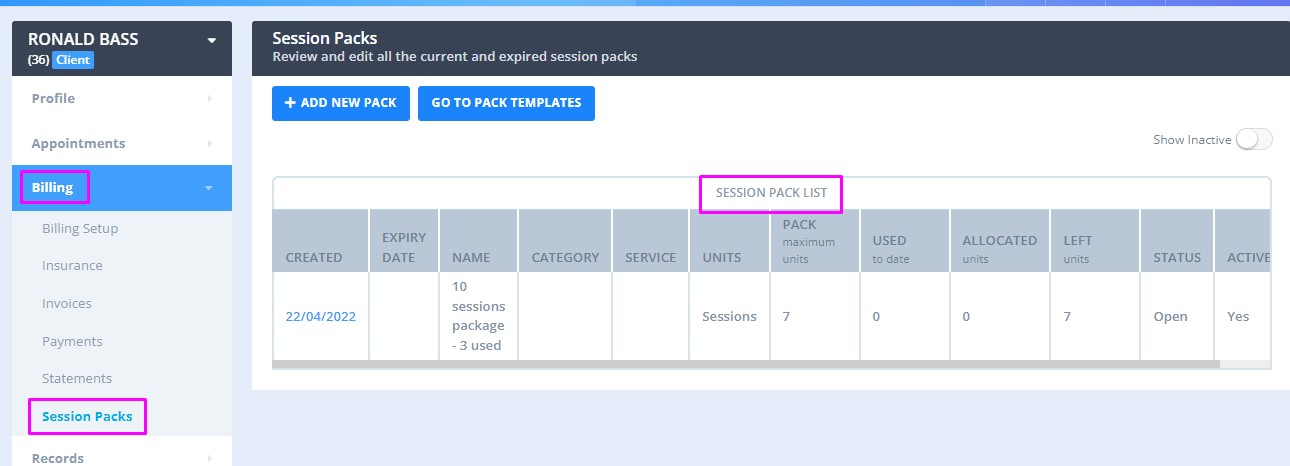
2. On the client’s profile page, navigate to Billing → Session Packs.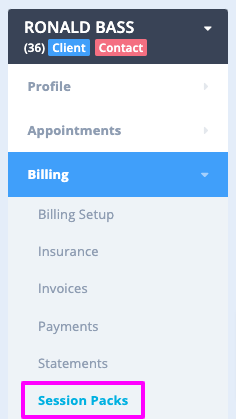
3. Click on + Add New Pack.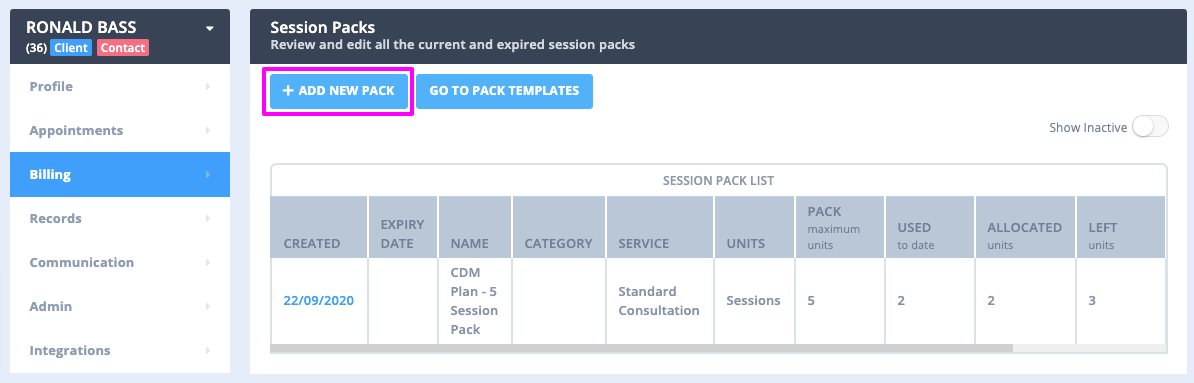
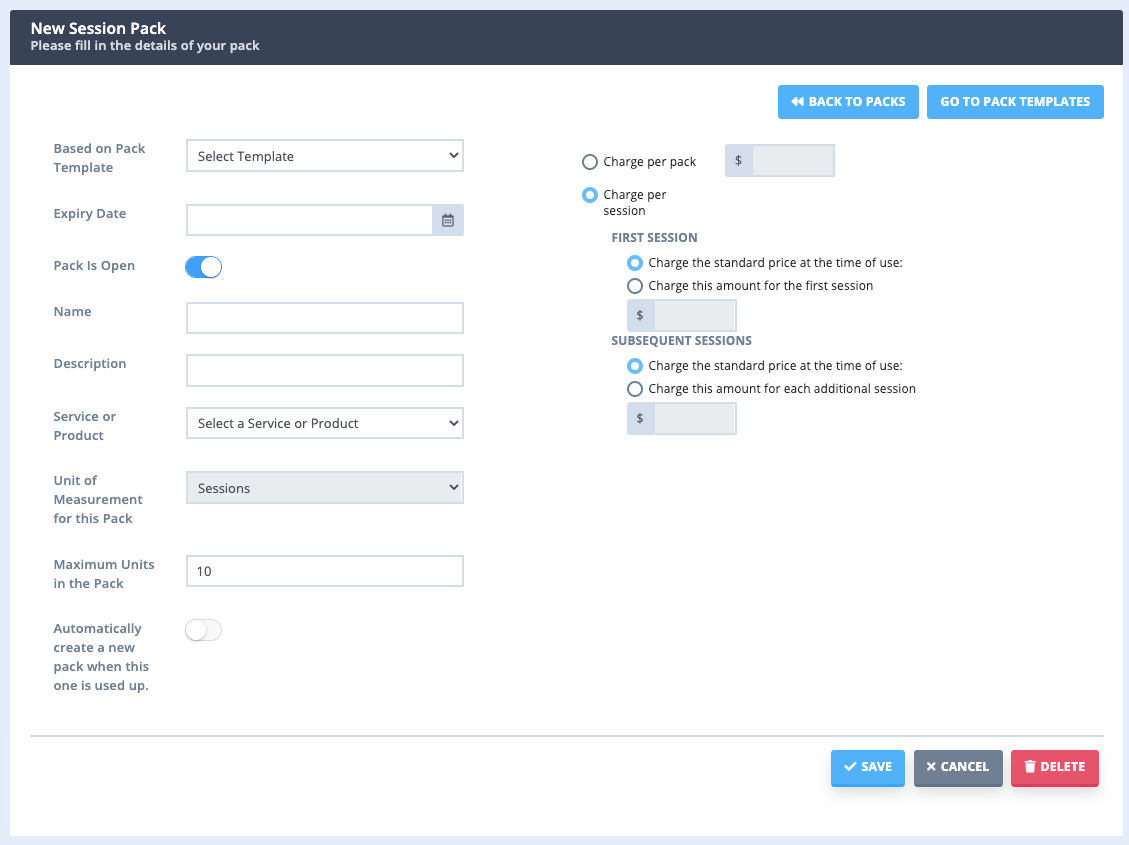
5. Fill in the details of the Session Pack you are assigning the client including name, description, and what metric you'd like to track (number of sessions, hours or money).
This includes setting subsequent sessions at a reduced rate, whenever applicable.
Hint 💡
Sometimes a client has already used some of the allocated units, for example, when they come to you from another practice, but still have a valid referral.
Simply adjust the Name and Maximum Units in the Pack to show the remaining amount. This will allow you to track the remaining sessions/money/hours.

7. Once done, you can easily see all active session packs for the client by navigating to Billing > Session Packs.
To start using this session pack, you'll need to
- Create an appointment
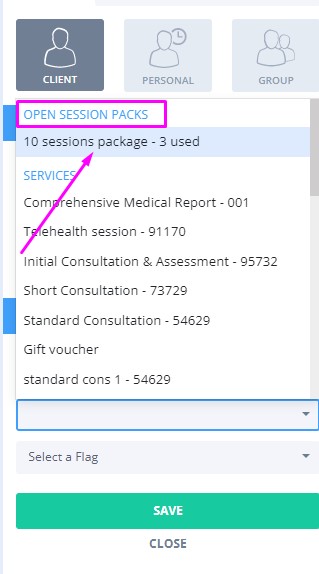
- Click on Select a Service, Pack, or Product on the appointment panel
- Select the session pack from the Open Session Packs
- Select a service or a product, if there is no default one that comes with the session pack
- Save
Method # 3: Adding a Session Pack From an Invoice
This method is a little trick you can use when
- You’ve completed a session from a Session Pack with a client - and forgotten to assign it to them in advance, so now you can add it to the client’s invoice.
- You have already provided some of the sessions within the referral and would like to add them to the session pack retrospectively.
Here's how you can add a session pack to an invoice:
1. Open the client’s Profile page by either using the search bar or by double-clicking on one of their appointments in your calendar.
2. Navigate to Billing > Invoices.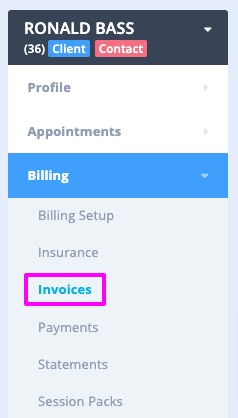
3. Click on the + New Invoice button or choose an existing invoice from the list of invoices below.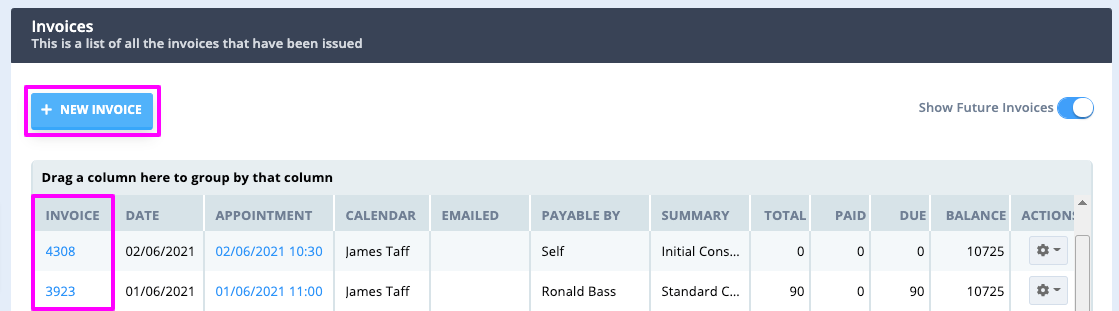
4. After opening an invoice, remove the Item Line that was there initially, by clicking on the red X on the right.
5. Click on Add Invoice Item and select an Open Session Pack or a Session Pack Template from the list.
6. Select the Service again, this will assign this service to the session pack to include in the session pack count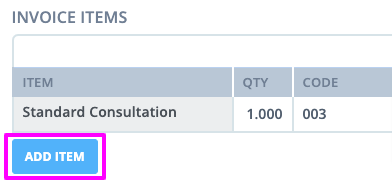
7. Once done, simply print the invoice or email it to your client, if required.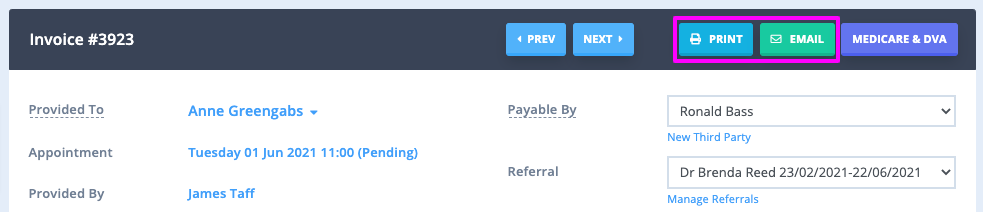
8. To avoid having to do this all the time, use the above two methods to assign a Session Pack to a client. But if you forget, this method is the way to go.
Hint 💡
For more advice on fixing the incorrectly applied session packs, please have a look at the "How Can I Fix or Delete Incorrect Session Packs?" article.
Method 4: Assigning a Session Pack as a Client’s Default Service
Use this method to
- Automatically apply the session pack to every appointment you create for this client.
These are the steps to follow:
1. Open the client’s profile page by either using the search bar on top of Power Diary or by double-clicking on their appointment in your calendar.
2. Navigate to Billing > Billing Setup.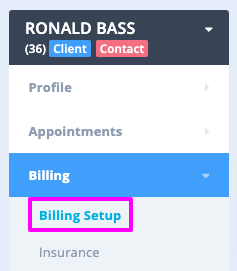
3. Click on Preferred Service or Pack and choose the right session pack from the list.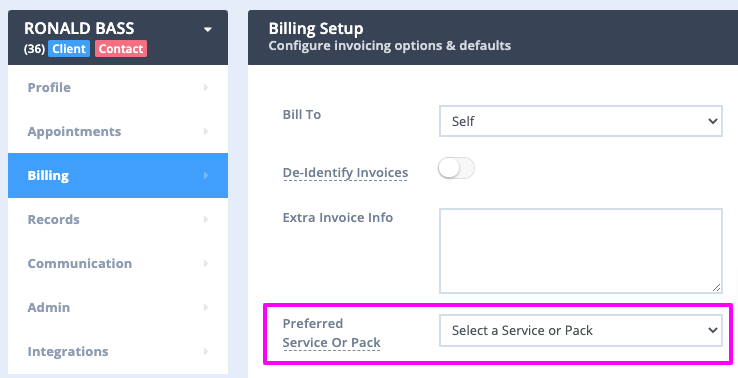
5. If the Session Pack Template does not have a default service or product, you will be offered to select one.
Setting Up System Tasks To Notify When A Session Pack Expires
You can have the system remind you when a client finishes the last session in their Session Pack. Here’s how:
1. Navigate to Settings > Communication > Tasks using the menu on the left-side of Power Diary.
2. Enable the toggle labeled Create a task when the last appointment in a session pack is used or a pack expires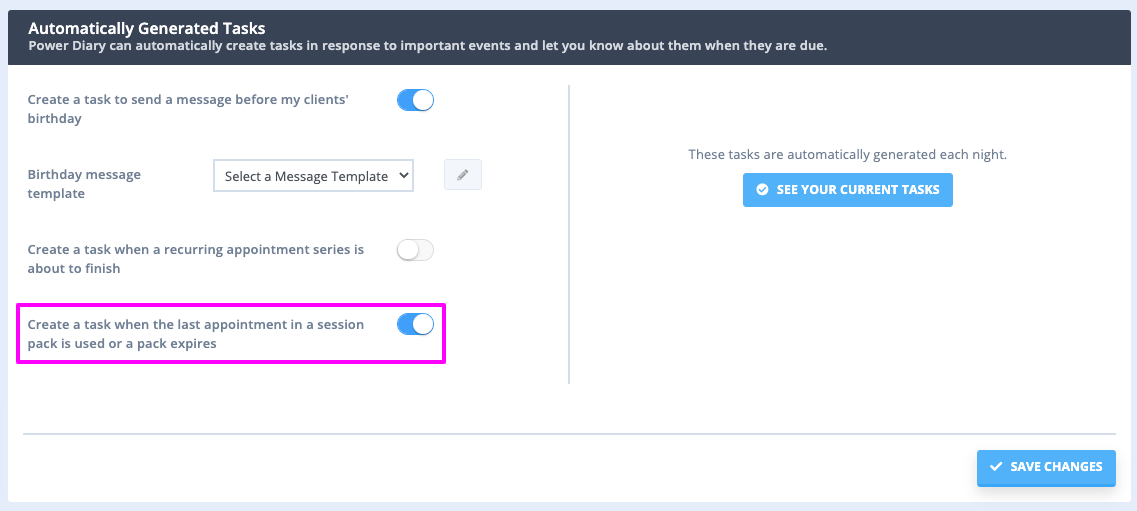
3. Click on the Save Changes button.
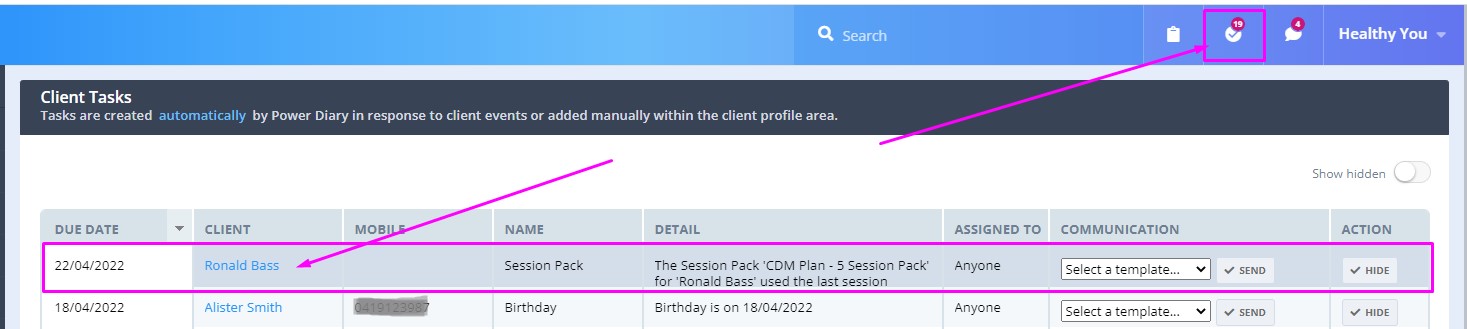
4. When the last session/unit in the session pack is allocated to the client, the Task will be generated to notify you of that.
Using The Session Packs Expiry Report
There is a special report that will provide you with an overview of all the active session packs and when they are about to expire.
Navigate to Reports > System > Pack Expiry to locate this report
- A report on session packs that can be used to show all packs created or filtered to show packs created within a period, expiring within a period, or packs that have a set number of sessions remaining.
- If you want to report on all session packs in the system, leave the filters blank and click 'Run Report'.
- Includes the date the pack was created, date of expiry, client name, pack name, product name, sessions included, used and remaining in the pack, and the status of the pack (open or closed).
