
Organize and manage client file uploads with ease using file tags in Power Diary. Sort files by tags.
File tags can be used to organize and manage your client file uploads, making them easier to sort through so that finding the file that you need is a breeze. Once tags are configured you can view the files area for each of your clients in a folder-like structure.
Creating File Tags
You can add new tags to your account or edit existing ones by following the steps below.
- Go to Settings > Custom Lists > Tags for Client Files
- Click + Add Tags for Client Files
- Enter a name for the tag, make sure it's active and click ✔ Save.
Apply Tags to File Uploads
After adding tags to your account for the use you will be able to apply these when a file has been uploaded. Just click on the date of the file you want to edit, or on the Actions icon. A file can have multiple tags applied to it.
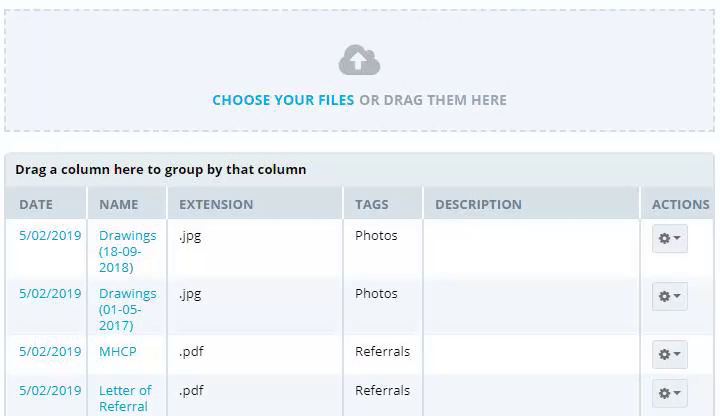
Sorting Files Based on Tags
You can sort a client's files area by the tag applied to each, creating a folder-like view that makes it easier to quickly find what you're looking for. To do this, simply drag the 'Tags' column heading to the sorting area, as shown below.
You can also use all of the same filters and column sorting options that you can in our other reports, so if you're looking for a certain file, or need to narrow down what you're looking at they might help. Check the related article below for more.