
Learn how to enter and manage insurance IDs in Power Diary, including setting up locations, adding insurers, and updating provider numbers for clients' invoices
You can enter all your Insurance IDs (Provider Numbers) into Power Diary so that the correct Provider Number is displayed on invoices for each client depending on the insurance policy they have. Some insurers also require separate Provider Numbers to be used for each location that you practice from. To manage this Power Diary allows you to record different Provider Numbers for each of your locations if needed.
Note: For Australian users, Medicare is considered as an insurance policy.
In this article:
- Initial Setup
- Applying An Insurer To The Client
- Add or Remove An Insurer From A Clients Invoice
- Update Provider Number
Initial Setup
The three initial steps required to set up insurers and their provider numbers are: (You'll only have to do these once.)
- Set up locations. (Only applicable if you have more than one location.)
1. Navigate to Settings → Configuration → Locations using the left-hand menu on the Power Diary dashboard. 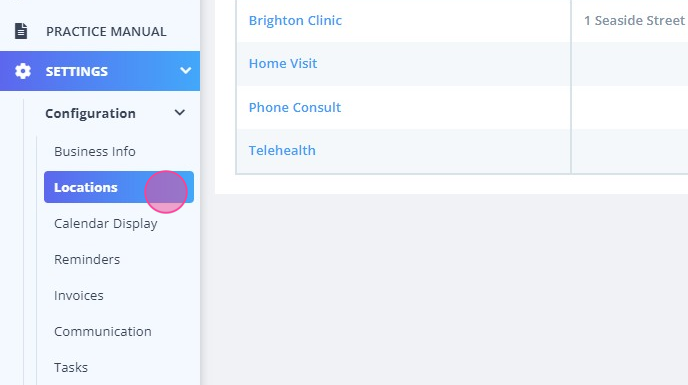
2. Click Add Location. 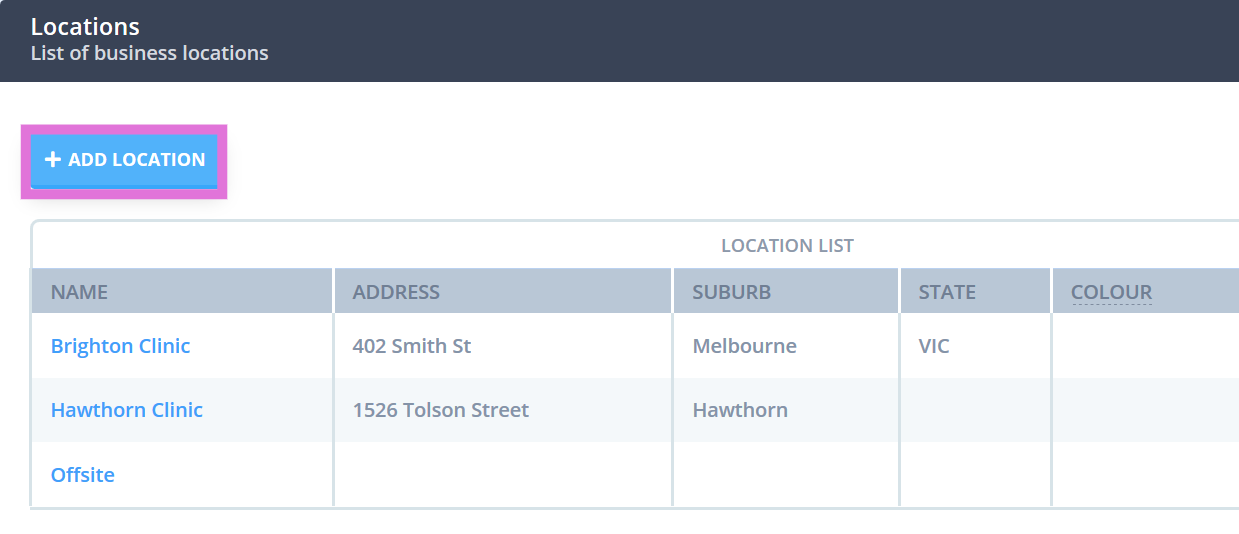
3. Enter the details of your new location in the form. Save the changes.

- Adding Insurers.
1. Navigate to Settings → Custom Lists using the left-hand menu on the Power Diary dashboard. 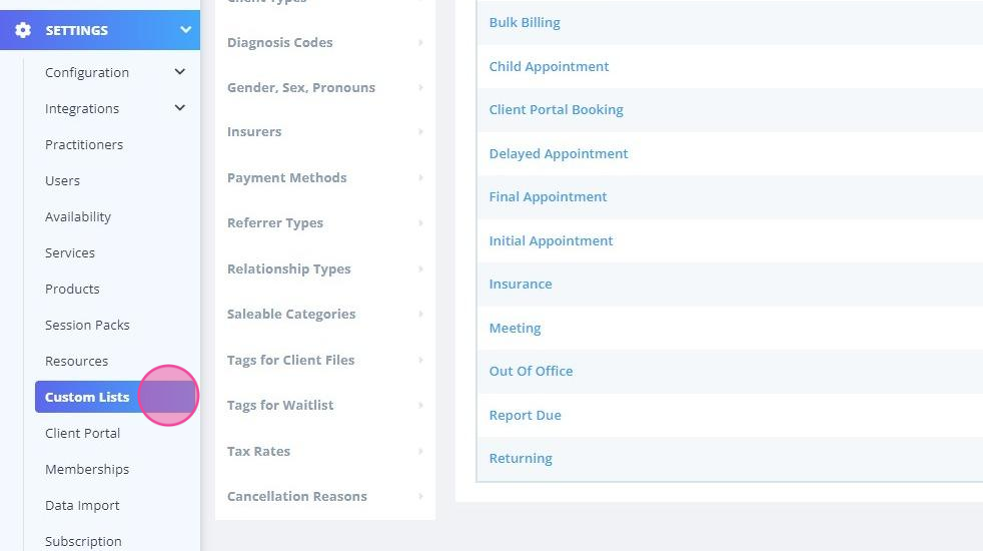
2. Go to Insurers and click Add Insurers.
3. For custom insurers, add 'Insurer Name (i.e. BUPA)' and 'Type (i.e. Standard).'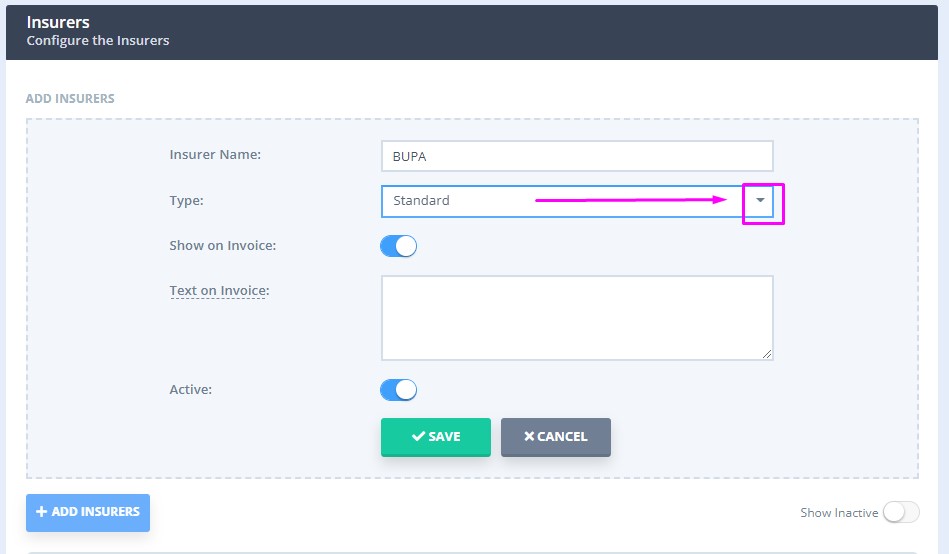
Important:
For integrated insurers, such as Medicare (AUS), DVA (AUS) and NDIS (AUS), enter their Insurer Name, and select the relative insurer type. This is important for the seamless work of the Medicare (AUS) and DVA (AUS) integration and the NDIS report.

4. Tick Show on Invoice if you would like the insurer information to be visible on invoices.
5. In the Text On Invoice field, enter the insurer information you want display on your invoices (e.g. BUPA Provider Number:).
6. Click Save.
- Adding Provider Number for Specific Practitioners.
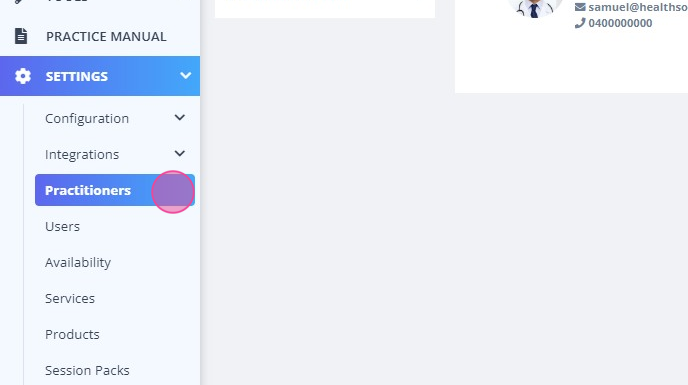
1. Navigate to Settings → Practitioners using the left-hand menu on the Power Diary dashboard. 
2. Select the practitioner to which you'd like to add an insurer and their Provider Number.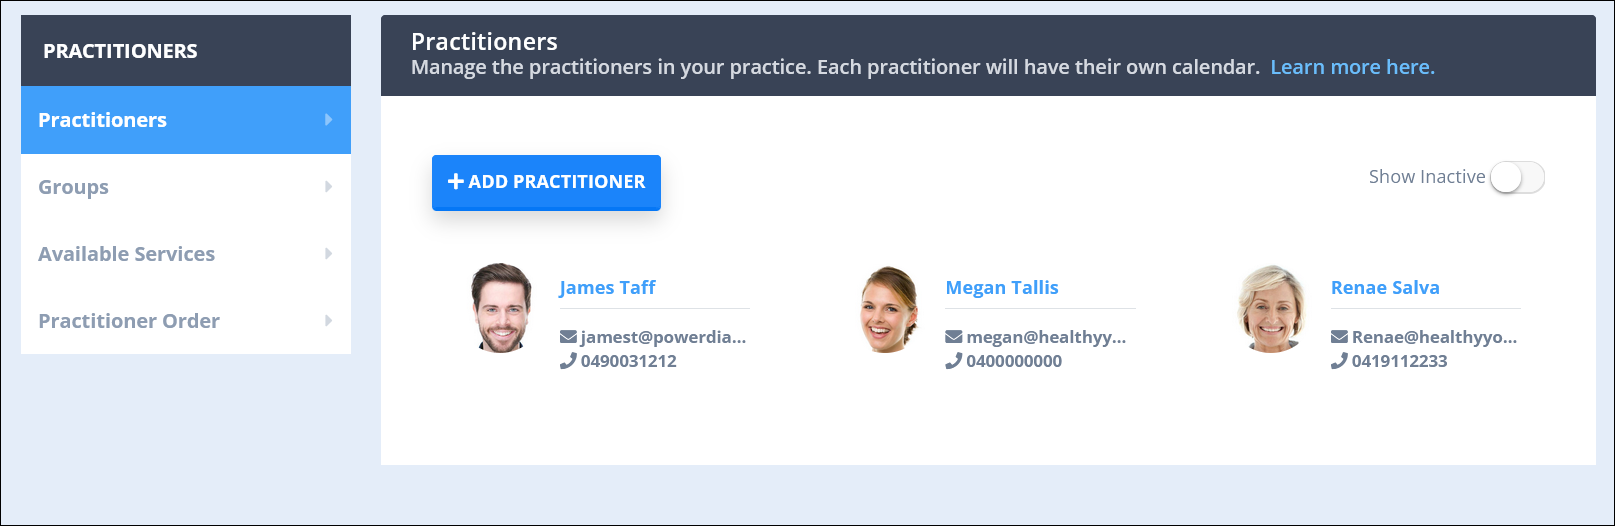
3. Go to Insurers. Select an existing insurer from the list or click Add Insurer to create a new insurer. 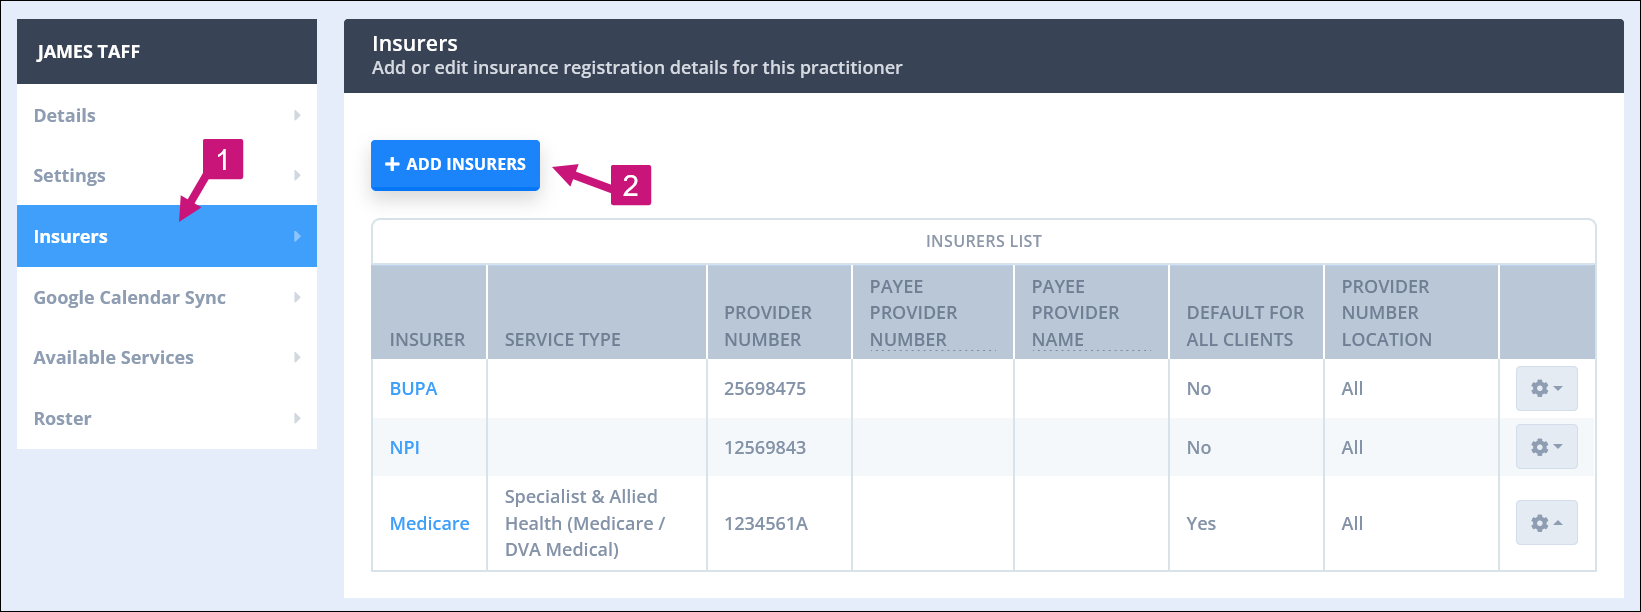
4. Enter the provider number and select whether this is for a specific location or for 'All' locations.

5. Tick Default for New Clients if you would like this insurer to automatically be assigned to new clients.
6. Click Save.
Applying An Insurer To The Client
You can view, add or edit the client's selected insurer. Here's how:
1. Go to the client's profile page by searching for them in the search bar on top of your Power Diary dashboard.
2. Navigate to Billing → Insurance. 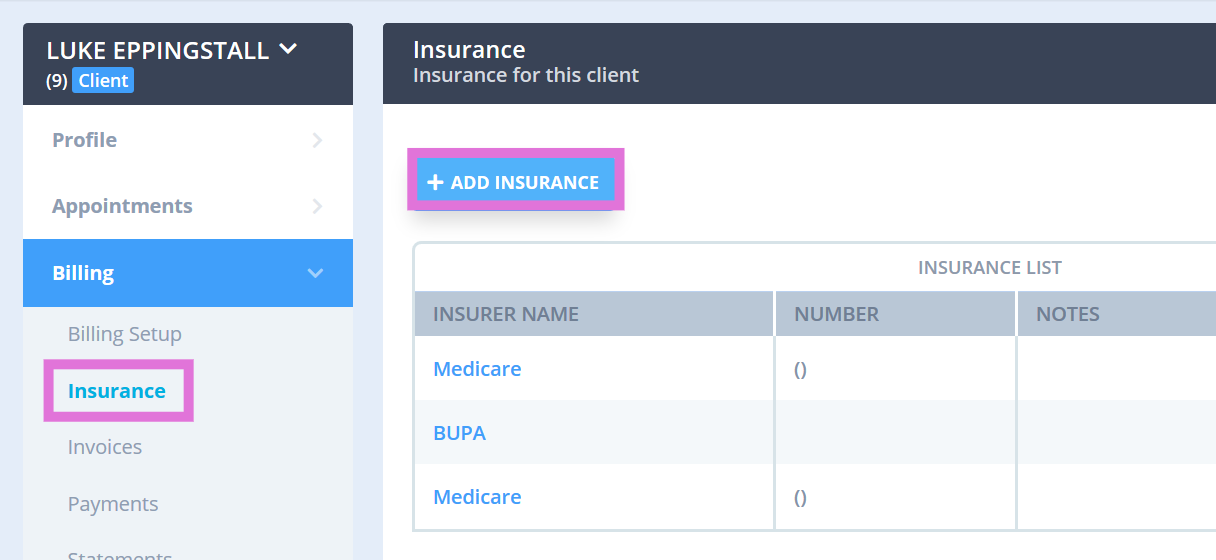
3. Choose an existing insurer from the list or add a new insurer by clicking Add Insurance.  4. Enter the insurance details and toggle the switch labelled Default on.
5. Click Save.
Note 💡
You can use Power DIary online forms with a linked profile field 'Insurance Details' to automatically collect client insurance details.
Change An Insurer From a Clients Invoice
You change the insurer in a client's invoice to another insurer. Here's how:
1. Go to the client's profile page.
2. Navigate to Billing → Invoices. 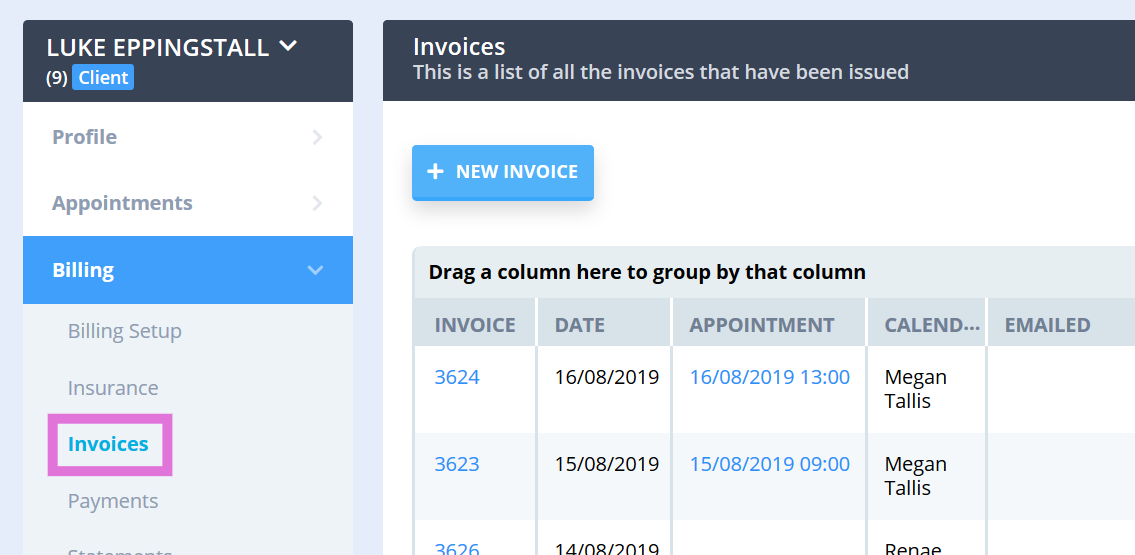
3. Click on the invoice whose insurer you'd like to change.

OR
1. In your calendar, click on the client appointment whose invoice's insurer you want to change.
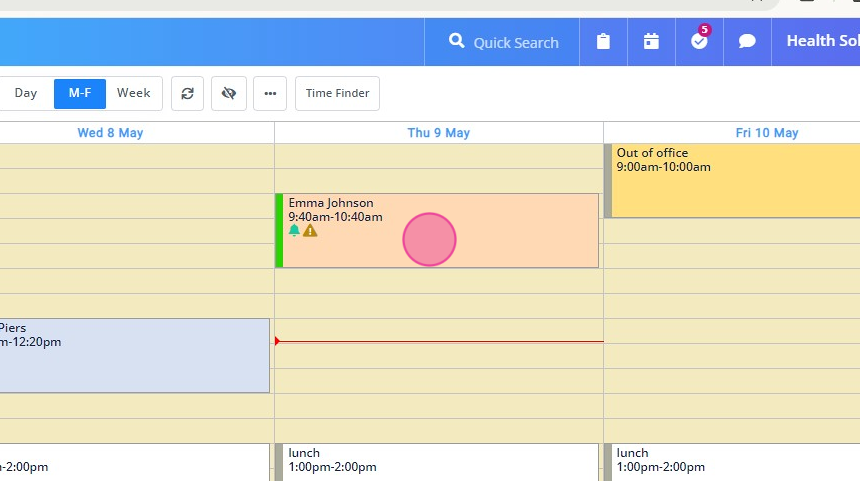 1. In your calendar, click on the client appointment whose invoice's insurer you want to change.
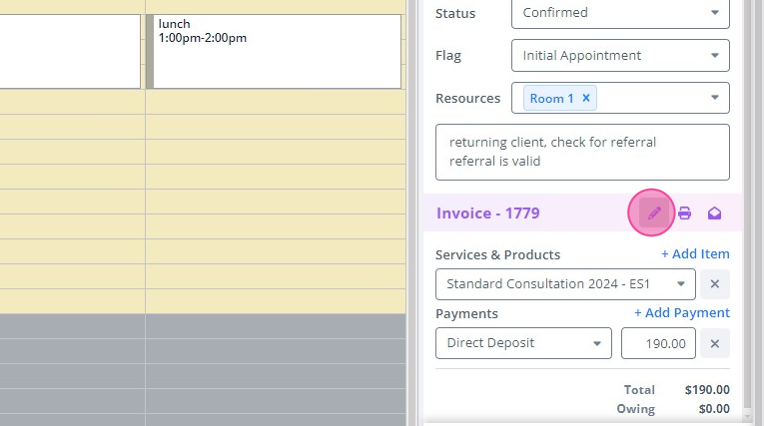
2. In the Appointment Settings Panel, scroll down until you see the Invoice section. Click on the Edit Invoice icon.

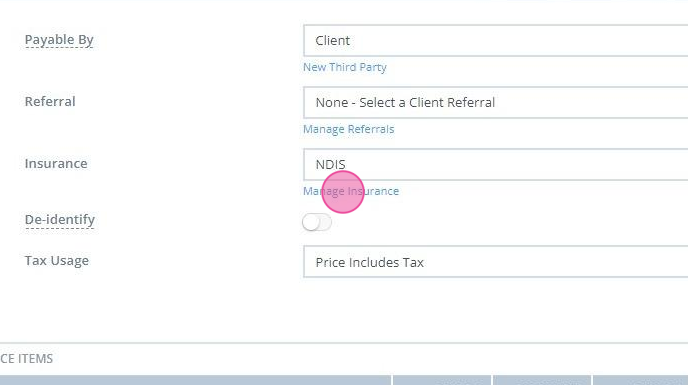
3. Once you have the invoice open, chose an insurer from the drop-down list next to the field labelled Insurance.

If you cannot find the appropriate insurer, click Manage Insurance and follow the instructions listed in the Step 2: Adding Insurers section
Update Provider Number
To update your Provider Number:
1. Go into Settings > Practitioners.
2. Click on the name of the practitioner you need to update.

3. Click on Insurers and then click the Insurer you need to update. 
4. Input the correct Provider Number.
5. Click Save