
Learn how to add services, record payments, edit charges, and print invoices/receipts in Power Diary after client appointments. Manage part-payments easily.
Once you have seen a client you may wish to enter the service provided or payment received, edit the amount charged or generate an invoice/receipt.
In this article:
- Adding a Service
- Adding a Payment
- Printing an Invoice or Receipt
- Editing the Amount Charged for a Service
- Adding Multiple Payment Methods or Part-payments
Adding a Service
- Click on the appointment block in question.
- Click on the "Select a service or Pack" drop-down list and select the service you wish to add.
- Click "Save" (Note: you can also Add a Payment before saving.)

Adding a Payment
- Click on the appointment block.
- Click on the blue text + Add Payment to add the payment drop-down list.
- Select the payment method you wish to add and the amount in your local currency.
- Click "Save".

Printing an Invoice or Receipt
There are two ways of printing an invoice/receipt:
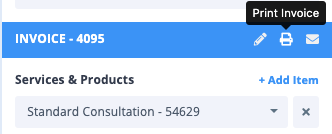
Method 1: From the Appointment Panel
- Click on the appointment block.
- At the blue banner of the Invoice panel, you'll see a white printer icon.
Method 2: Quick Print
- Right-click an appointment block.
- Select Print Invoice.

Editing the Amount Charged for a Service
When you add a service to an appointment Power Diary uses the default Sell Price related to the service as the fee. You can edit the amount charged for a particular appointment if required. For example, you may decide to discount a service for a client on a particular day. Here's how you do it:
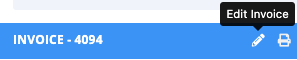
- Right-click on the appointment and select Edit Invoice (You can also click Invoice → Edit Invoice in the appointment panel).
- Enter the amount you wish to charge in the Price field.
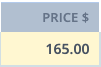
- Click Save Invoice.
Adding Multiple Payment Methods or Part-payments
A client may pay using multiple payments (e.g. Cash and Eftpos), or may only make a partial payment. You can easily manage these situations using the Edit Invoice feature. Here is how you do it:
- Right-click on the appointment and select Edit Invoice (You can also click Invoice → Edit Invoice in the appointment panel).

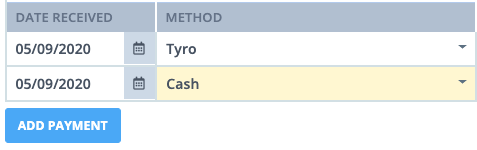
- Use the "Add Payment" function to add a partial payment, or to add multiple payment methods (e.g. $50 cash and $80 Eftpos).
 Did this answer your question? Thanks for the feedback There was a problem submitting your feedback. Please try again later.Yes No No results found