Learn how to manage client contacts in Power Diary. Add, edit, or remove contacts to enhance communication, appointment booking, and emergency support for your clients.
In Power Diary, you can add contacts to a client’s profile. Adding a new contact on a client’s profile has many benefits - both for you and your clients.
For example, with the permission of your client, you can give their contacts the ability to book appointments on their behalf. Also, you can automatically send reminders to a client’s contact (again, with the client’s permission) for upcoming appointments. And most useful of all, you can reach out for help to a client’s contact if the client themselves is unreachable or falls into an emergency. This can also be beneficial for parent-child relationships.
And that’s not all! If a client’s contact wants to use your services, you can create appointments and invoices for them as well - and turn that contact into a client.
In this article:
- Creating a New Contact or Adding an Existing Client as a Contact to a Client’s Profile
- Adding a Referrer or a Third Party as a Contact to a Client Profile
- Removing a Contact From a Client’s Profile
Creating a New Contact or Adding an Existing Client as a Contact to a Client’s Profile
Adding a new contact to a client’s profile is easy. Here’s how you can do it:
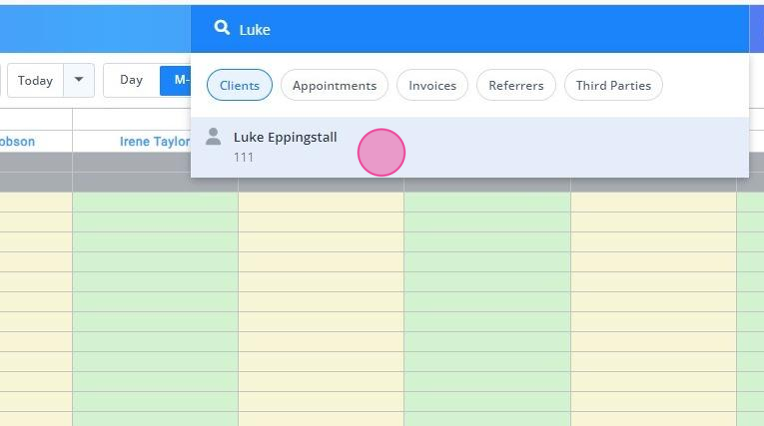
1. Open a client’s profile page to which you want to add a contact. To quickly go to a profile page, type in the client’s name in the Quick Search on top of the Power Diary dashboard.
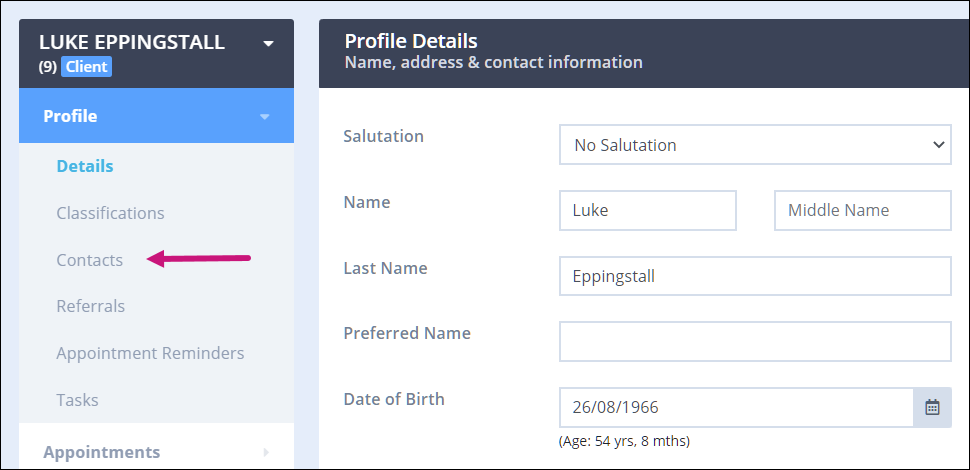
2. Once you’re on the client’s profile page, navigate to Profile → Contacts.
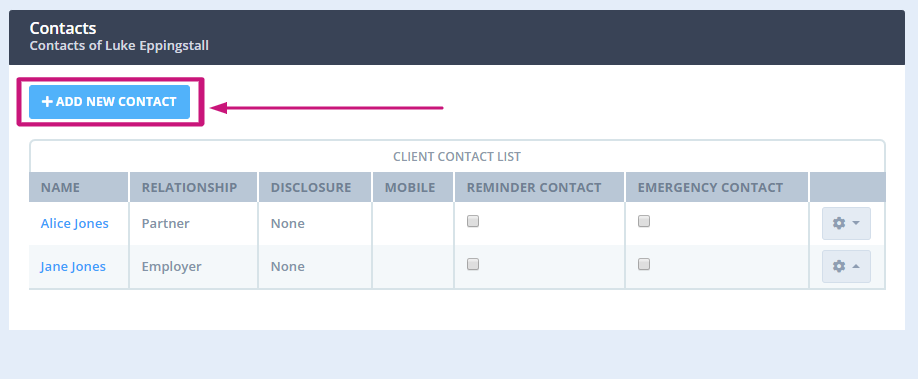
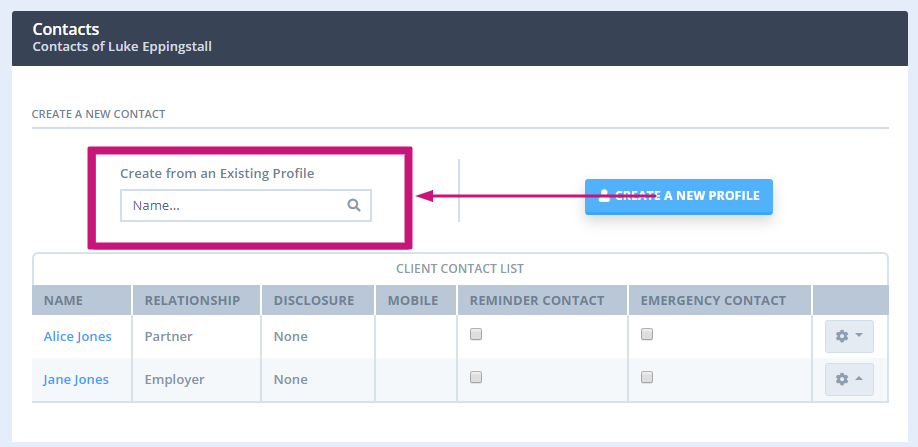
3. On the Contacts page, click Add New Contact. You’ll be presented with two options. Click on the Create New Profile button to add a new person as a contact.
OR
1. If the person that you want to add as the client’s contact is also a client or an existing contact, simply type their name in the search box and select their profile from the drop-down menu.
2. A form will come up for the new contact. Here, add all the details of the new contact. Start by specifying the contact’s relationship with the client. Choose whether they are emergency contact. Define what level of disclosure they’ll have to your client’s information. Set up automatic reminders for them or give the contact the ability to create appointments for your client. 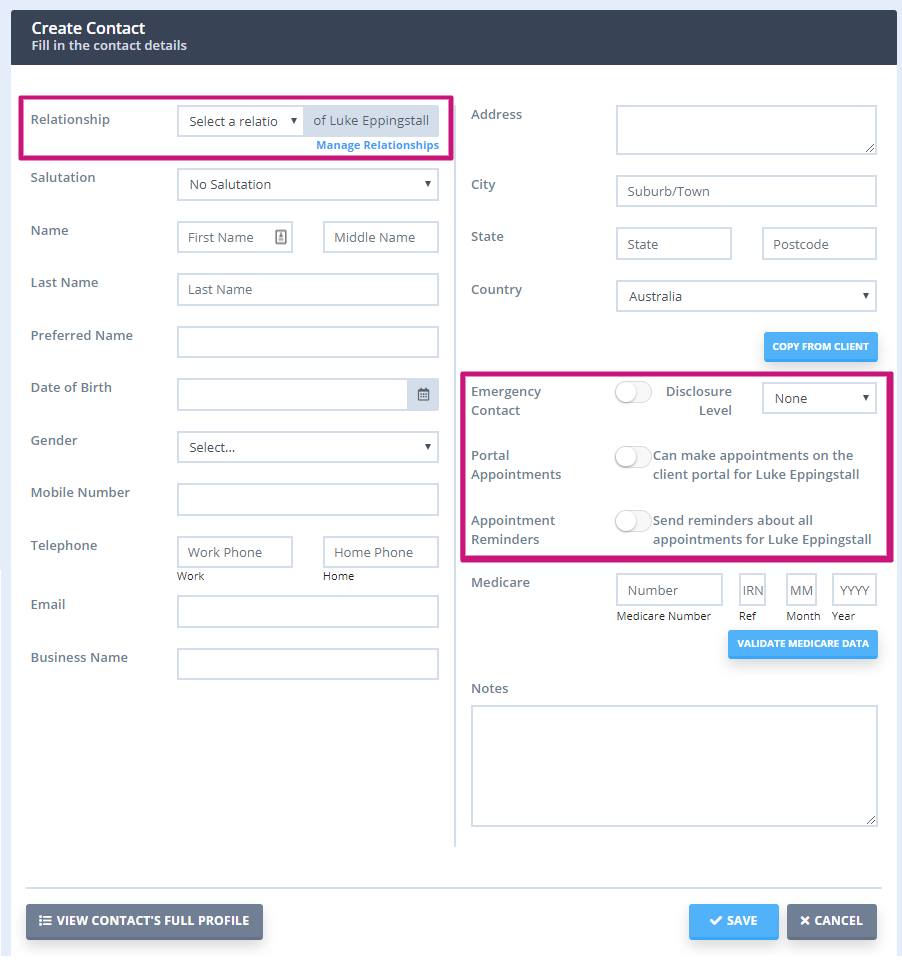
3. After completing the form, click on the Save button at the very bottom of the page.
That’s it. Once you’ve saved the contact, you can find it on the client’s profile page by navigating to Profile → Contacts.
Important
It is important which profile you start from when setting up Client Contacts if you wish the contact to make bookings on behalf of the client.
e.g. Elizabeth (mum) and Charles (son).
If we start from Charles' profile and add Elizabeth as a Contact, then the option will say "Can make appointments on the client portal for Charles"
If, however, we start from Elizabeth's profile, and add Charles as a Contact, the option then will say "Can make appointments on the client portal for Elizabeth"
Adding a Referrer or a Third Party as a Contact to a Client Profile
There might be circumstances when you need to add a referrer or a third party as a contact to your client, for example, if they need to be allowed to make appointment bookings or receive appointment reminders on behalf of your client. There is just one extra step you need to make to add them as a contact to a client:
1. Open the referrer or third party profile in question, on their Admin > Manage page and turn on the Contact role at the top of the page. Save the changes.

2. That's it. You are now ready to add this profile as a contact to a client profile. Just follow the steps we provided above.
Removing a Contact From a Client’s Profile
To remove a contact from a client’s contact list, follow these steps:
1. Go to the client’s profile whose contact(s) you want to remove. (Use the search bar on top of the Power Diary dashboard to quickly search for the client’s profile page).
2. On the client’s profile page, navigate to Profile → Contacts. You’ll be presented with a list of contacts attached to the client’s profile.
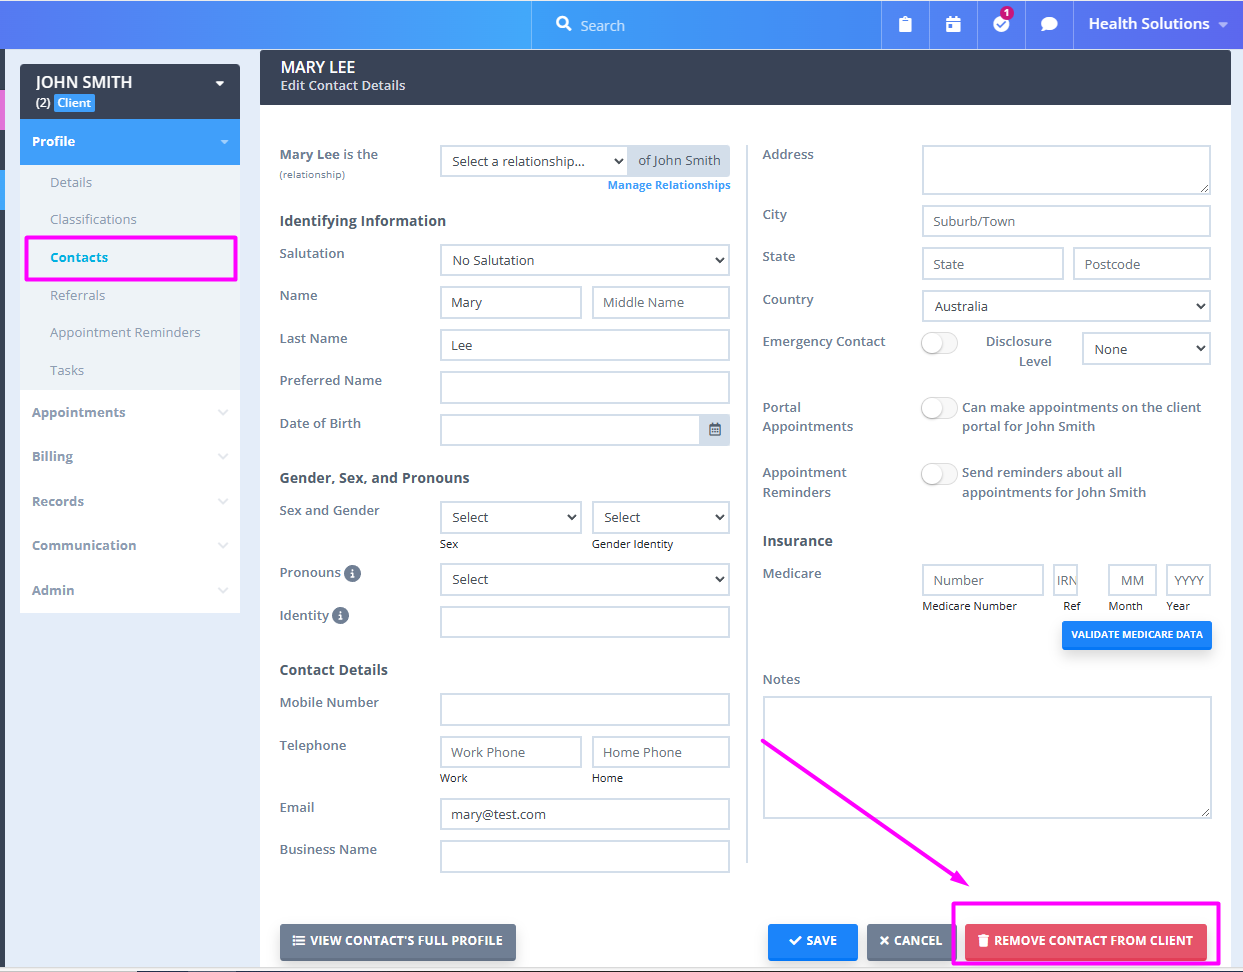
3. Click on the contact name who you want to remove to open their profile page. Scroll to the bottom and click on Remove Contact From Client.
4. In the popup box that appears, click OK to confirm the deletion. This will remove the contact from the client’s contact list.
