Create and manage session notes in Power Diary with ease. Learn to set up templates, edit, pin, copy, attach files, and print or email notes for streamlined clinical documentation.
You can write Session Notes (or Treatment Notes) in a way that works for you and your clinical practice. Templates allow you to focus on writing these Notes without worrying about formatting or forgetting information that you need to record.
In this article:
- Creating a Session Note
- Opening a Session Note
- Editing a Session Note
- Expanding and Collapsing Notes
- Displaying Notes in Two Columns
- Pinning a Session Note
- Copying a Session Note
- Attaching Files to a Note
- Printing and Emailing Notes
- Frequently Asked Questions
Creating a Session Note
You should Create a Session Note Template prior to creating a Note
A new client note can be created right from their appointment panel, minimising the need to navigate between multiple pages, while in session or when working on creating your notes. Here is how you create a new client session note.
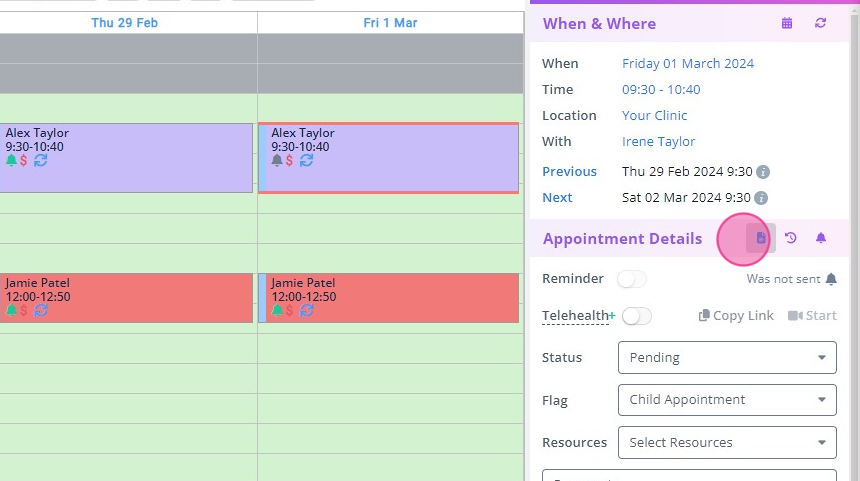
1. On the calendar screen, click the client's appointment block to bring up the appointment booking panel. The 'Appointment Details' section of the panel is equipped with the 'Create a new Note' icon. Click it once.

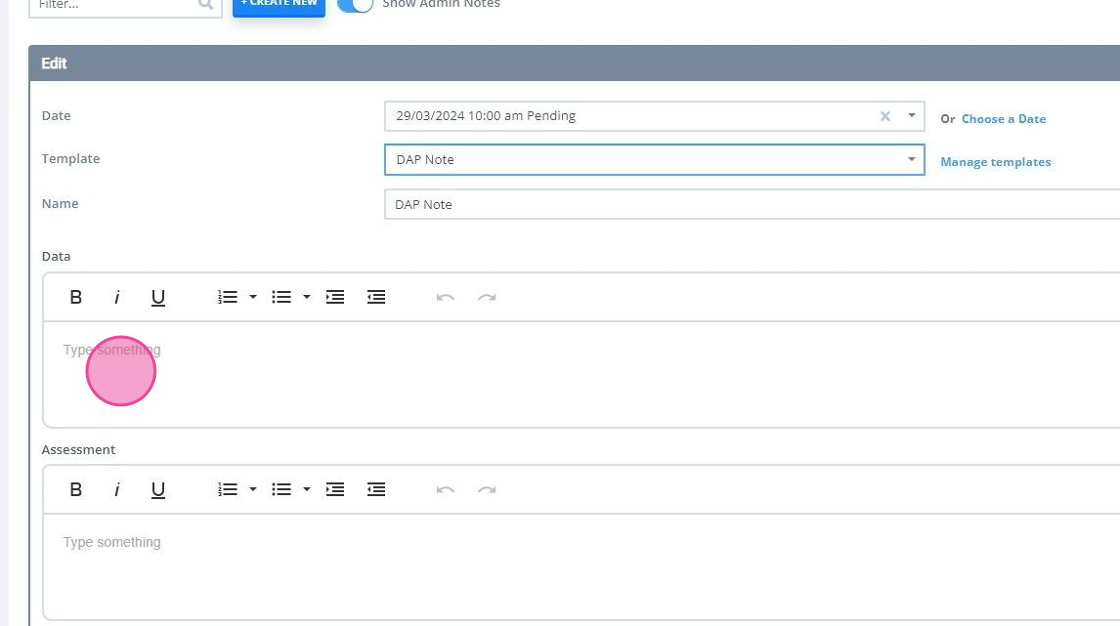
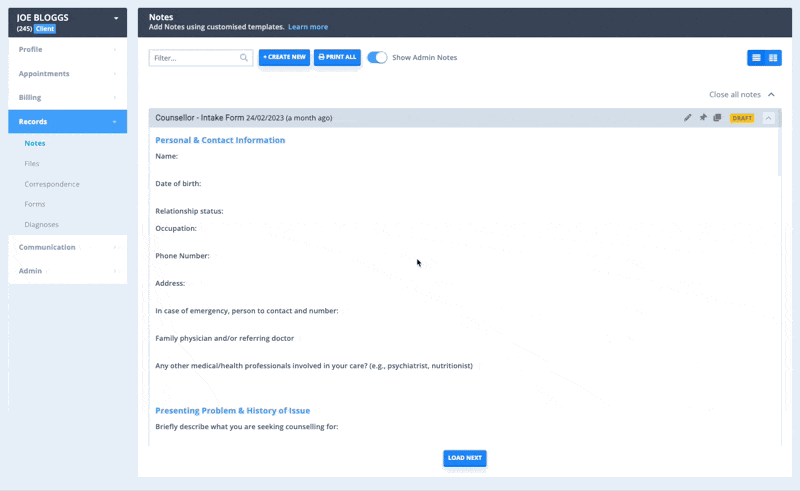
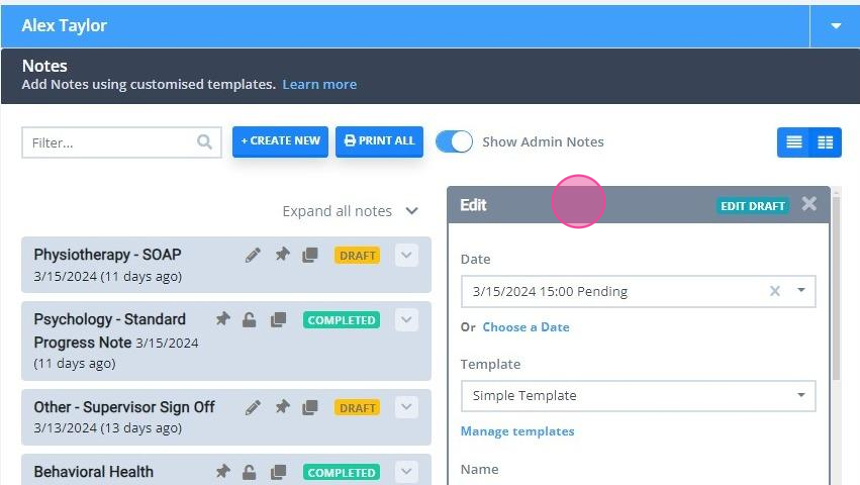
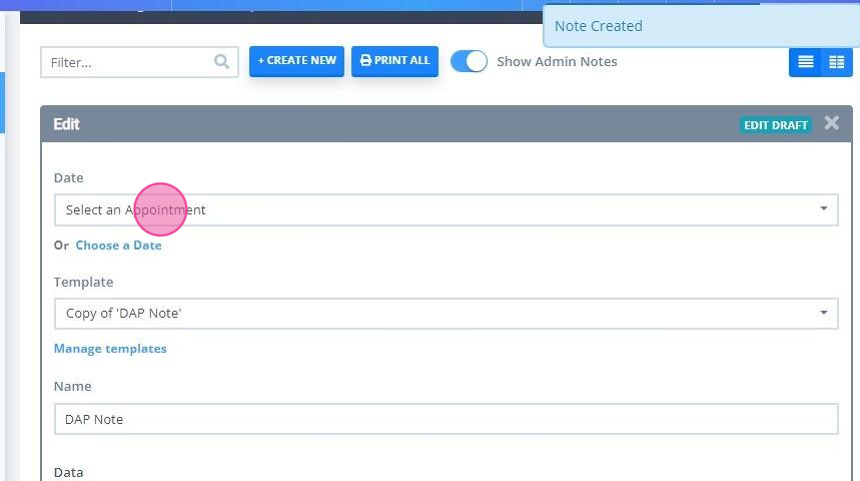
2. You will be moved to the client profile > Records > Notes page, and a new note linked with the appointment will be created. Select the applicable clinical template from the 'Template' dropdown.

3. Fill the note as necessary.
Note
You can copy and paste text from other sources. Please beware that if the original source has excessive formatting you can experience difficulties with printing such a note. If this happens, please delete the copied text and paste it again as plain text. This will allow to keep line spaces and breaks in the pasted text and print the note.
4. At the bottom-right of the note, you will be able to save it as a draft, or as complete.

Hint
When you create a new note, and do not manually save it as a draft, the system will automatically save the note. This will be recorded in the note log as auto-draft.
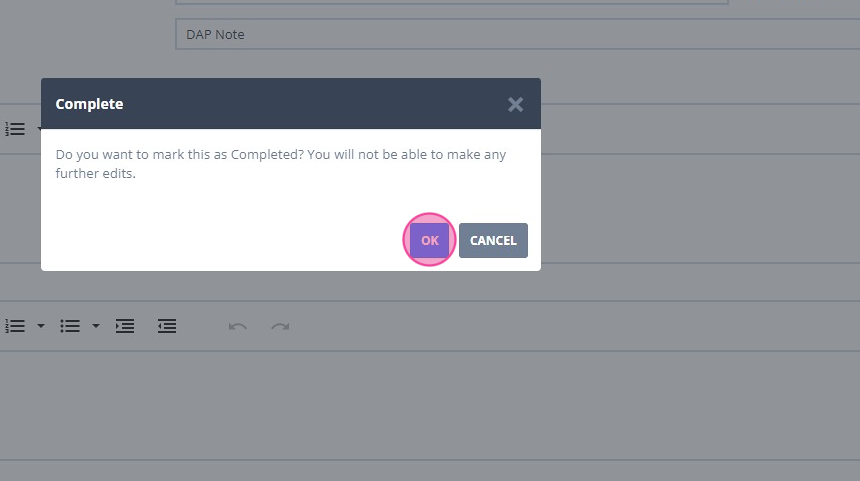
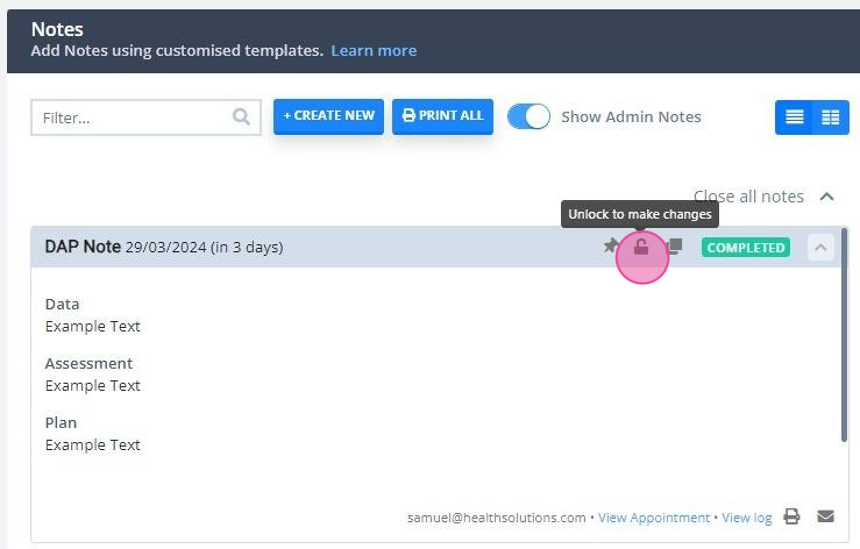
5. If you save the note as complete, you will be asked to confirm the action. Click "OK' to proceed with completing the note. Once saved, the completed note will be locked from editing.
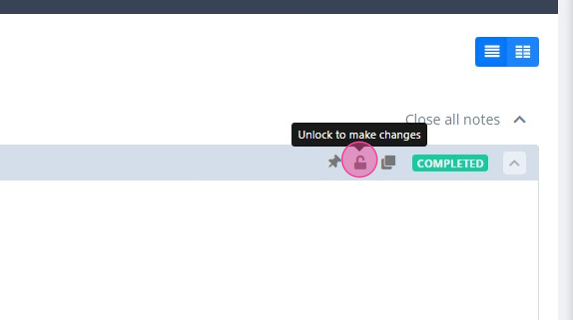
6. A session note can be unlocked if you are logged in as the master user, or if your user profile has a permission to unlock notes in client profiles assigned to their practitioner or user with access. To unlock a note click the padlock icon at the top-right:
Opening an Existing Session Note
It is possible to open an existing drafted or completed session note two ways:
Open a session note from an appointment panel
1. Locate the client's appointment on your calendar screen;
2. Click on the Note icon on the appointment details section of the panel.
Three possible behaviours can be expected:
a) A note linked with this appointment will open on the Client Profile > Records > Notes page;
b) If there are two notes linked with this appointment, the newest created note will open;
c) If the note being opened is not part of the initial view on the Client Profile > Records > Notes page (i.e. the user must click “Load next” to see it) then the note will not be opened, just the Client Profile > Records > Notes.
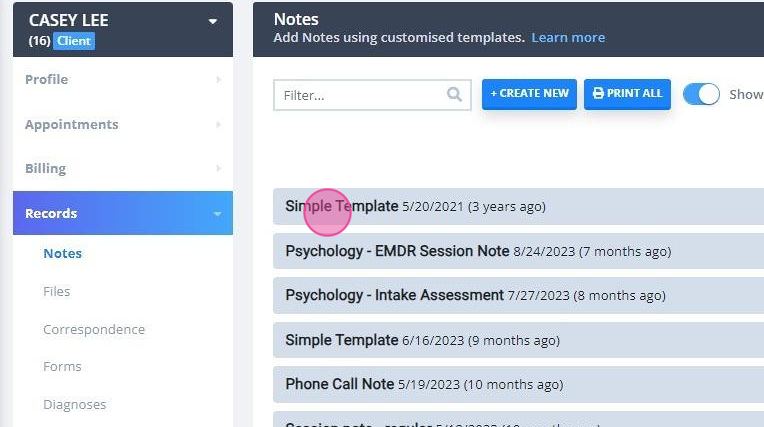
Open a session note on Client Profile > Records > Notes page
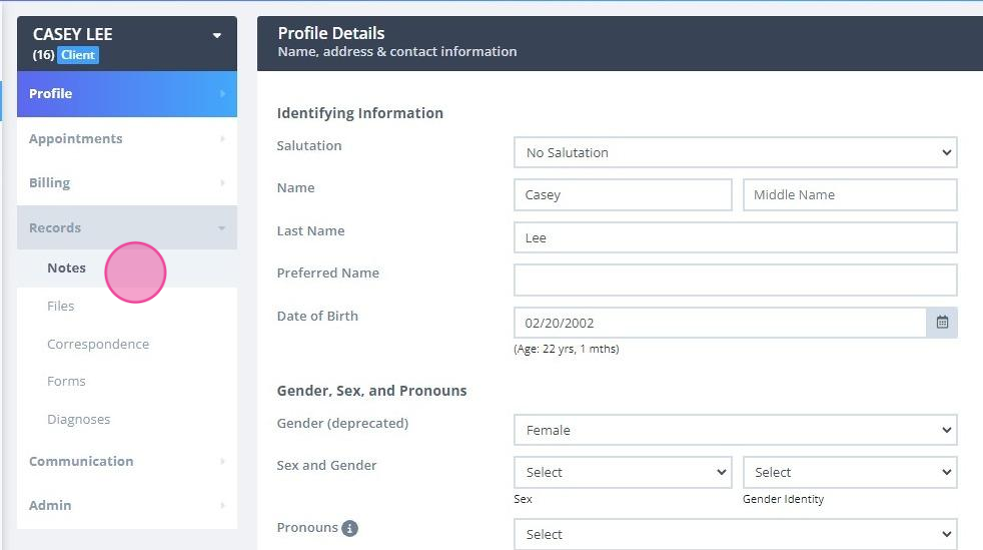
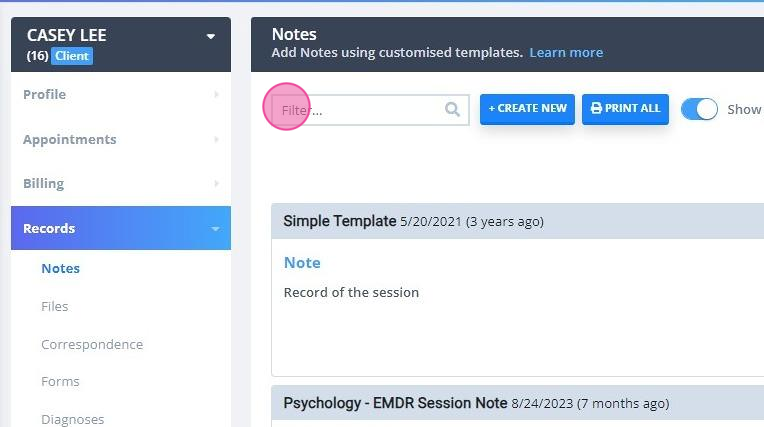
1. Navigate to Client Profile > Records > Notes page.
2. Use the search filter functionality to locate the note if you have a long list of notes for the client;
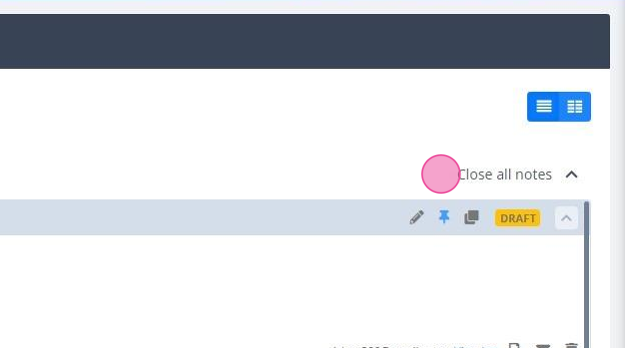
3. Alternatively, use the 'Close and Expand all notes' functionality to locate the note if you have a long list of notes for the client;
4. Click the note's title to open the note's content.
5. Click here to expand the full note to view its contents.
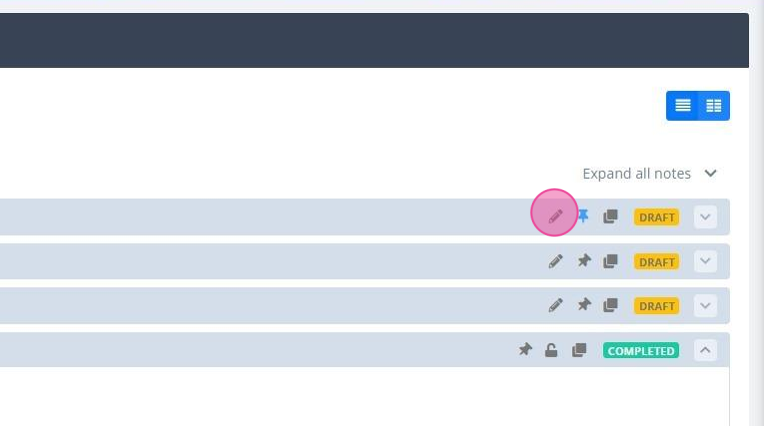
Editing a Session Note
If it's still a Draft, you can go back into it and edit its content any time by clicking on the pencil icon. Any progress is automatically saved.
Note
Copying and pasting of formatted text will not copy the formatting. This is expected behavior to prevent from copying the excessive formatting which might affect the final note output when printing or emailing the note.
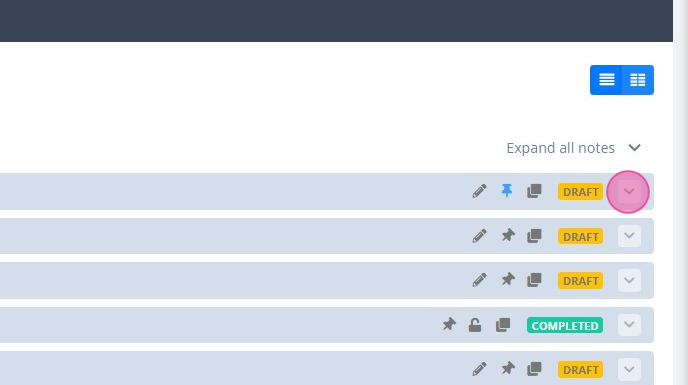
Expanding and Collapsing Notes
For the convenient viewing of the list of existing notes and forms, we have added the option to close and expand all notes and forms.
Each note and form, in its turn, can also be expanded and closed separately:
Watch this short tutorial here:
Displaying Notes in Two Columns
- The Two Columns button allows you to display notes in two columns.
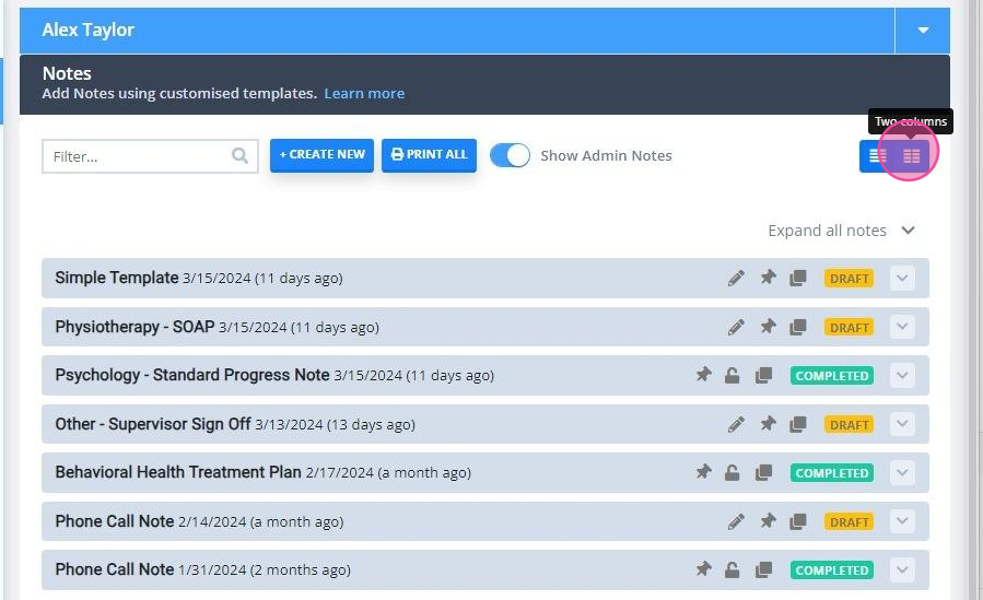
- In the left-side column, you can view, filter and scroll through the existing notes. In the right-side column, you can create and work on the current note.
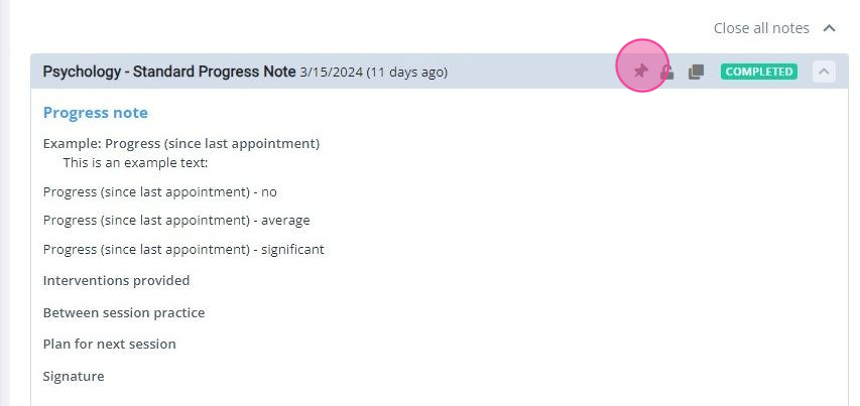
Pinning a Session Note
By default, all Session Notes for a client are listed chronologically, with the newest at the top.
- If a particular Session Note is important to your client's long-term planned treatment, you can click on the pin icon which literally pins it to the top of the page regardless of its age, saving you time searching and scrolling.
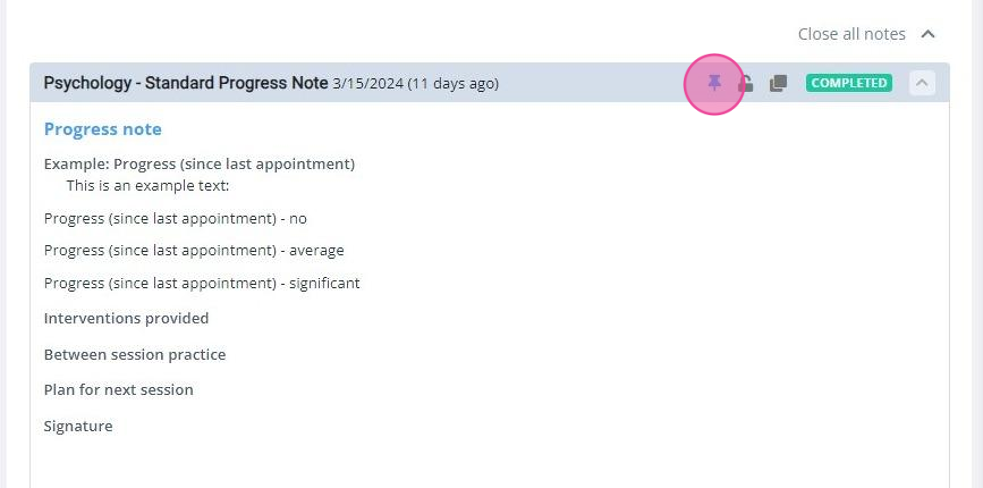
- Click the blue pin icon to unpin a note from the top of the list. The unpinned note will have the grey pin icon at the top.
Copying a Session Note
If you find yourself using the same template continuously for your sessions this makes it easy to pick the same one automatically, ready for your most recent observations.
1. At the top-right of an existing note you'd wish to copy, click on the 'Copy to new' icon.
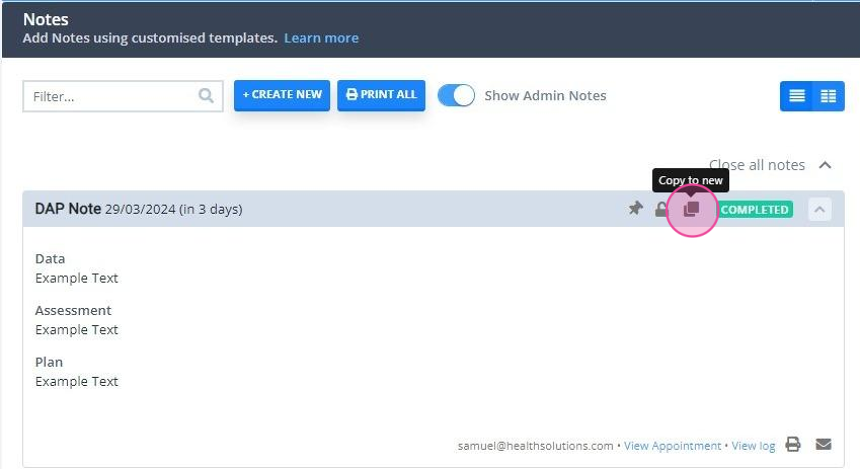
2. A copy of the note will be created. Select the relevant appointment or a date, and edit the note as needed.
Attaching Files to a Note
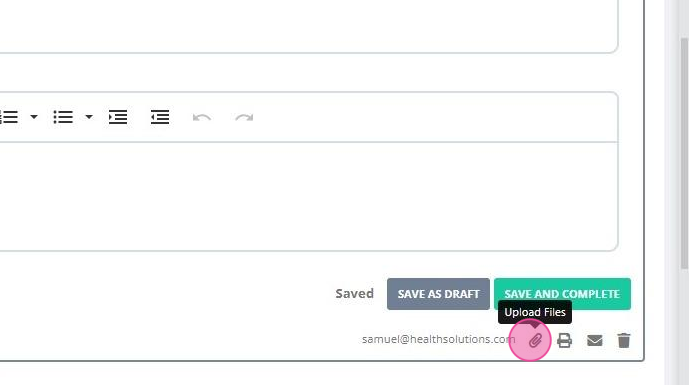
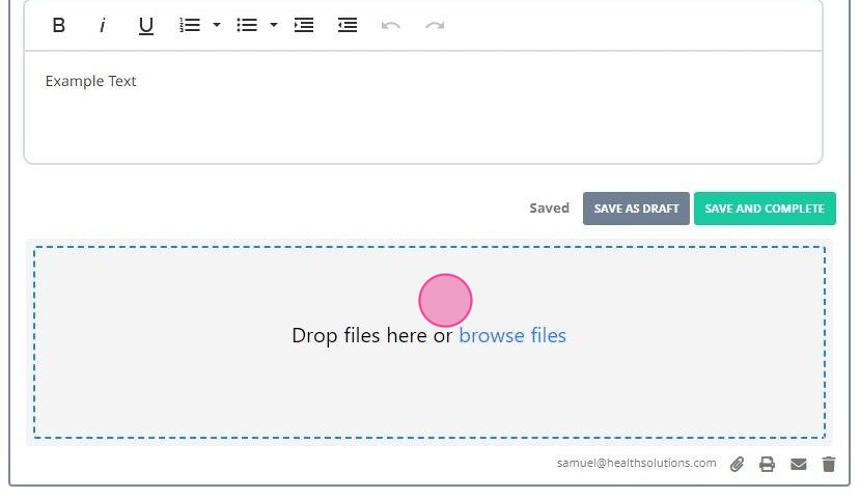
After uploading, they can be clicked on and previewed inside Power Diary.
Upload Restrictions
Multiple file uploads are allowed per one session note. If you try and upload a type of file we can't accept, we'll let you know. At the time of writing, valid types of files we can accept are;
-
jpg/jpeg and png images
- csv, xls, or xlsx Worksheets
-
zip
- doc or docx Microsoft Word documents
- text/txt files
- html, htm
- heic
Video formats are not supported because they are typically too large, but these can be compressed into an aforementioned ZIP file.
Printing and Emailing Notes
There are several available options for obtaining a printed or digital copy of a note or all notes.
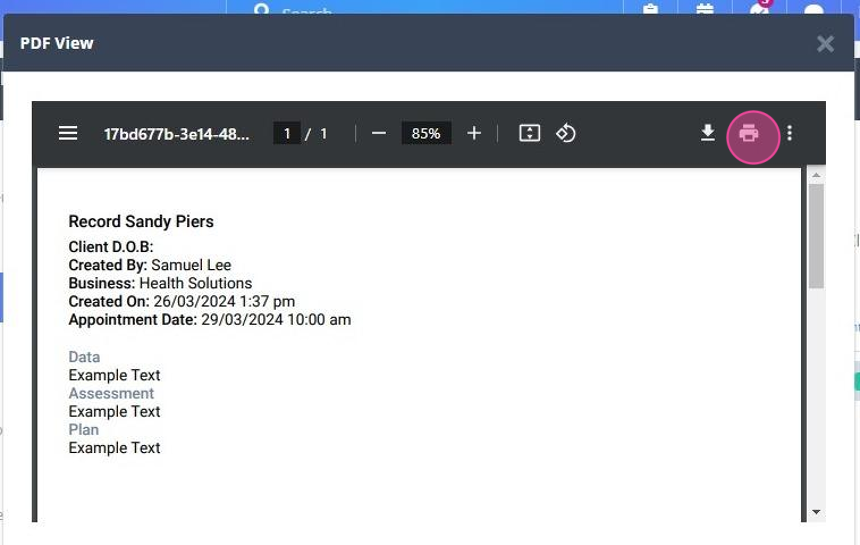
- You can simply go to the client's profile, navigate to their Records → Notes and click Print All.
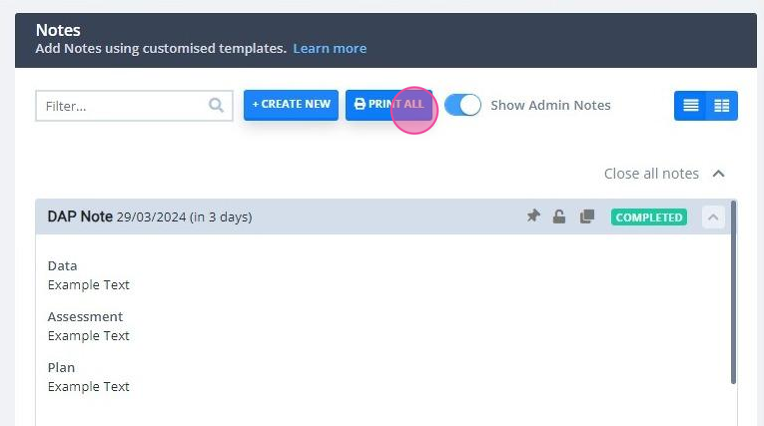
This will generate a single PDF file that will include all the notes created in this particular client profile. Send this file to Print or save as PDF on your device to attach to an email.
- When a single note needs to be printed or emailed, scroll down to the bottom of the note and click on the Print or Email buttons.

- Alternatively, if you would like the entire record for the client in a machine-readable format you can go to Tools → Data Export and use the single client export function. Learn more about that at Exporting Your Data.
Frequently Asked Questions
How can I see who authored a Session Note?
The username of the author is displayed toward the bottom right of the Session Note.
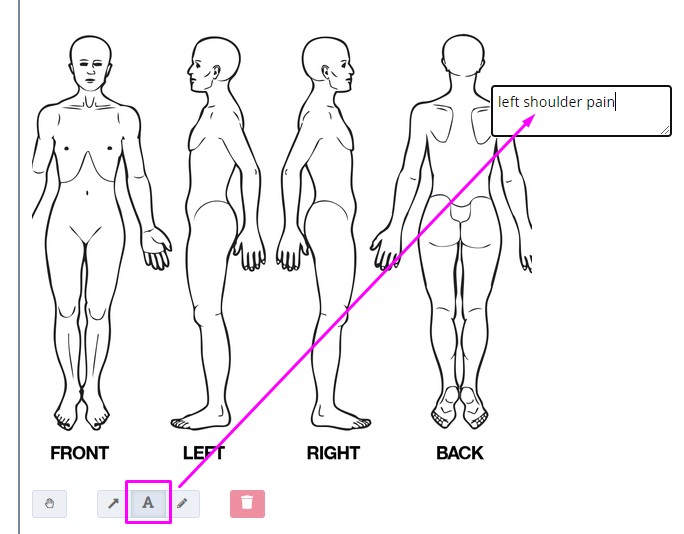
How can I make text annotation on the annotation image?
Click on the 'A' button under the annotation chart image, click on the spot on the image where the text annotation should be added and type. Once done, hit the Enter key to save the text annotation on the chart.
Can I unlock a locked Session Note?
The Session Note can be Unlocked if you are logged in as the Master User or a sole practitioner, or if your user has the permission assigned to unlock notes you have written. Just navigate to the Session Note in question and click on the padlock icon shown here.

This moves the Session Note back into the Draft status for further edits.
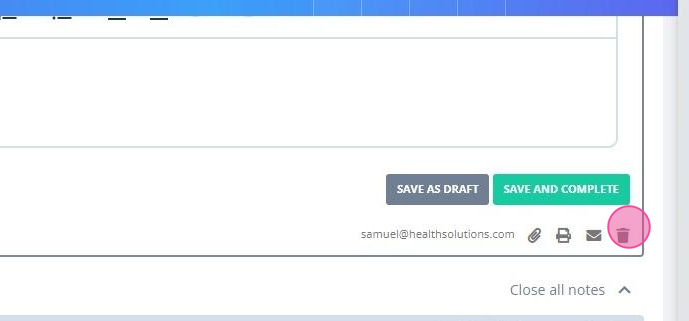
I have completed a Session Note but accidentally saved it to the wrong client profile - can I delete it?
1. Go to the client's Profile > Records > Notes, click the lock icon to unlock the note.
2. This should convert it back to a Draft, at which time the trash can icon will appear in the bottom-right of the Session Note so you can delete it.
How do I manage my Note Templates?
Session and Admin Note Templates are managed via Tools > Note Templates. You can learn about this at Creating a Session Note Template.
Will my logo print on Session Notes?
Yes. When printing Session Notes, if you have uploaded your logo at Settings > Configuration > Invoices your logo will appear on printed Session Notes.
If notes are left as a Draft indefinitely, do they stay there forever, or will they expire at some point?
They'll stay there indefinitely - as long as a user does not delete or edit it, which they could do to a Draft!
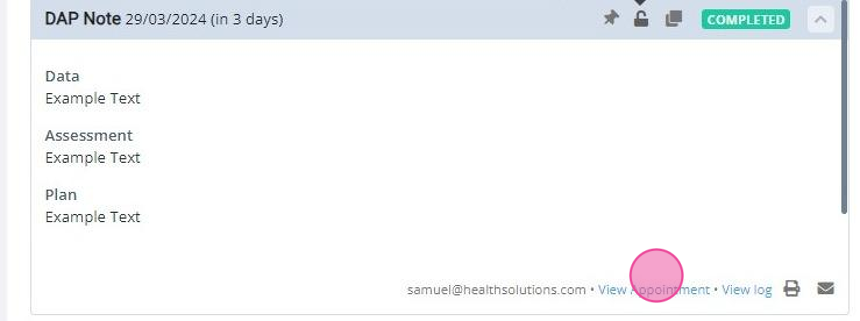
How can I quickly return to an appointments panel from its appointment note?
Once you created a note for an appointment, they will be linked with each other. At the bottom of the note, you will see a hyperlink for its associated appointment 'VIew Appointment'. Left-click on the link to go straight to the appointment panel, or right-click on it to open the appointment panel in a different tab or window. This is especially useful when you write session notes for each participant of a group appointment and need to return to the appointment to work on a note for the other participants.
I deleted a Session Note accidentally - can you rescue it?
We do prompt you if you are sure to delete something, as this is a permanent action a Power Diary user cannot remedy:
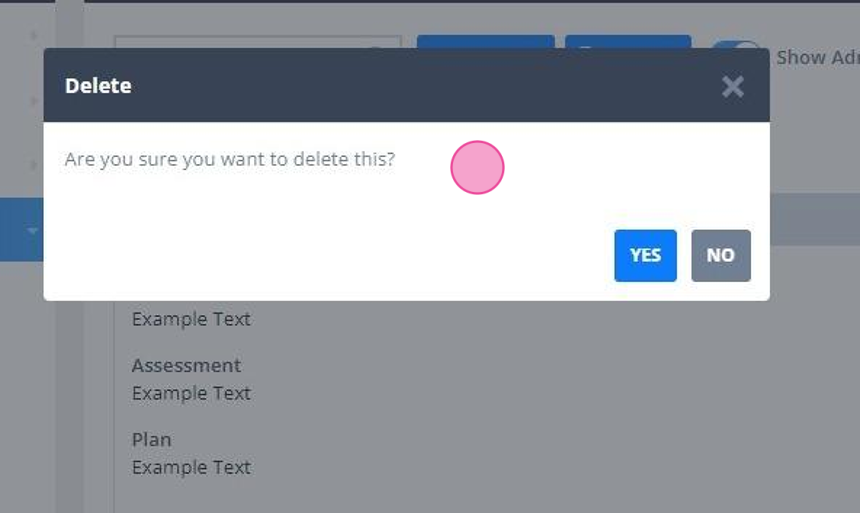
However, if you need to restore a deleted note, please reach out to the support team via support@powerdiary.com
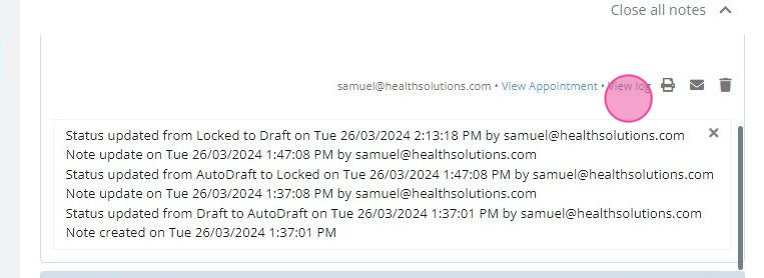
Can I see who and when made changes to a note?
Each session note created has a user activity log at the bottom-right of a note. Click on the View Log hyperlink to open the log to view all recorded system and user actions.
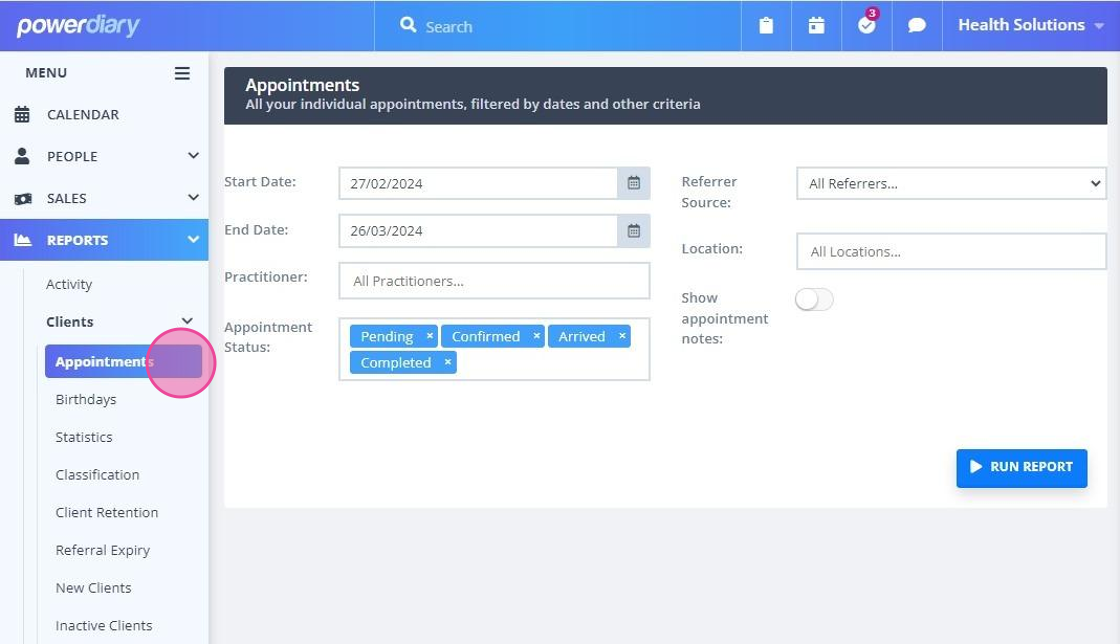
Can I get a report of completed notes?
The Reports > Clients > Appointments report allows to generate a report with the Session Note column, that column will contain the information if the session note was created, drafted or completed for the appointment.