
Customize your Power Diary calendar
In Power Diary, every individual person in your health clinic can have their own calendar. In it, you can make appointments, create invoices and do much more.

In this article, we’ll show you how to customize your calendar in Power Diary.
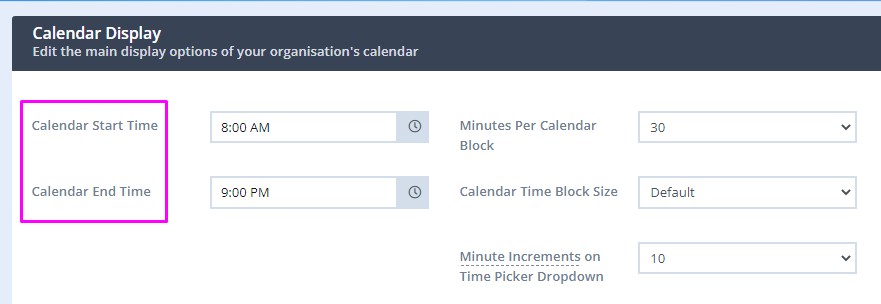
First things first. To customize your Power Diary calendar, go to Settings → Configuration → Calendar Display. Here, you’ll find all the settings for customizing your Power Diary calendar.

Set The Calendar Start Time And End Time
The very first settings you can change is the Calendar Start Time - and below that, the Calendar End Time. With these two settings, you can change the time period that shows up on your Power Diary calendar.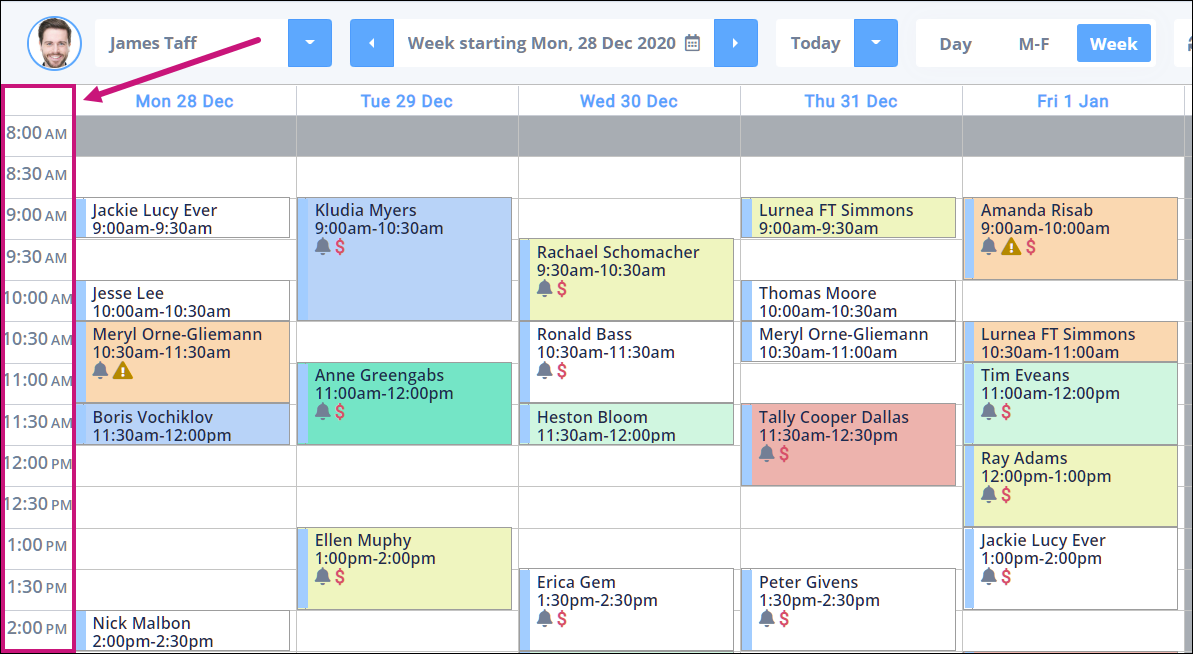
The Calendar Display page is divided into two parts. On the left side, you’ll find the settings with which you can make changes to your calendar’s start and end time.
Here are the settings:
Customize The Calendar Block
Each block on the Power Diary calendar represents a time period. By default, a block represents 30 minutes. Meaning if you want to add a one-hour appointment to your calendar, you will select two blocks.
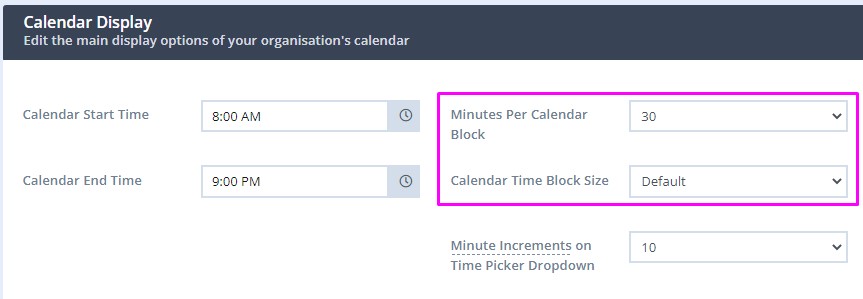
To change the block settings, you have two options:
- Minutes Per Calendar Block: This option lets you change the time period a block represents. You can have a block that represents as little as 5 minutes or as long as 60 minutes.
- Calendar Time Block Size: This option simply lets you change the size of the block. You can make the blocks on your calendar look small or large depending on your preferences.
Minute Increments on Time Picker Dropdown 💡
This setting applies to all the time pickers throughout the account, including Appointment Panel, Availability, and Update Availability pop-up. Use this setting to define the default minute increments on time pickers.
Customize The Functionality of Your Calendar
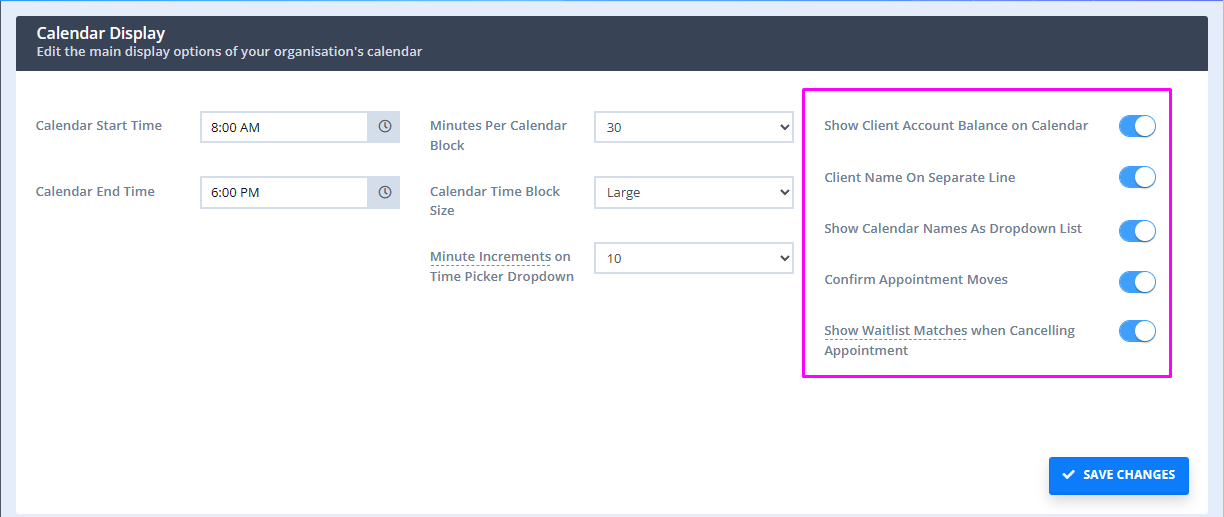
Power Diary lets you change certain aspects of how your calendar looks and behaves. Some other changes you can make are:
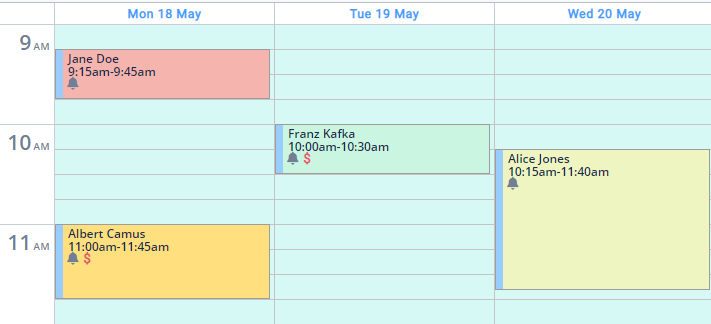
- Show Client Accounts on Calendar: After enabling this option, Power Diary will show a red dollar sign on those client appointments who have a pending invoice that are yet to pay.

- Client Name on A Separate Line: When you create an appointment on the Power Diary calendar, it shows the client name, the date and time of the appointment and other information. Enabling this option will separate the client's name on another line from the rest of the info.
- Confirm Appointment Moves: If you accidentally drag appointments and reschedule them, this option can come in handy. If you turn it on, you’ll get a confirmation popup anytime you reschedule an appointment.

-
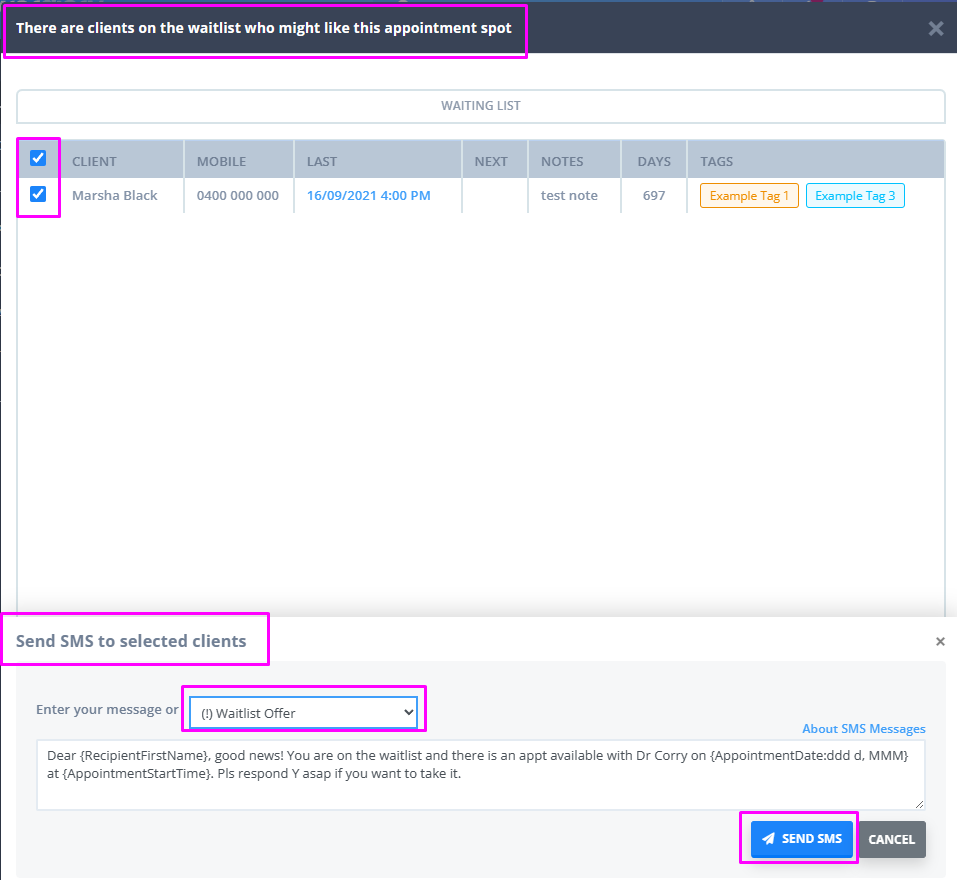
Show Waitlist Matches when Cancelling Appointment: if enabled, whenever an appointment is cancelled or rescheduled, an automatic popup window will appear, where the system will show a list of waitlisted clients with availability that matches the released time slot. You will be able to select matching clients and send them an SMS to offer the available spot:
Once you’ve made the desired changes to your calendar, click on the Save Changes button.