
Set up custom email servers in Power Diary, including Gmail, Outlook, Yahoo, and Apple iCloud.
Important:
- This is an advanced feature. Using a custom email server means you may need to set up SPF and DKIM records in your DNS server. This differs for every mail provider and DNS provider, so if you need assistance, you will need to contact the providers of these services.
You should only continue if you are familiar with these terms or are IT supported for a clinic. When you are harnessing your own SMTP server, Power Diary acts as a mail client and therefore does not have a role in managing SPF and DKIM records.
- Please check with your email provider if they impose any hourly/daily send limits, as they will reject any emails you try to send above that limit.
In this article:
- Power Diary vs. Custom Mailing Server
- Using Power Diary's Mail Server
- Using Gmail Mail Server
- Using Microsoft Outlook Mail Server
- Using Yahoo's SMTP Server
- Using Your Apple iCloud's SMTP Mail Server
- Generating Third-Party Passwords for Some Mail Services
- Troubleshooting
Power Diary vs. Custom Mailing Server
What's the Difference?
- The job of a mailing server is to send your emails to your recipients and deliver emails that are sent to you. As such, if you use Power Diary's mailing server, your emails will be delivered by Power Diary's mailing server on your behalf.
- On the other hand, a custom mailing server is a server provided by your email provider. This typically includes providers like Yahoo!, Apple iCloud etc. You can choose your emails to be handled by them, instead of Power Diary. The settings for each are given below.
Is Power Diary affected by the 2024 Google and Yahoo's email sender requirements ?
- Power Diary default email servers have all the best practices for authentication, security, and spam prevention already in place.
- If you are using other email sender, then it depends on what address you are sending from and how your domains are configured. As explained above, users using their custom SMTP (including Gmail) with a custom domain would have to setup some of those spam prevention options manually.
Using Power Diary's Mail Server (this is default unless you change this)
- Login to your Power Diary account and go to Settings > Communication > Communication Options
- Toward the bottom of the page, select "Use Power Diary's Default Server"
- Click Save.
Security 💡
Our default mail server supports opportunistic TLS 1.1 or higher. Secure connections always depend on the recipient – for example, if the recipient's server supports TLS 1.2 or above, then that is what will be used.
If you decide to connect your Power Diary account with your custom SMTP server, you will be required to provide your username and password for authentication. Please be informed that the password you provide will be encrypted in the Power Diary database to ensure that no one has access to it.
Using Google Gmail Mail Server
If you have a Google Gmail account, you can use this as a mail server by following the steps below:
- Login to your Power Diary account and go to
- Settings > Communication > Communication Options.
- Under Mail Server select "Gmail" from the list.
- Click "Connect to Gmail with Google".
- Sign in with Google to your Gmail account.
- Review the access and click "Allow".
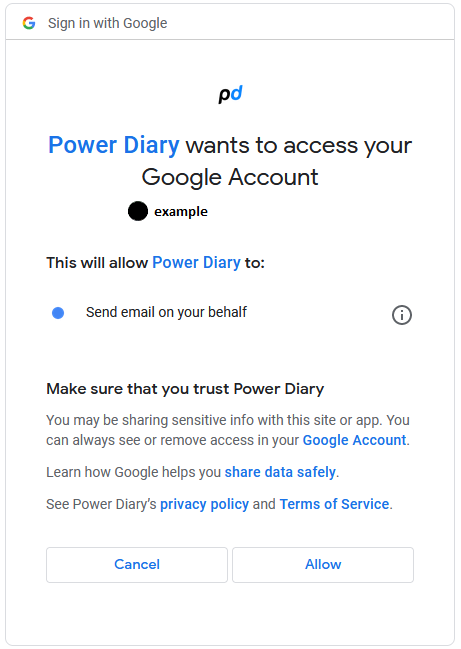
6. Click Save.
Please note that all emails sent through Power Diary will be sent "from" your Gmail address, however, the reply-to address will be set to the "from" address you have entered in Power Diary either for the template, or in your account settings.
Using Microsoft Outlook Mail Server
- Login to your Power Diary account and go to Settings > Communication > Communication Options.
- Under Mail Server select "Microsoft Outlook" from the list.
- Click "Connect to Microsoft Outlook".
- Sign in with Microsoft to your Outlook account.
- Review the access and click "Allow".
- Click Save.
Please note that all emails sent through Power Diary will be sent "from" your Outlook address, however, the reply-to address will be set to the "from" address you have entered in Power Diary either for the template, or in your account settings.
Using Your Yahoo SMTP Mail Server
If you have a Yahoo (Yahoo, YMail etc.) account then you can use this as a mail server by following the steps below:- Login to your Power Diary account and go to Settings > Communication > Communication Options;
- Under Mail Server untick "Use Power Diary's Default Mail Server";
- Enter your SMTP Server and Login details. For Yahoo, these will be as follows:
- Host Name: smtp.mail.yahoo.com
- Port: 587 or 465
- Username: your Yahoo address (ie. john@ymail.com)
- Password: your Yahoo password
- Click Save.
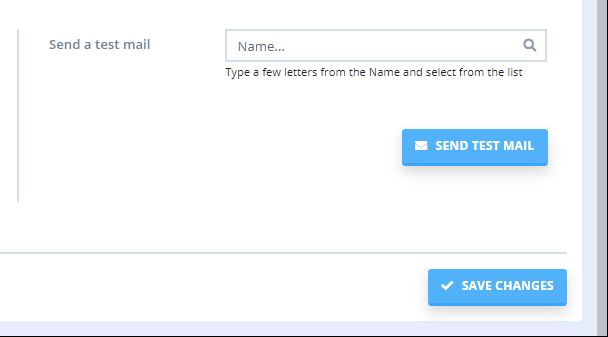
- Use the Send Test Email functionality to test that you have entered your Mail Server details correctly.
Important
Please note that due to Yahoo's DMARC policy, you will likely be unable to send email through Power Diary's mail server when using your Yahoo email address as the 'from' address. In these instances, you should follow the above steps to send an email directly through your own mail server.
Using Your Apple iCloud SMTP Mail Server
- Login to your Power Diary account and go to Settings > Communication > Communication Options.
- Under Mail Server untick "Use Power Diary's Default Mail Server".
- Enter your SMTP Server and Login details. For Yahoo, these will be as follows:
- Host Name: smtp.mail.me.com
- Port: 587 or 465
- Username: your iCloud email address (ie. john@icloud.com).
- Password: your iCloud email password.
- Click Save.
- Use the "Send Test Email" functionality to test that you have entered your Mail Server details correctly.
Generating Third-Party Passwords for Some Mail Services
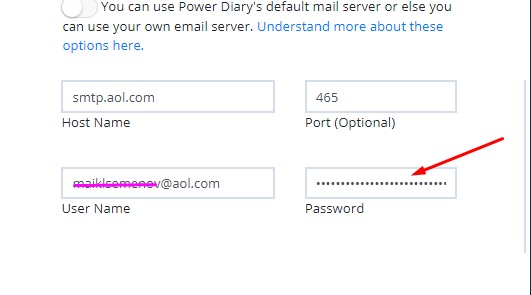
Some mail services require creating third-party application passwords due to their security requirements. In such a case, you will not be able to use your mail account password when setting up your custom SMTP server in Power Diary. Below are example recommendations for the AOL server, but you may be required to reach out to your mailing provider for support.
How to add a third party password for the application:
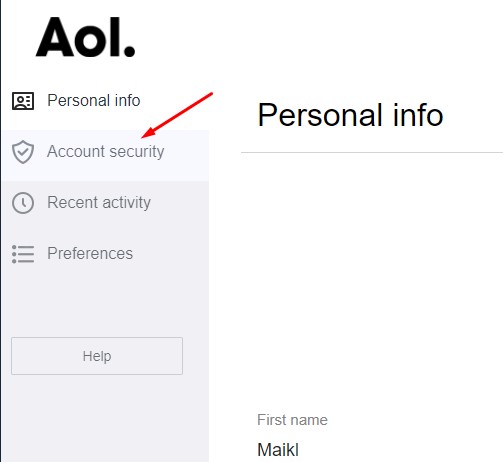
1. Go to the profile page.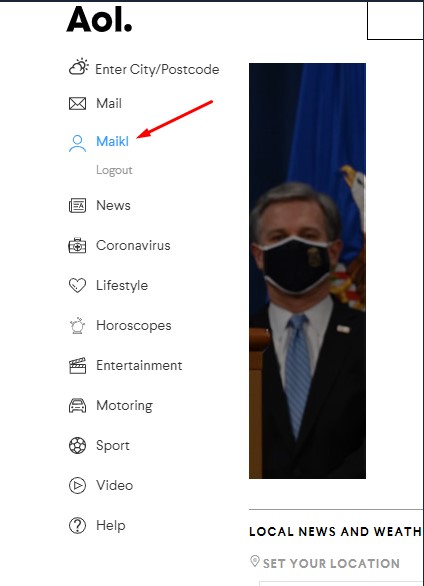
2. Click on Account security menu item
2. Click on the Generate app password link.
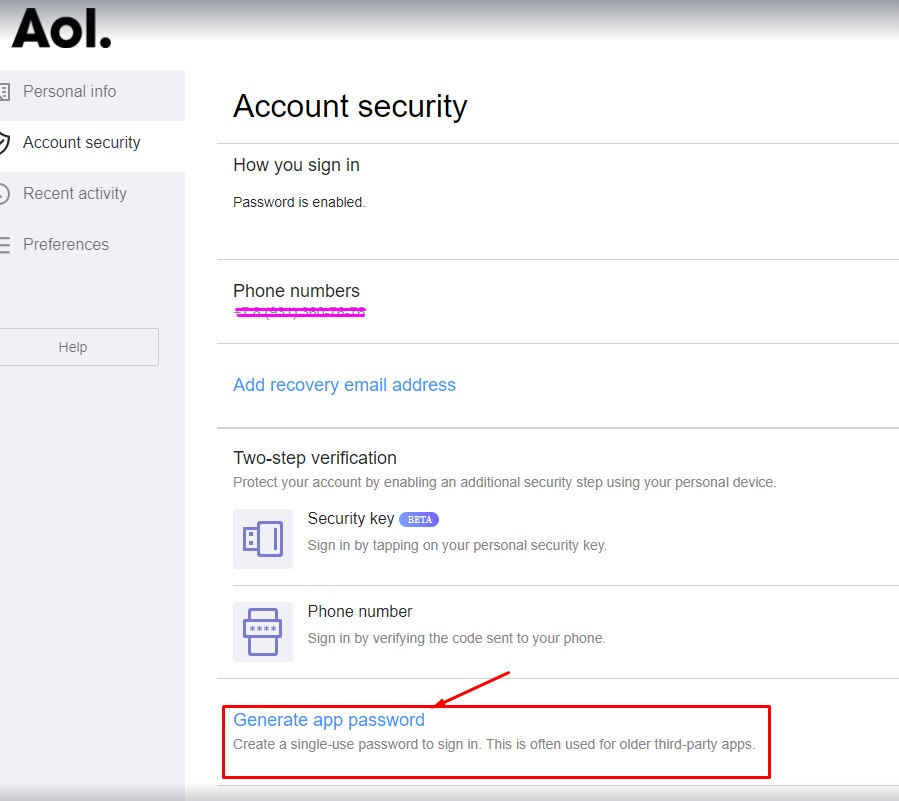
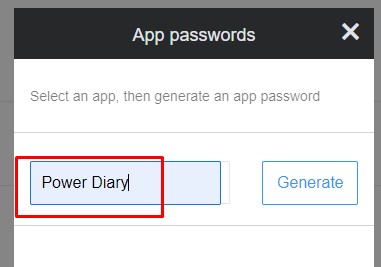
3. Select the Other app option from the dropdown menu.

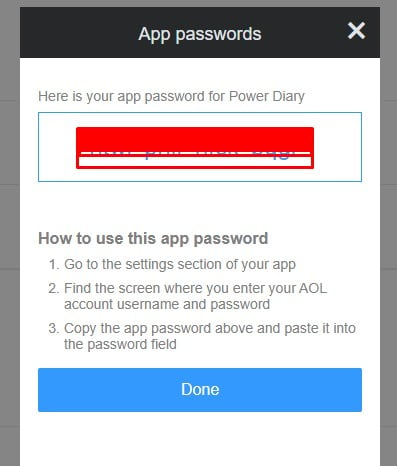
4. Fill in the field something like Power Diary and click on the Generate button.
5. Copy the password and paste it into the password field in Power Diary.
Troubleshooting
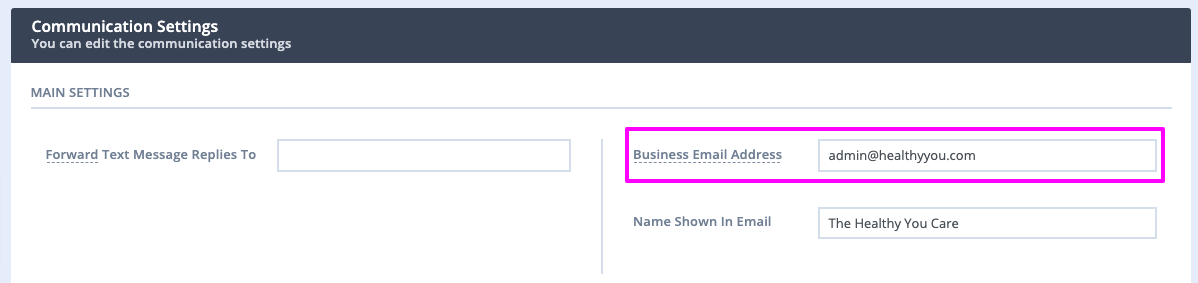
- Please make sure to send yourself a test email after entering the configuration settings. In this test email, the best approach would be to enter a mock client profile that includes your email address. This way, you can instantly check whether your custom SMTP server is working or not. When doing this test, also make sure the email listed here is different from the Business Email Address listed at the top of the page. If you are unable to get a test email, please reach out to your email provider to ask them why they are not allowing your emails to be sent from within your Power Diary account.
- If you're finding that emails are not sending, it may be worth trying another port (i.e. if you tried 587 change to 465).
- Check the Business Email address listed on the page is the same email as the SMTP Username you have entered, otherwise, this can fail to authenticate through your mail provider and refuse to process it.
- Check the email template you're trying to send has the same From Email Address entered as the SMTP Username you have entered, otherwise, this can fail to authenticate through your mail provider and refuse to process it.
