Learn how to add insurer payments to invoices in Power Diary and differentiate between client and insurer payments for billing and record-keeping.
For those who take insurance payments for services, you can differentiate between who made the payment by selecting Client or Insurer in the Paid By dropdown. These fields have been added in preparation for integrated insurance claiming for our customers in the United States.
Tip💡
If you do not use the ' Paid By Insurer' field it will not appear on the invoices sent to clients.
How to Add an Insurer Payment to an Invoice
Adding an Insurer payment to an invoice is easy. Here’s how:
- If you haven’t already, create an appointment with your client in your Power Diary calendar.
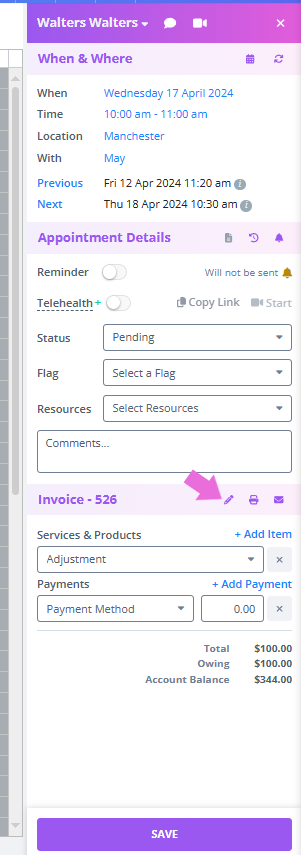
- Click on the appointment you just created to open the appointments panel. Scroll to the bottom until you see the Invoice section. Here, simply choose a Service, Product or Session Pack you’d like to add to your invoice. To add multiple services/products, click the +Add Item button. Then click Save.
- Click the pencil icon on the appointment panel to open the Edit Invoice page.

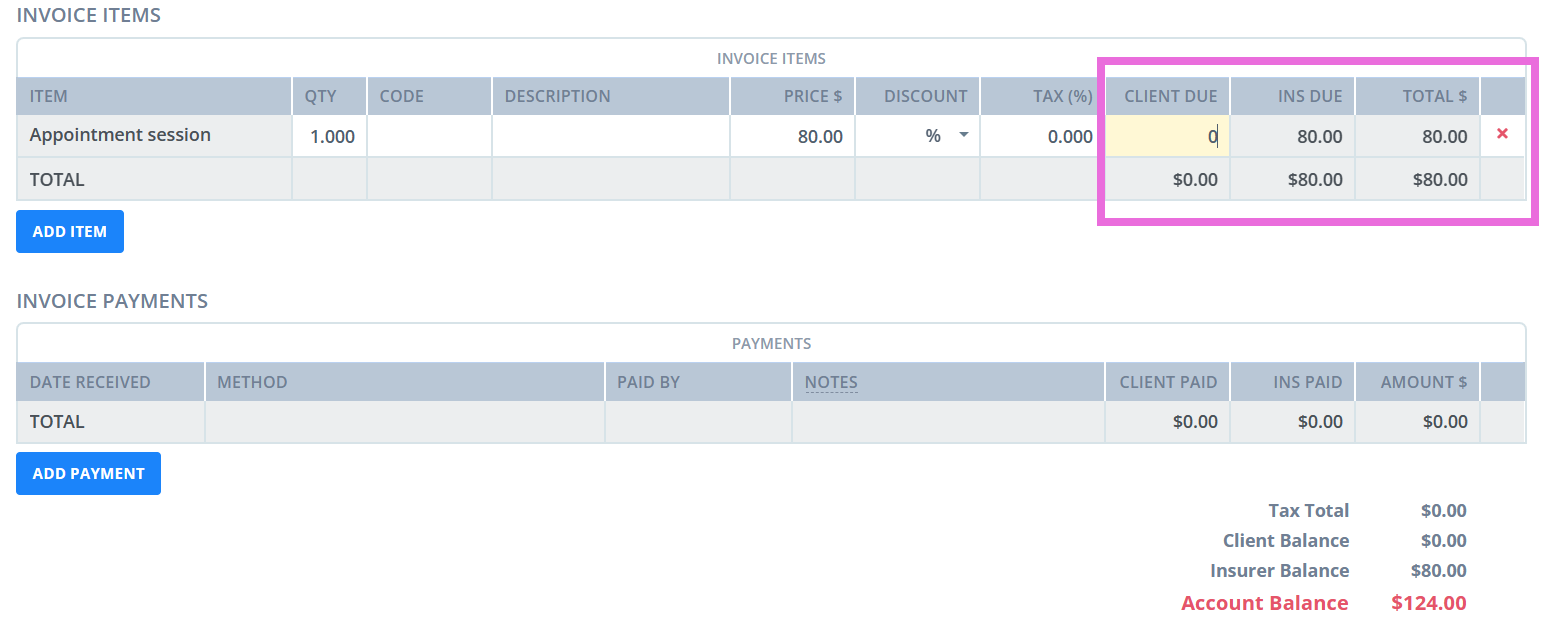
4. On the Edit Invoice page, enter the client amount due - the insurance amount due will automatically update. 
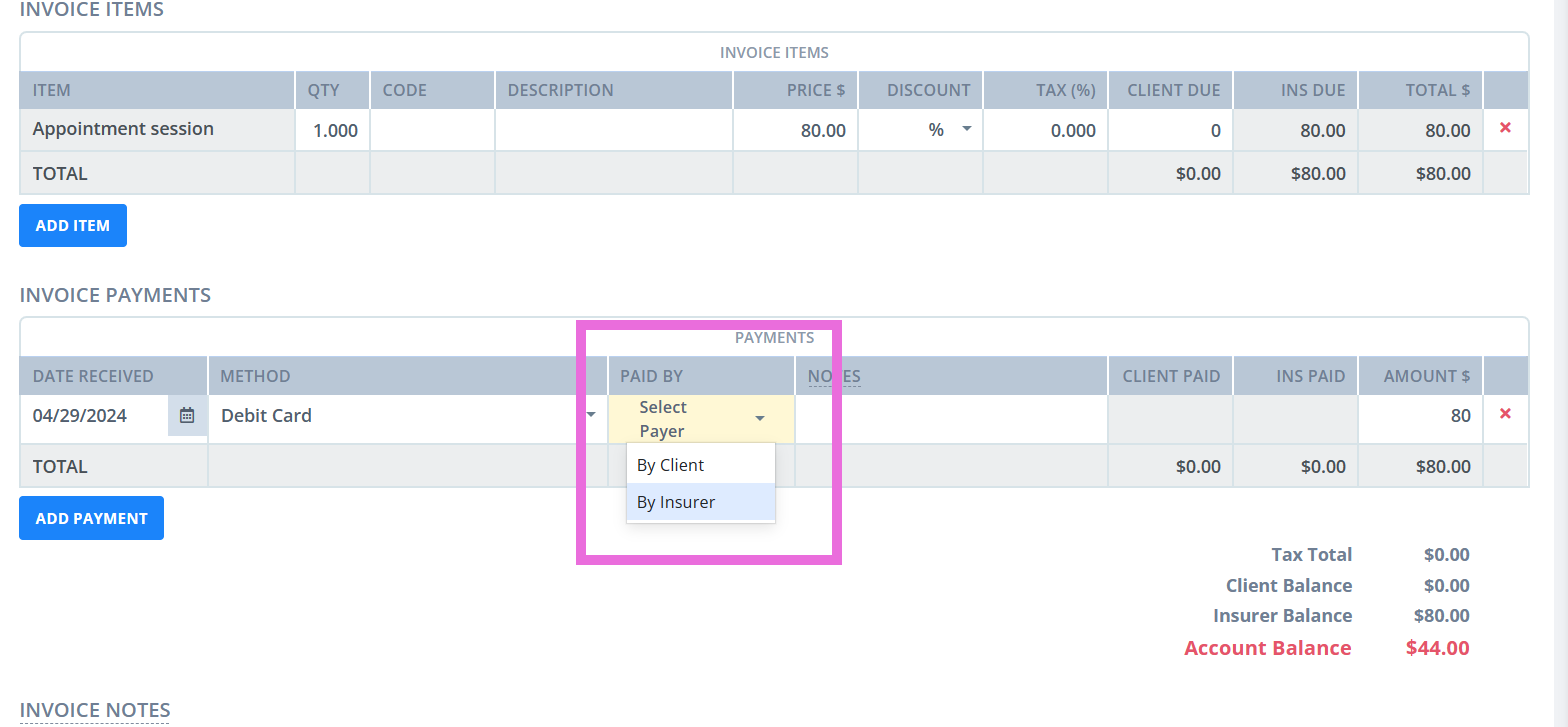
5. On the same Invoice page, select Add payment, select the payment method, then click on the 'Select Payer' dropdown. You will then see the option to select an Insurer as a payer.

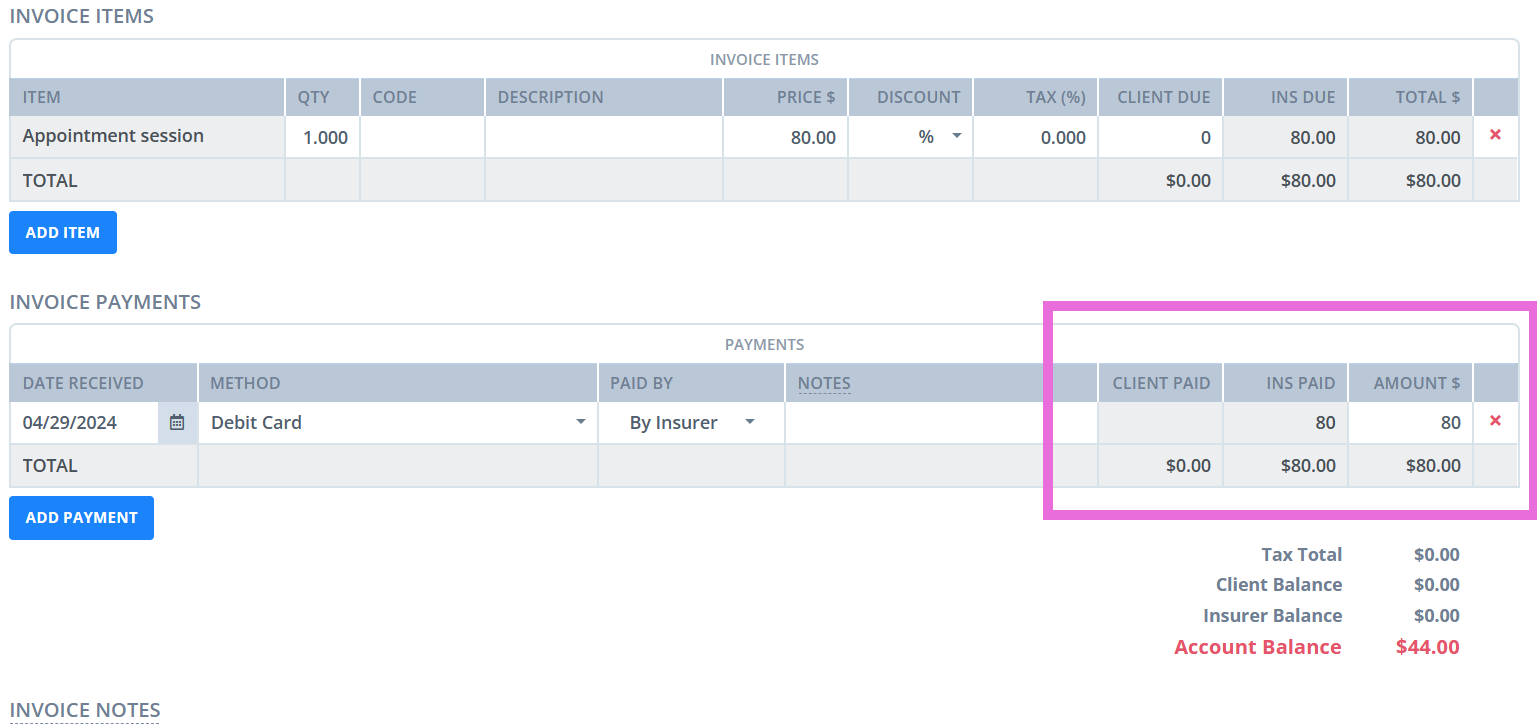
6. Then add the amount the Insurer has paid. The amount will then be added to the Insurer portion of the Invoice.

7. Then click the Save Invoice button so that these changes are applied.
Hint💡
You can also access the Edit Invoice page by going to the client's profile → Billing → Invoices→ Edit Invoice.