Managing Users
You can add additional users to Power Diary. Users can manage your account on your behalf. You can allocate for a user to create, edit and delete appointments, manage invoices, register new clients and do much more. What exactly they can manage depends on the permissions you grant them.
Note💡
If you are adding a new practitioner that will take on appointments, you’ll have to create a new practitioner's calendar first and then create their user to link them to it as the "Default Practitioner".
In this article:
Managing The Master User Profile
The email address and password used to create your Power Diary account is the master user. The master user has total administration rights and can make changes to any user account they create. As such, the master user cannot be suspended or deleted.
However, you can make changes to the profile. Here you have the option to change the name, email address, password, manage two factor authentication, and upload a signature for email/letters created by the master user. To access this page:
- 1
-
Log in to Power Diary using the master user’s email address and password.
- 2
- In the top-right corner of the dashboard, click on the business name. In the pop-up menu, click Profile.
-


- 3
-
Here you can edit the name, email/username, rest the password, upload a signature, and manage two factor authentication.

After, click Save.
Add and Edit a User
Adding a New User
Adding a new user to your Power Diary account is easy. Here’s how you can do that:
- 1
-
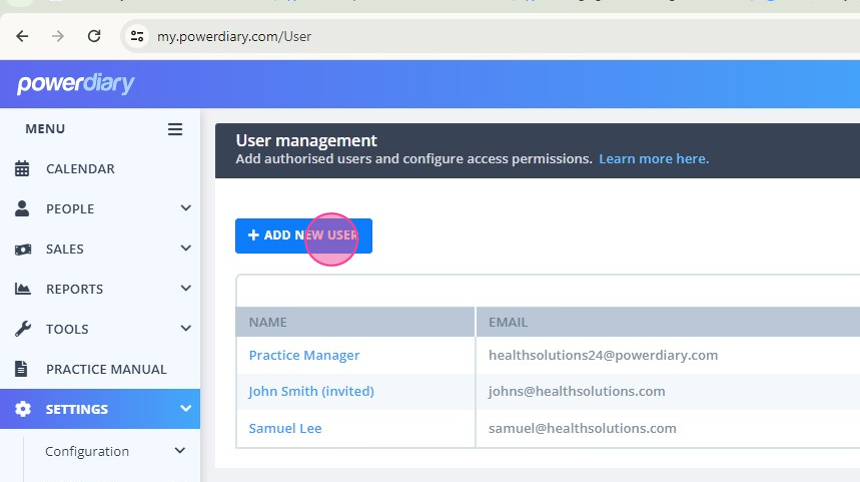
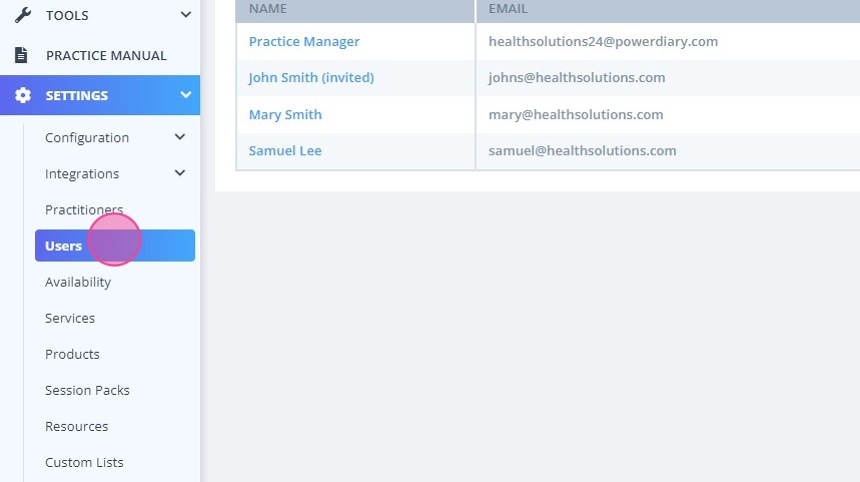
On the left-side menu of Power Diary, navigate to
Settings
→ Users. This will take you to the
User Management page.


- 2
-
Click the
Add New User button. This will bring up a form using which you can add the new user’s details - and setup which features they can access.
-
-
- 3
-
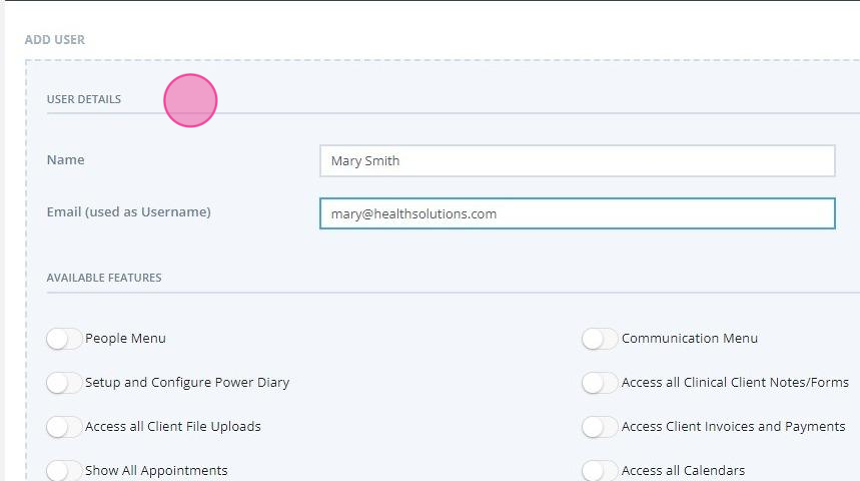
In the form, enter the new user’s name and email. If you want, assign them a default practitioner's calendar they can manage.

- 4
-
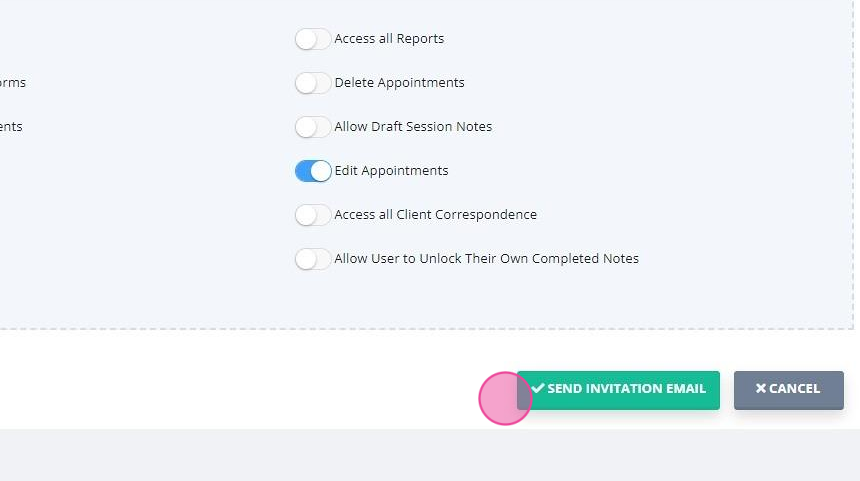
Next, toggle the features you want them to be able to access.
- 5
-
Once done, click
Send Invitation.
This will send an email to that user which they will have to open and follow the instructions to verify their account:

Once they do that, they will be able to access and use Power Diary as normal.

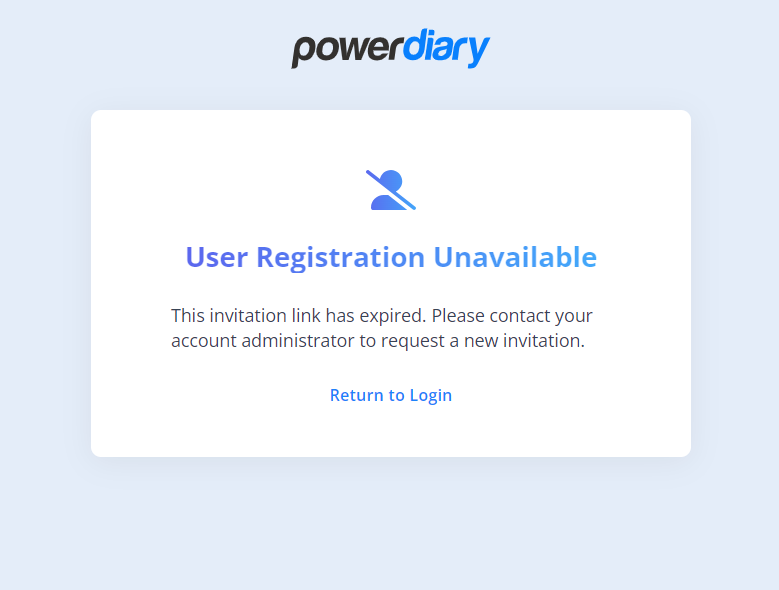
If their invitation email has expired (it will happen within seven days after the invitation link was generated and sent), the user will be notified accordingly, ans asked to contact you for a new user invite:
Editing User Profile
To edit the profile information of an existing user, follow these steps:
- 1
-
On the left-side menu of Power Diary, navigate to
Settings
→ Users. This will take you to the
User Management page. This will bring up a list of users in your Power Diary account.
- 2
-
Click on the name (or the edit button on the far right) of the user whose details you’d like to edit.
- 3
-
The same form will appear using which you can edit the user’s information and feature access. Make the necessary edits.

- 4
-
On this page, you are also able to require the
Two Factor Authentication to be enabled by the user. Toggle the switch on and save the changes. The user will be required to enable the 2FA upon their next login.
Once done, click Save.
Managing User Access Permissions
Here is an in-depth description of the permissions. Read these features carefully and allow access based on their role within your business.
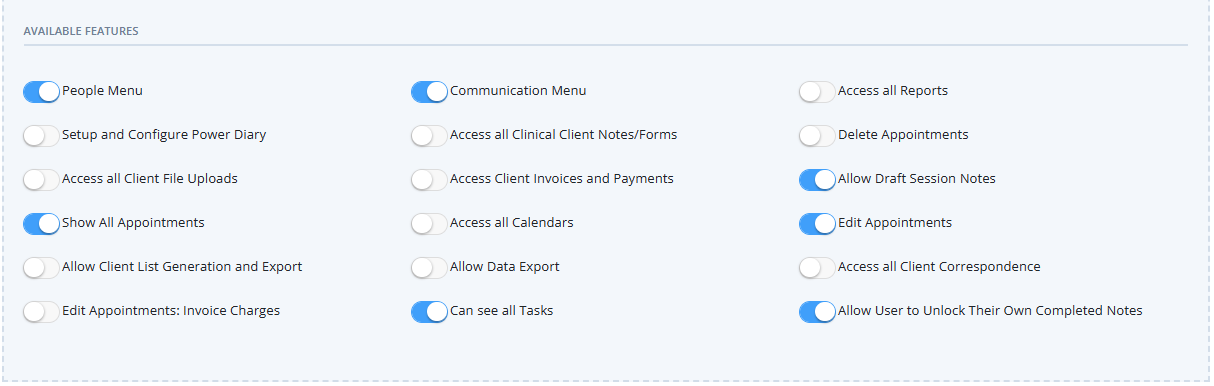
- People Menu: This feature allows a user to access your complete contacts database, including clients, referrers and even people in your waitlist. In addition, the user can also add new contacts as well. A practitioner will also need the People Menu enabled to gain access to all client profiles.
- Communication Menu: This feature lets a user access your communications template including SMS and Email templates. In addition, the user can send bulk messages to your contacts database as well. Plus, if your account is connected to Mailchimp, the user can export your contacts to Mailchimp for email marketing purposes.
- Access all Reports: This feature lets users generate a complete report across all departments in your clinic such as financial reports, client reports and system reports.
- Setup and Configure Power Diary: This feature lets users access all settings under the Settings menu. In addition, the user can edit user permissions as well, except that of the master user. A user with this permission will also be able to remove the content of SMS received from clients in Client Profile > Communication > Activity.
- Access All Clinical Client Notes/Forms: This feature lets a user access session notes for all clients in your Power Diary account - in all practitioners. If not enabled, your users can access only the session notes of the clients of the practitioner they are allowed to access based on their default practitioner. If this feature is turned off and no default practitioner is chosen, the user won’t be able to access any session notes at all.
- Delete Appointments: This feature allows a user to delete appointments in your Power Diary calendar. If not enabled, users can update the appointment status to reflect cancellations.
- Access all Client File Uploads: This feature lets the user view files attached to a client’s profile of all practitioners. If disabled, they can only access files for their default practitioner. If this feature is disabled and no practitioner access is granted, users will not be able to access client file uploads at all.
- Access Client Invoices and Payments: After enabling this feature, a user will be able to access your client’s invoice and payment history - and will also get the ability to process payments via Stripe (if you activated it). If disabled, the Sales and Payments page for that client will be disabled, along with access to a client’s Invoice and Payments page through their profile.
- Allow Draft Session Notes: This feature allows a user to save session notes as a draft status - and to view and edit it at leisure. If disabled, the user can only save session notes in locked status, which they won’t be able to edit.
- Show All Appointments: When enabled, this feature allows a user to see all appointments and its details in all calendars. If disabled, a user can only see the details of their default practitioner, while appointments in other calendars will be greyed out:
- Access All Practitioners: When this option is enabled, a user can access all practitioners in your Power Diary account. If not, a user can only access their default practitioners.
- Edit Appointments: This feature enables a user to create new appointments and edit them in a calendar. If disabled, users can only view existing appointments in the calendar.
- Allow Client List Generation And Export: This feature allows users to view a client list generated using specific filters. In addition, users will also be able to export the lists to PDF, Excel, and more. If disabled, the user can only search for individual clients.
- Allow Database Export: By enabling this feature, a user can export your complete Power Diary database at Tools → Data Export.
- Access All Client Correspondence: If this feature is activated a user can view all saved communication your clients had with you via Power Diary. This includes SMS, emails and letters.
- Edit Appointments: Invoice Charges: If this feature is activated a user can edit the charges on an invoice. If disabled, a user is able to add and remove services to an invoice from the Appointment panel, but is unable to edit the details of the invoice (eg changing quantity or value of items), nor receipt a payment against that invoice.
Important
You may set up a User with a Default Practitioner, and not allow access to confidential information of All Clients. In this scenario, please navigate to a Client Profile > Admin > Manage, and make sure that the User is assigned to this client as a Primary Practitioner (= Default Practitioner), or a User With Access. This will allow the User to have access to this client's confidential information.

User Profile
Each user will have access to their profile once they have logged in. This is accessible via the menu in the top right hand corner which shows the business name and then selecting "Profile".
On the profile page a user can update their Name, Email (also used as their username), Password, as well as options to upload their signature to be used on Email and Letter templates they create, and to set up two factor authentication.

Deactivate User Access
You can easily deactivate a user’s account whenever you want. Here’s how:
- 1
-
On the left-side menu of Power Diary, navigate to
Settings → Users. This will take you to the User Management page.
- 2
-
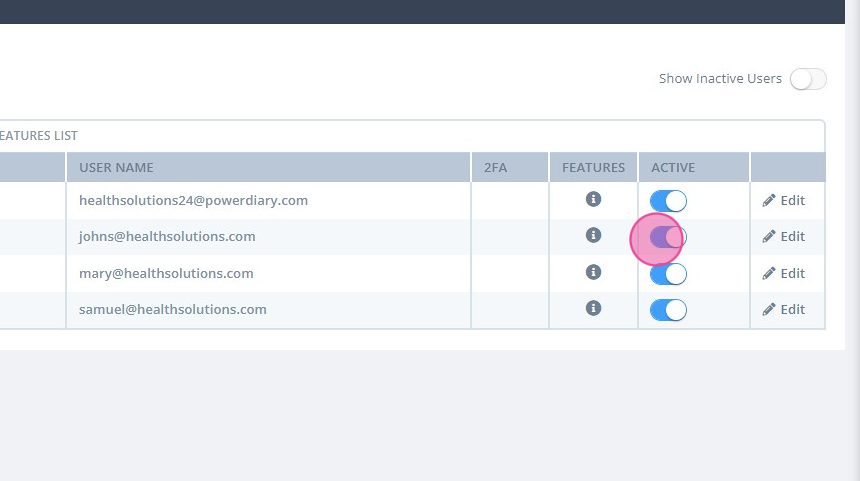
In the user list, toggle the switch off next to the name of the user under the
Active column. This deactivates their profile.
That’s it. From this point on, the user won’t be able to access their Power Diary account and their name will disappear from the user list.
- If you want to reactivate a user’s profile back, you’ll have to toggle on the switch labelled Show Inactive Users

- and then toggle them back to active.
